
The DIY pastel painted speckled plastic Easter eggs post started as a DIY plastic egg projects roundup. The post quickly turned into not one, but two, new Easter tutorials. (Yes, I’ll be sharing another egg tutorial next week!) I already shared one Easter tutorial, had put up my Easter decorations, and wasn’t planning to do any other decorating this year. Sometimes ideas just grab you. I know that some of you out there get it and are already planning a trip to Michaels so you can make these DIY pastel painted speckled plastic Easter eggs.
I’m all about very affordable home decor, especially holiday decor. These painted plastic eggs are no exception. I’ve included prices for the supplies, so you can see just how little you’ll have to spend.
Supplies:
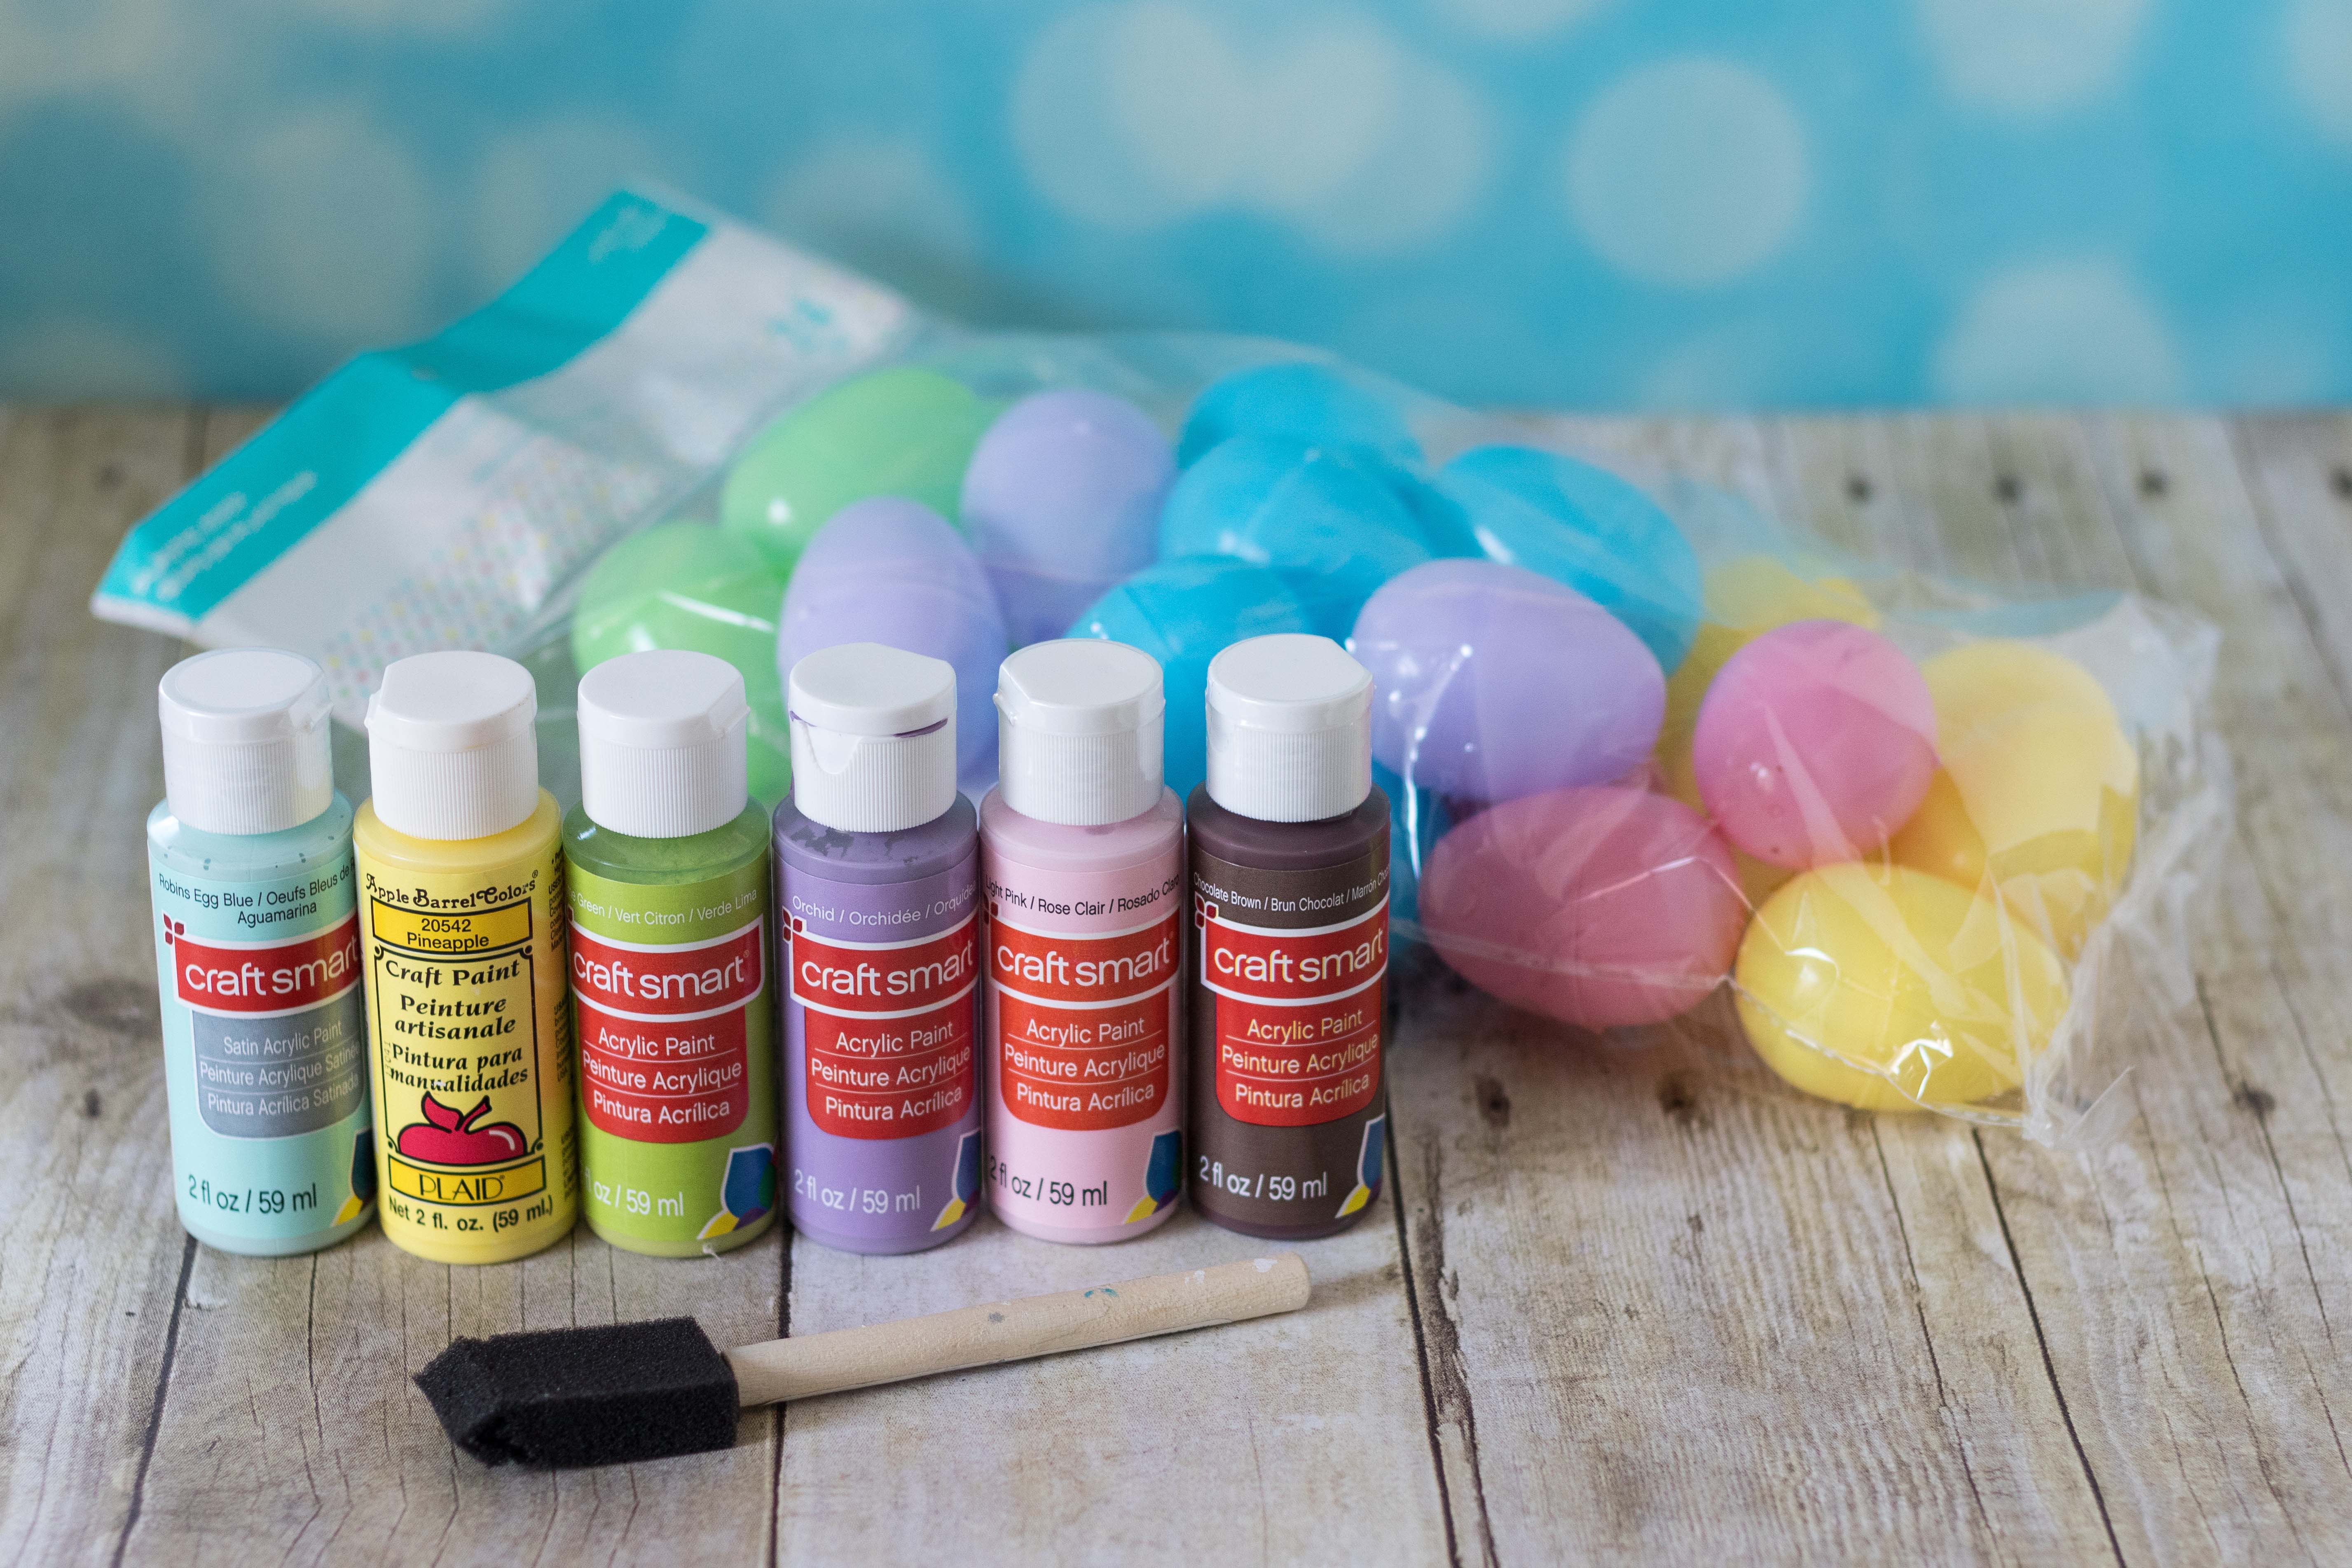
- Pastel plastic Easter eggs ($2.00 for 24 eggs)
- Acrylic paint (I used five pastels plus a chocolate brown, $2.40 total)
- Small foam brush ($0.25 maximum, I’ve seen them as low as $0.05)
- Wicker or wooden basket (I got mine for $2.49 at Michaels)
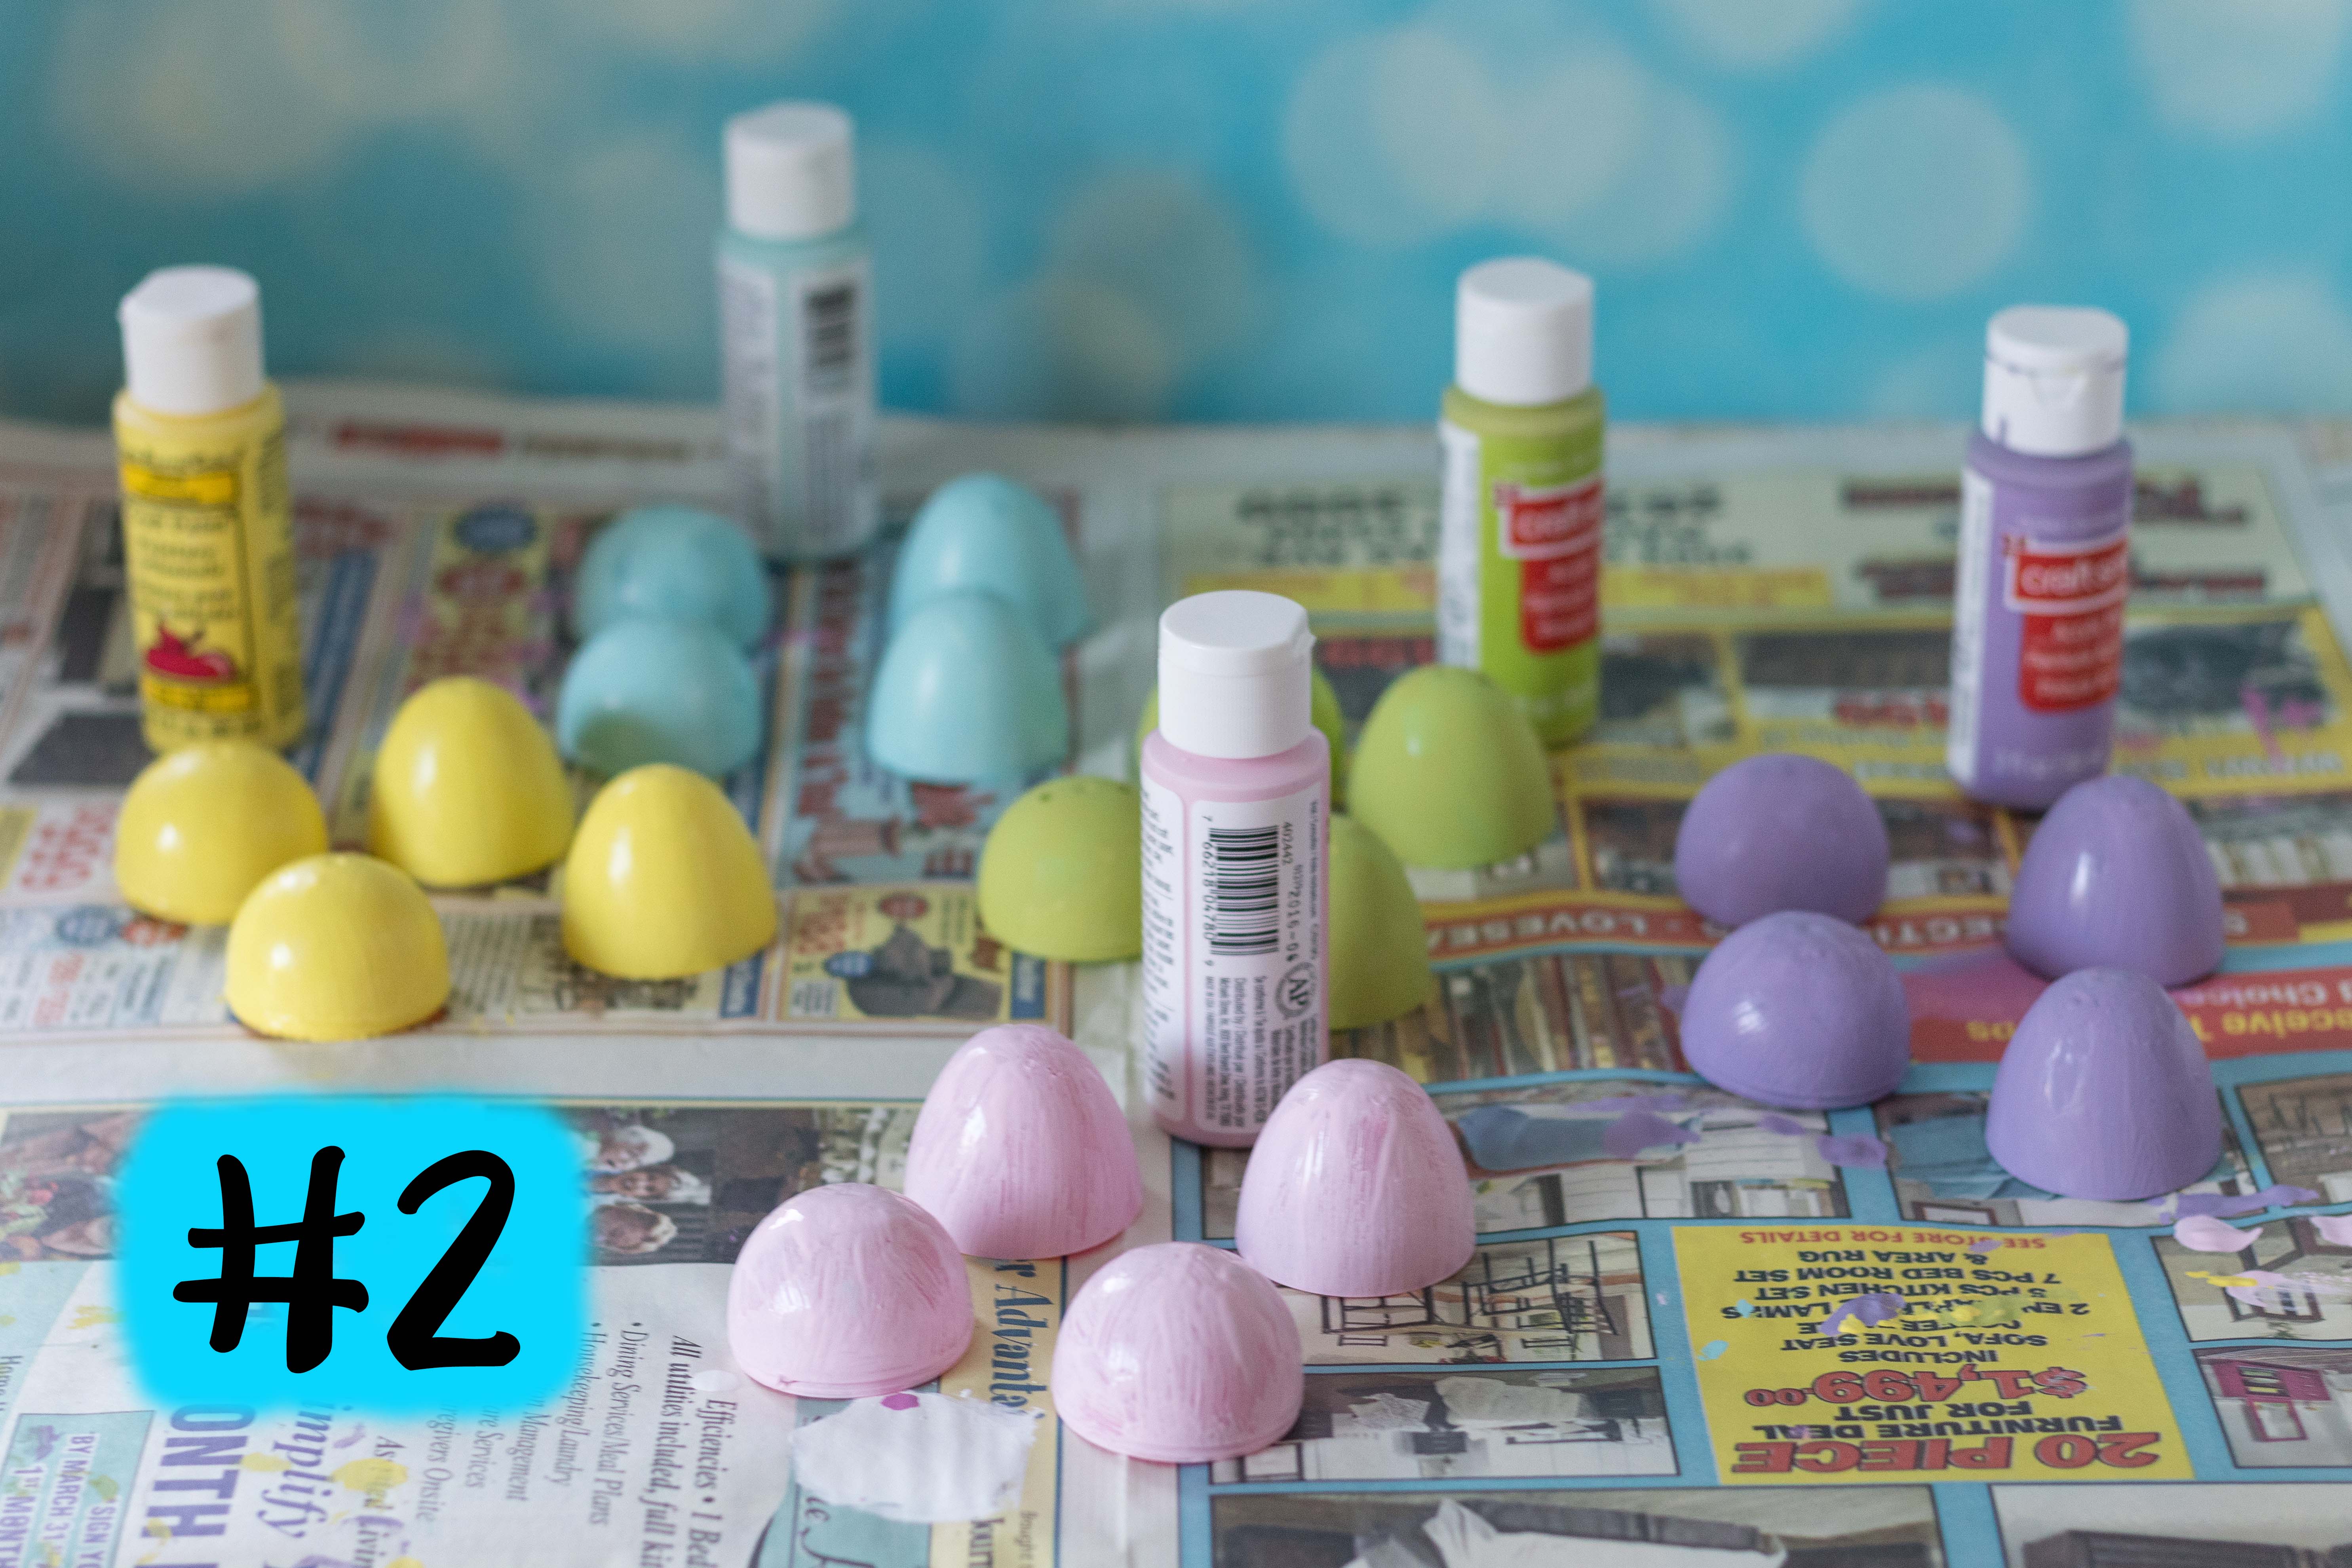
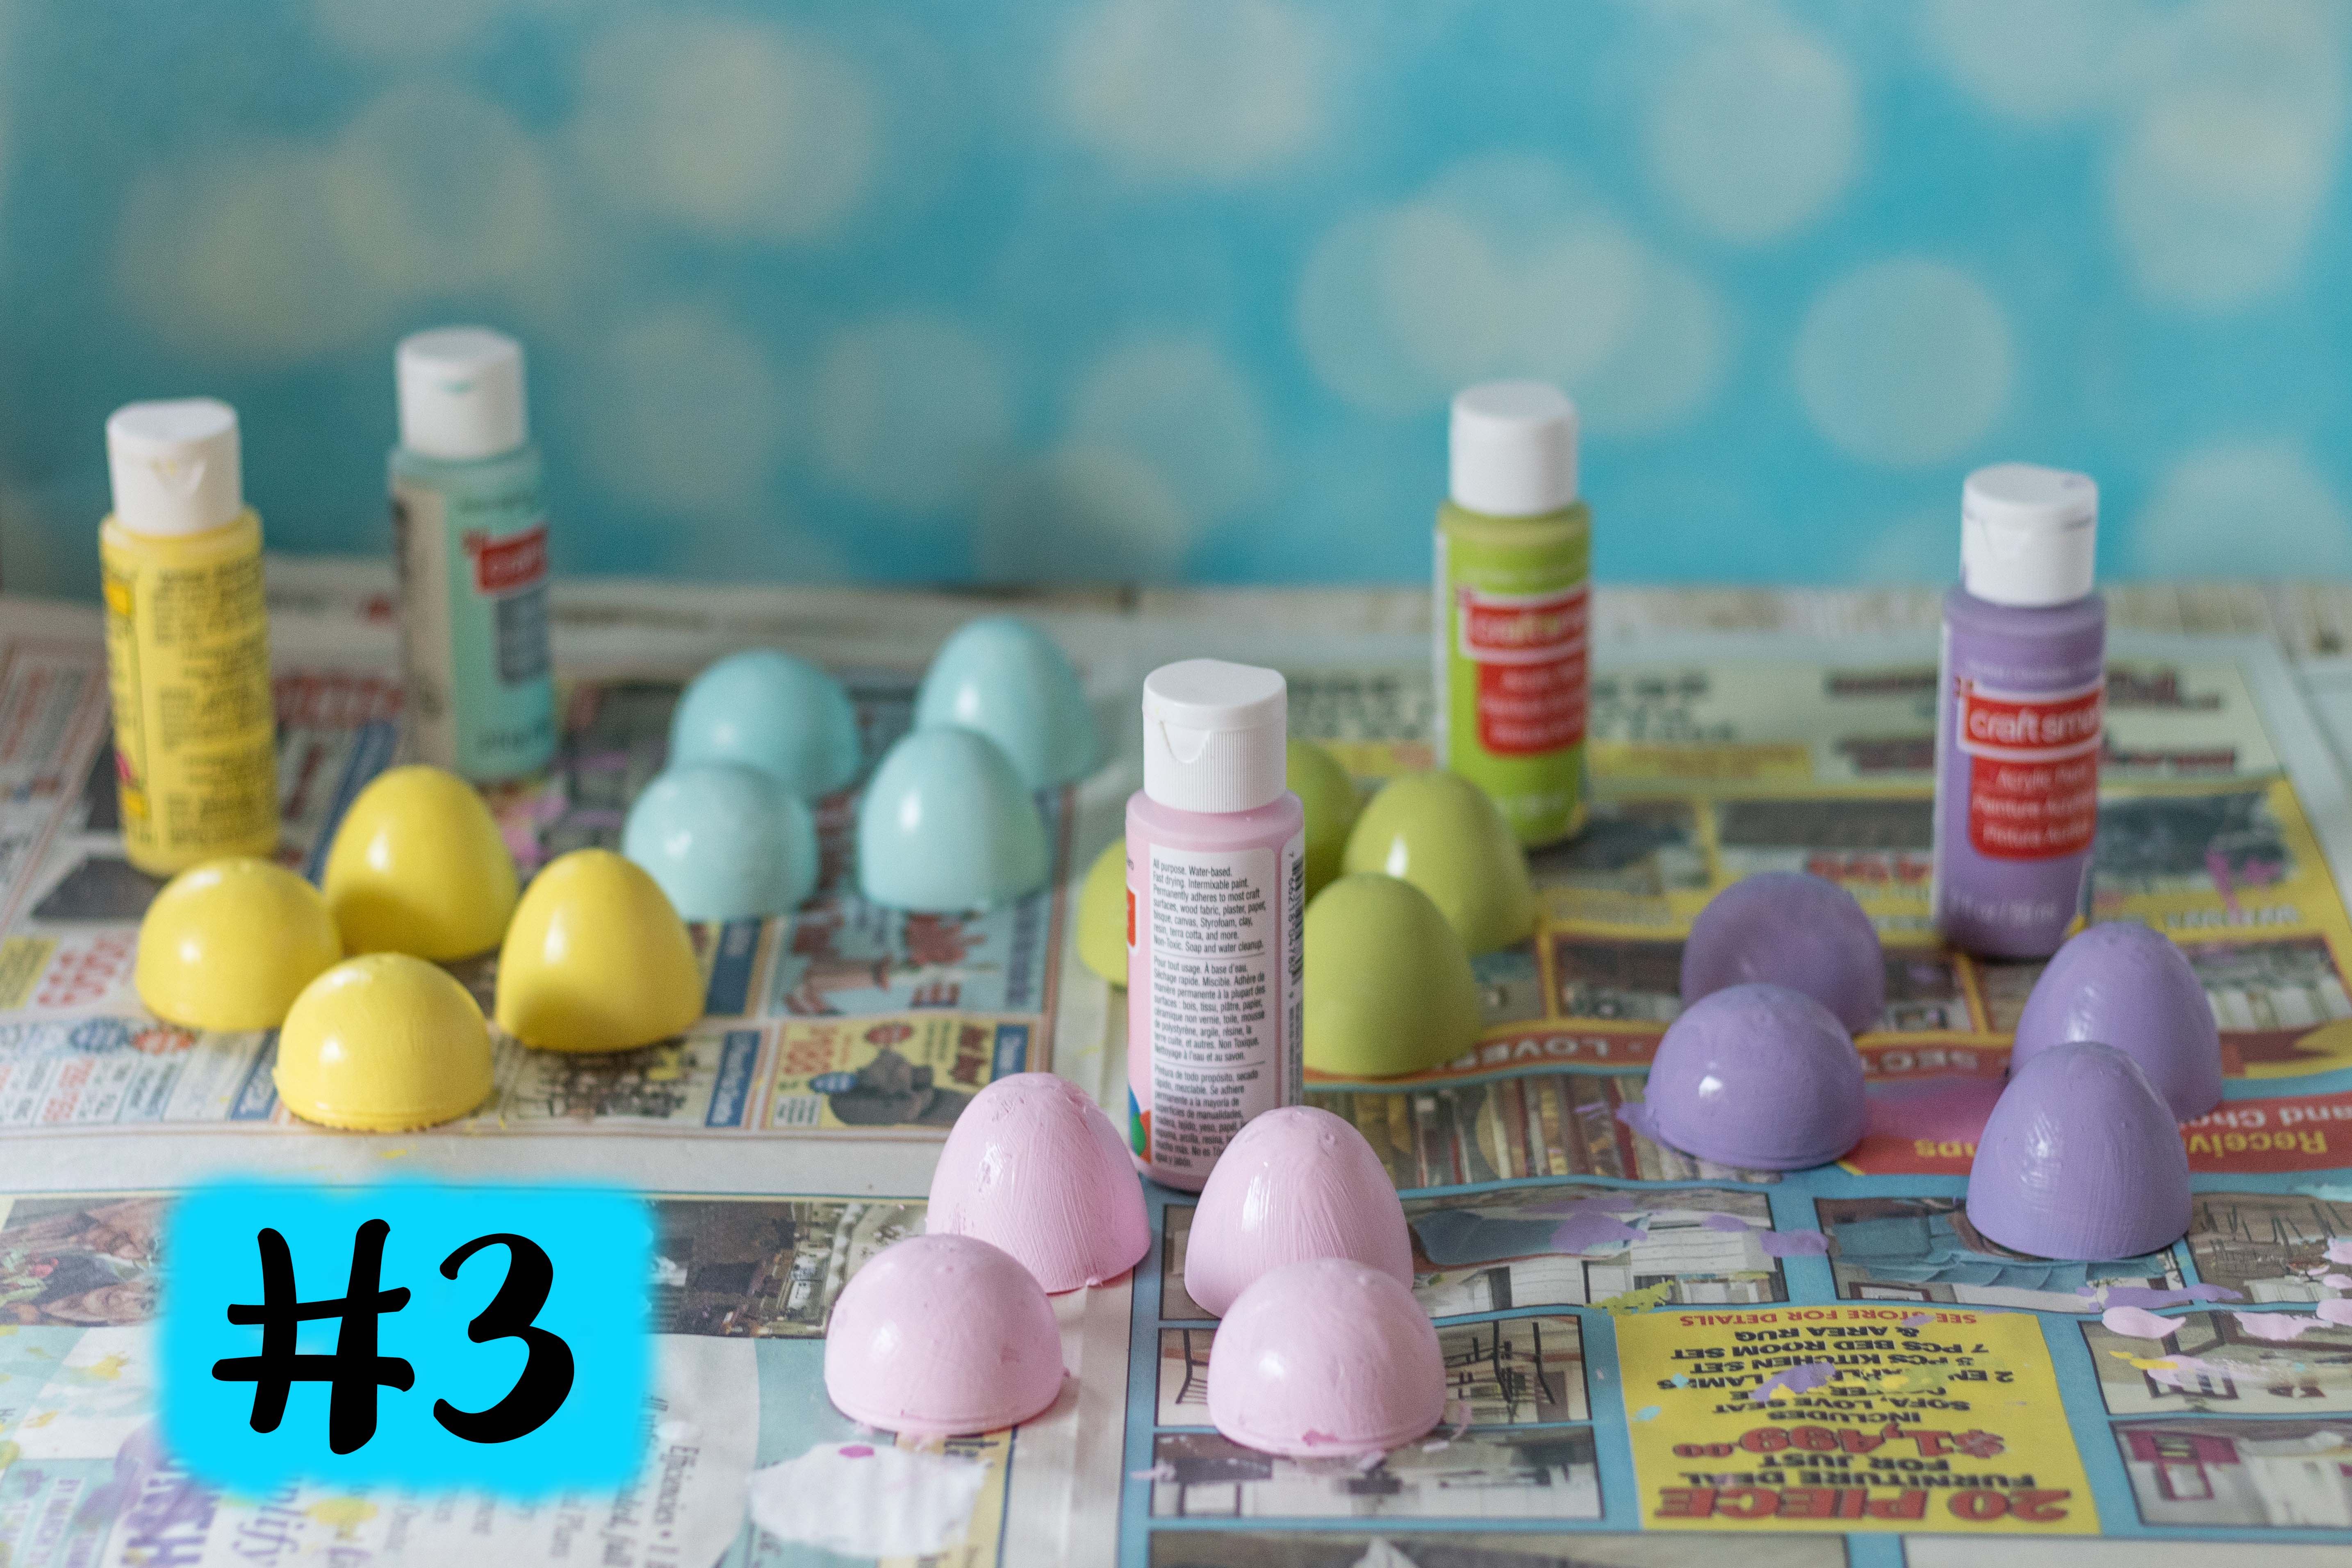
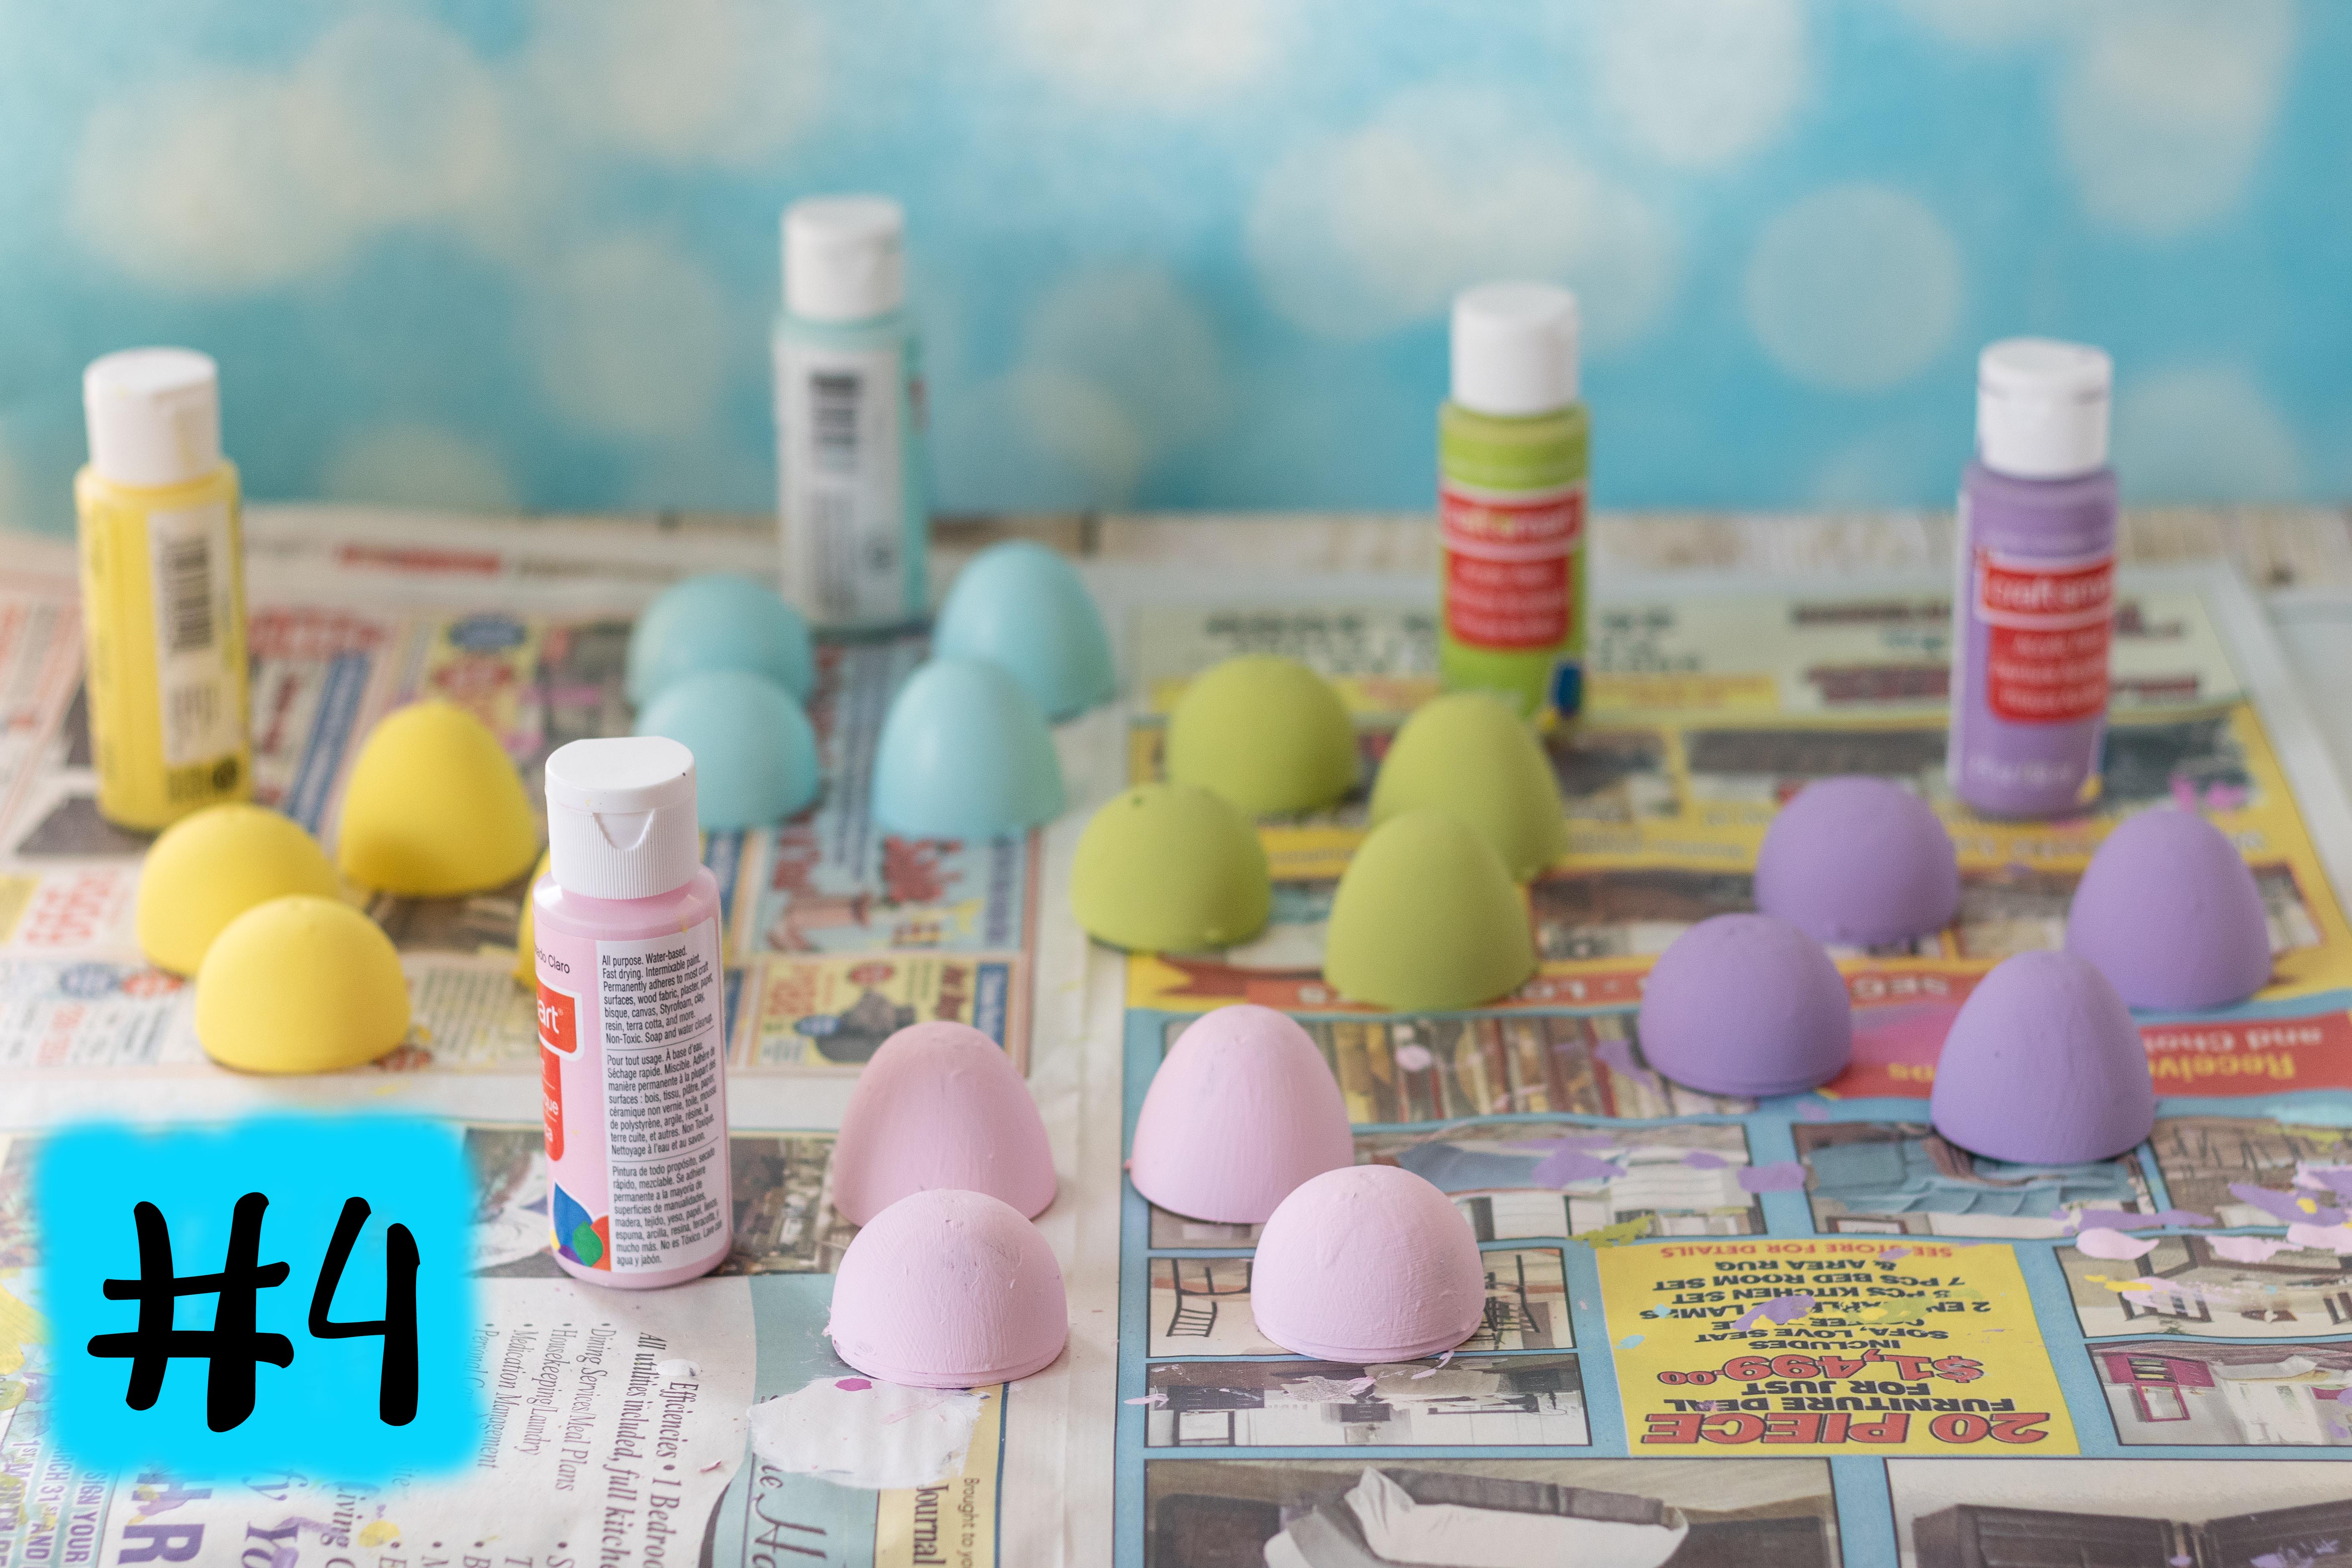
The only other supply you’ll need is an old toothbrush for applying the brown paint. The paint colors I used are Apple Barrel 20542 Pineapple and Craftsmart Lime Green, Robins Egg Blue, Orchid, Light Pink, and Chocolate Brown.
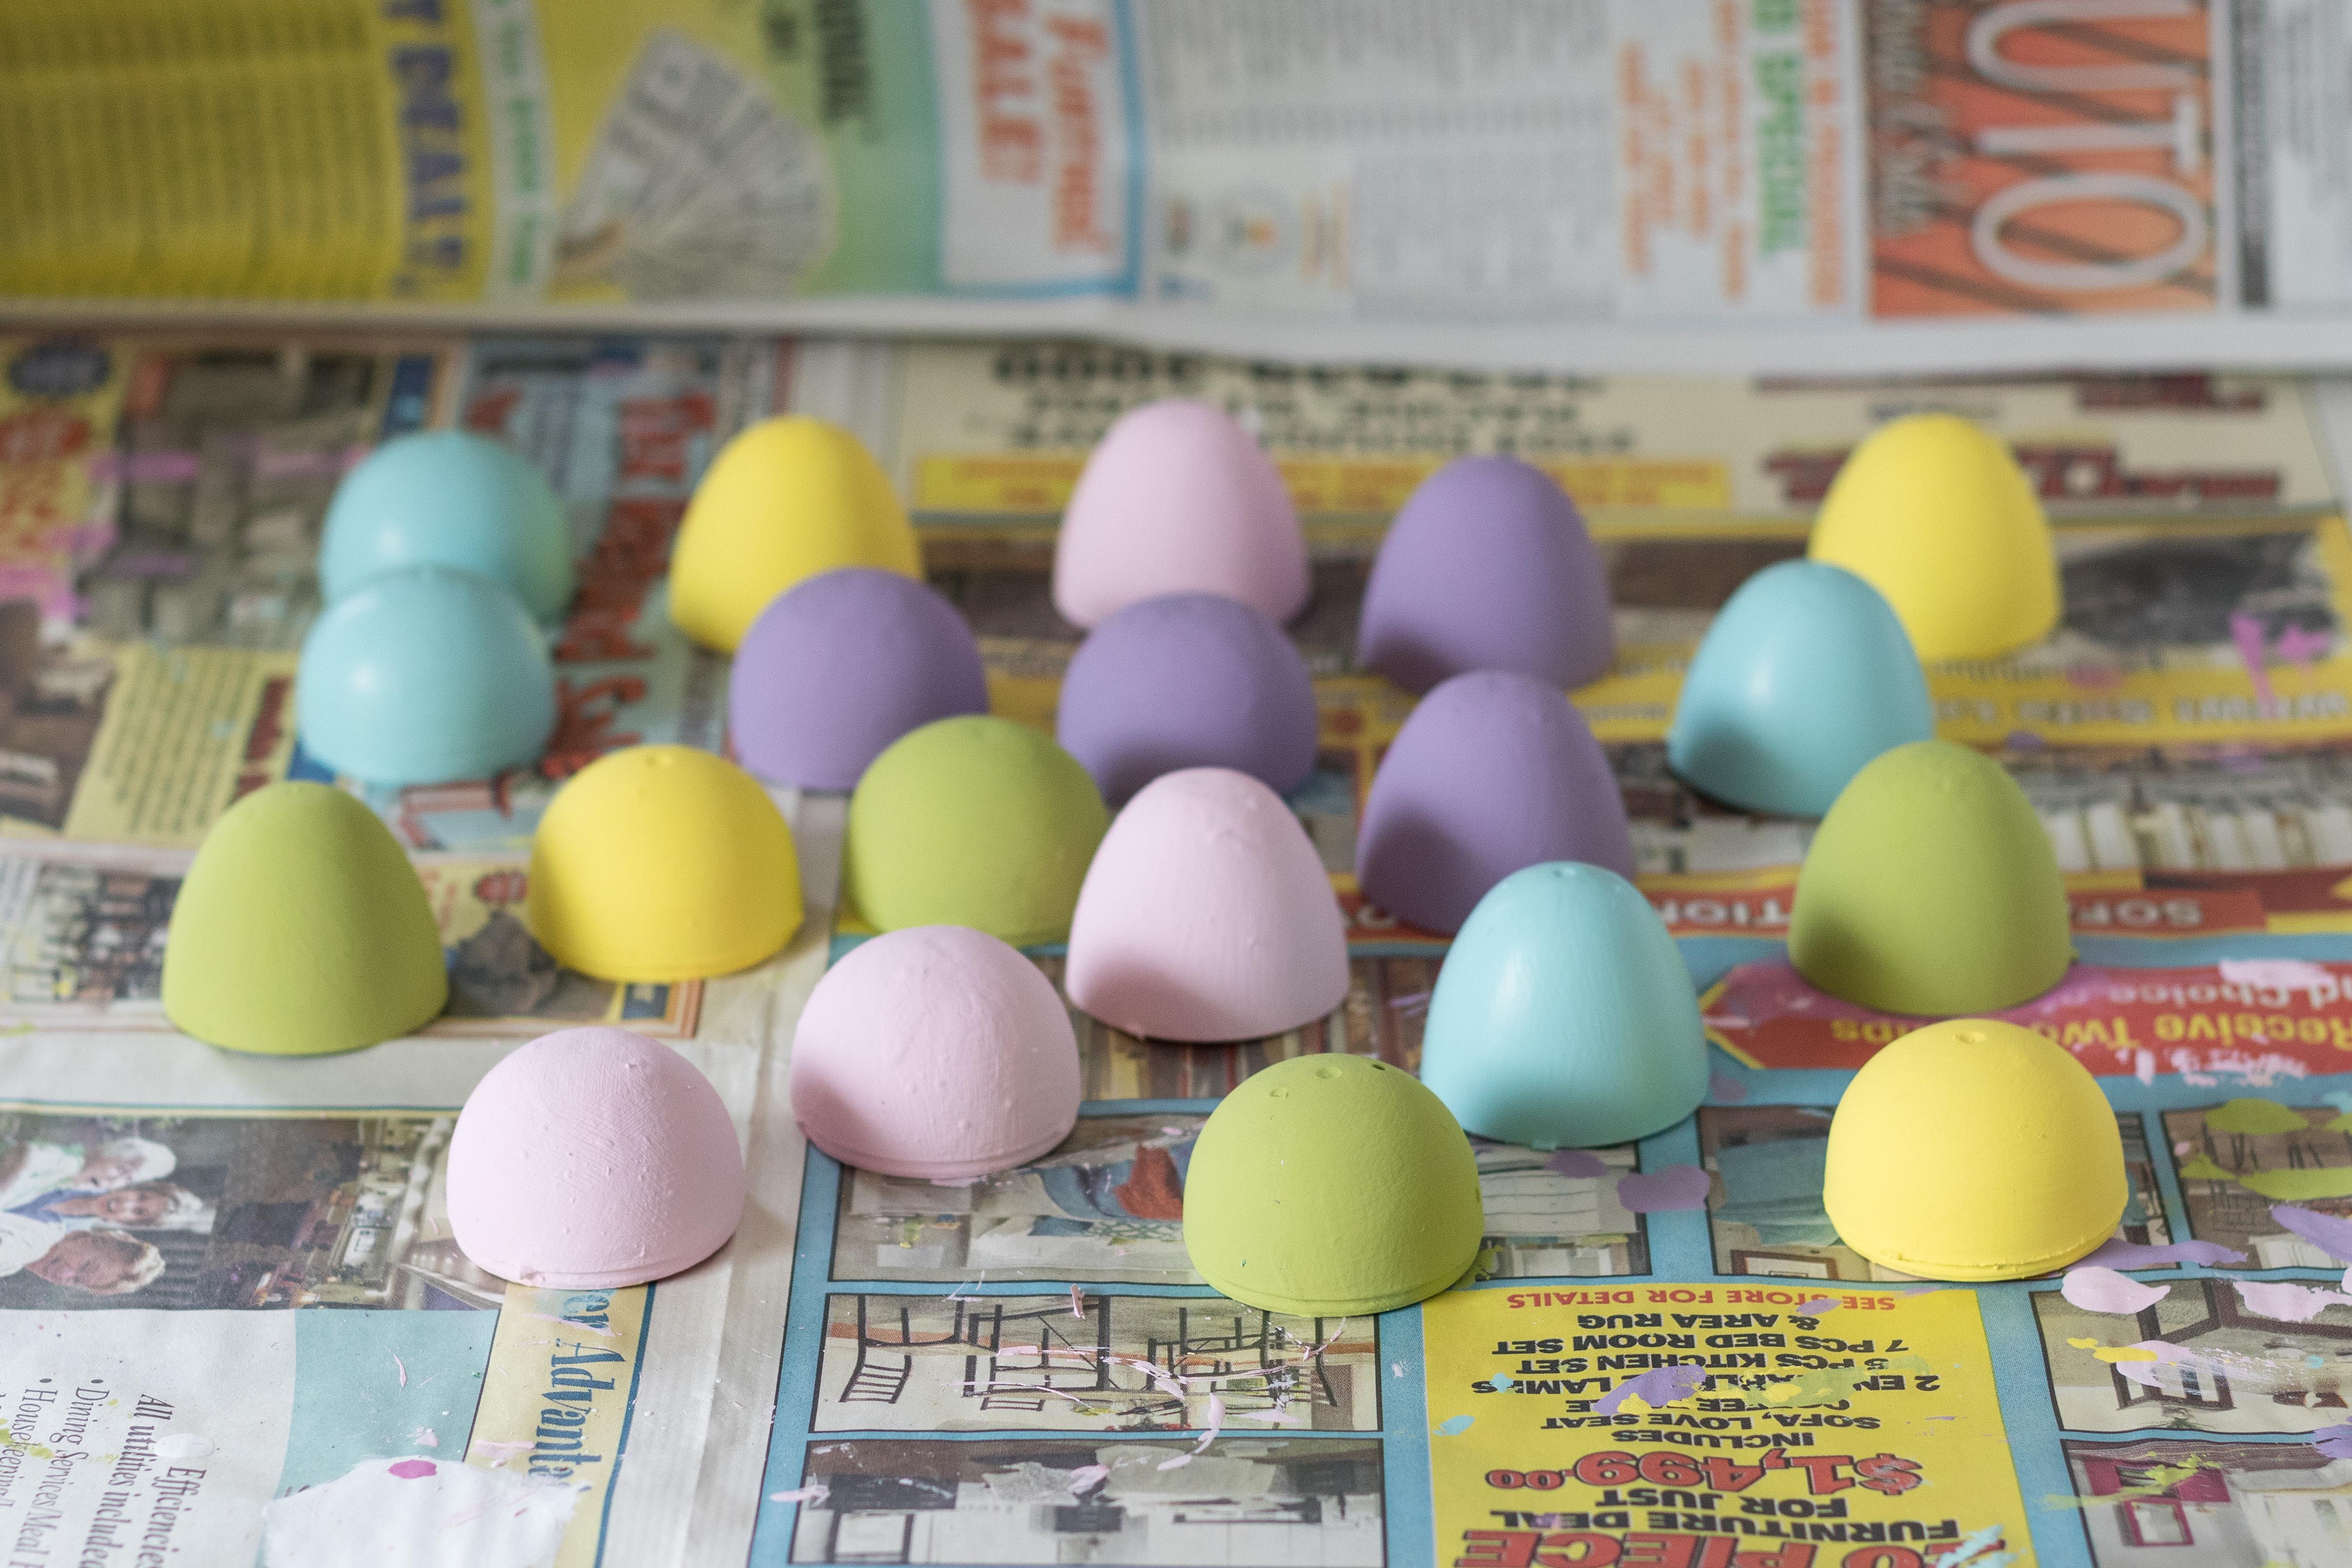
Gather your plastic eggs and other supplies. I painted two of each of the five pastels in my set. It worked out just about perfectly for filling my little basket, which measures 5″ W x 4.5″ D x 3.5″ H.
Open up the eggs. Lay the egg halves on a sheet of newspaper or other scrap paper.
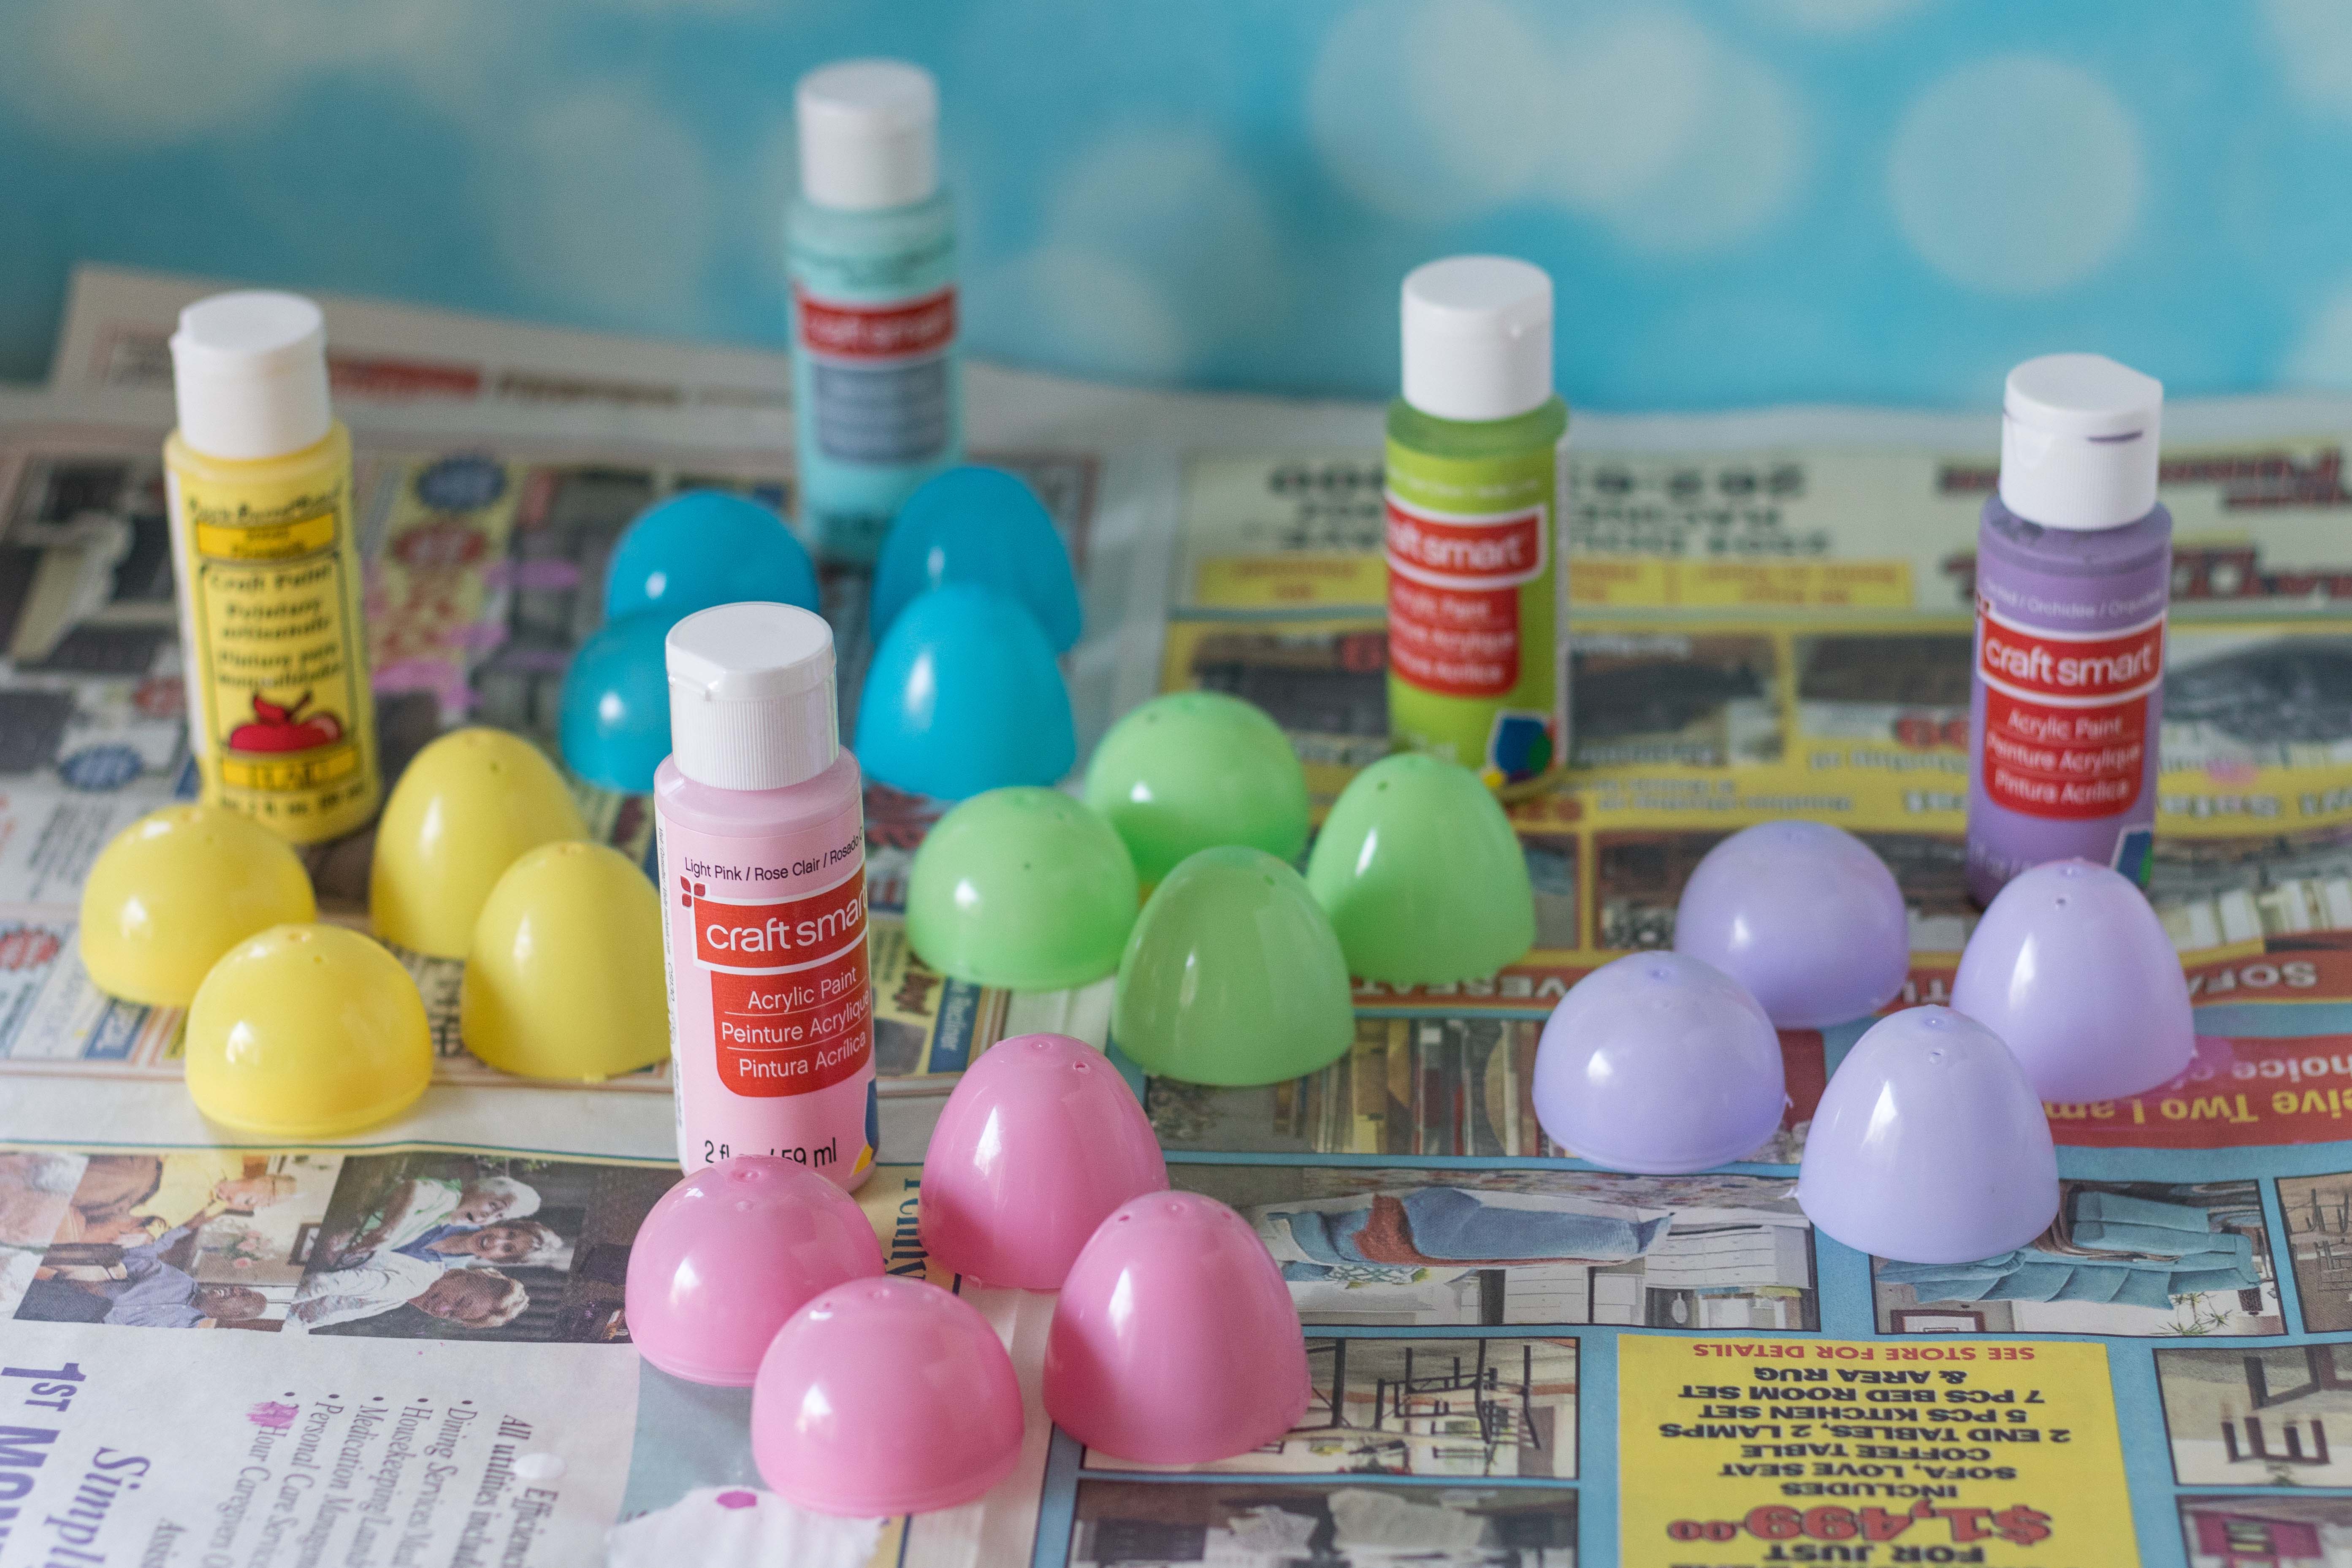
Use the foam brush to paint the egg halves. I actually kept five foam brushes going, so I could get all my eggs painted at once. Simply cover your brush heads with plastic wrap or place the brushes in a plastic Ziplock bag in between coats to avoid rinsing out the brushes repeatedly.
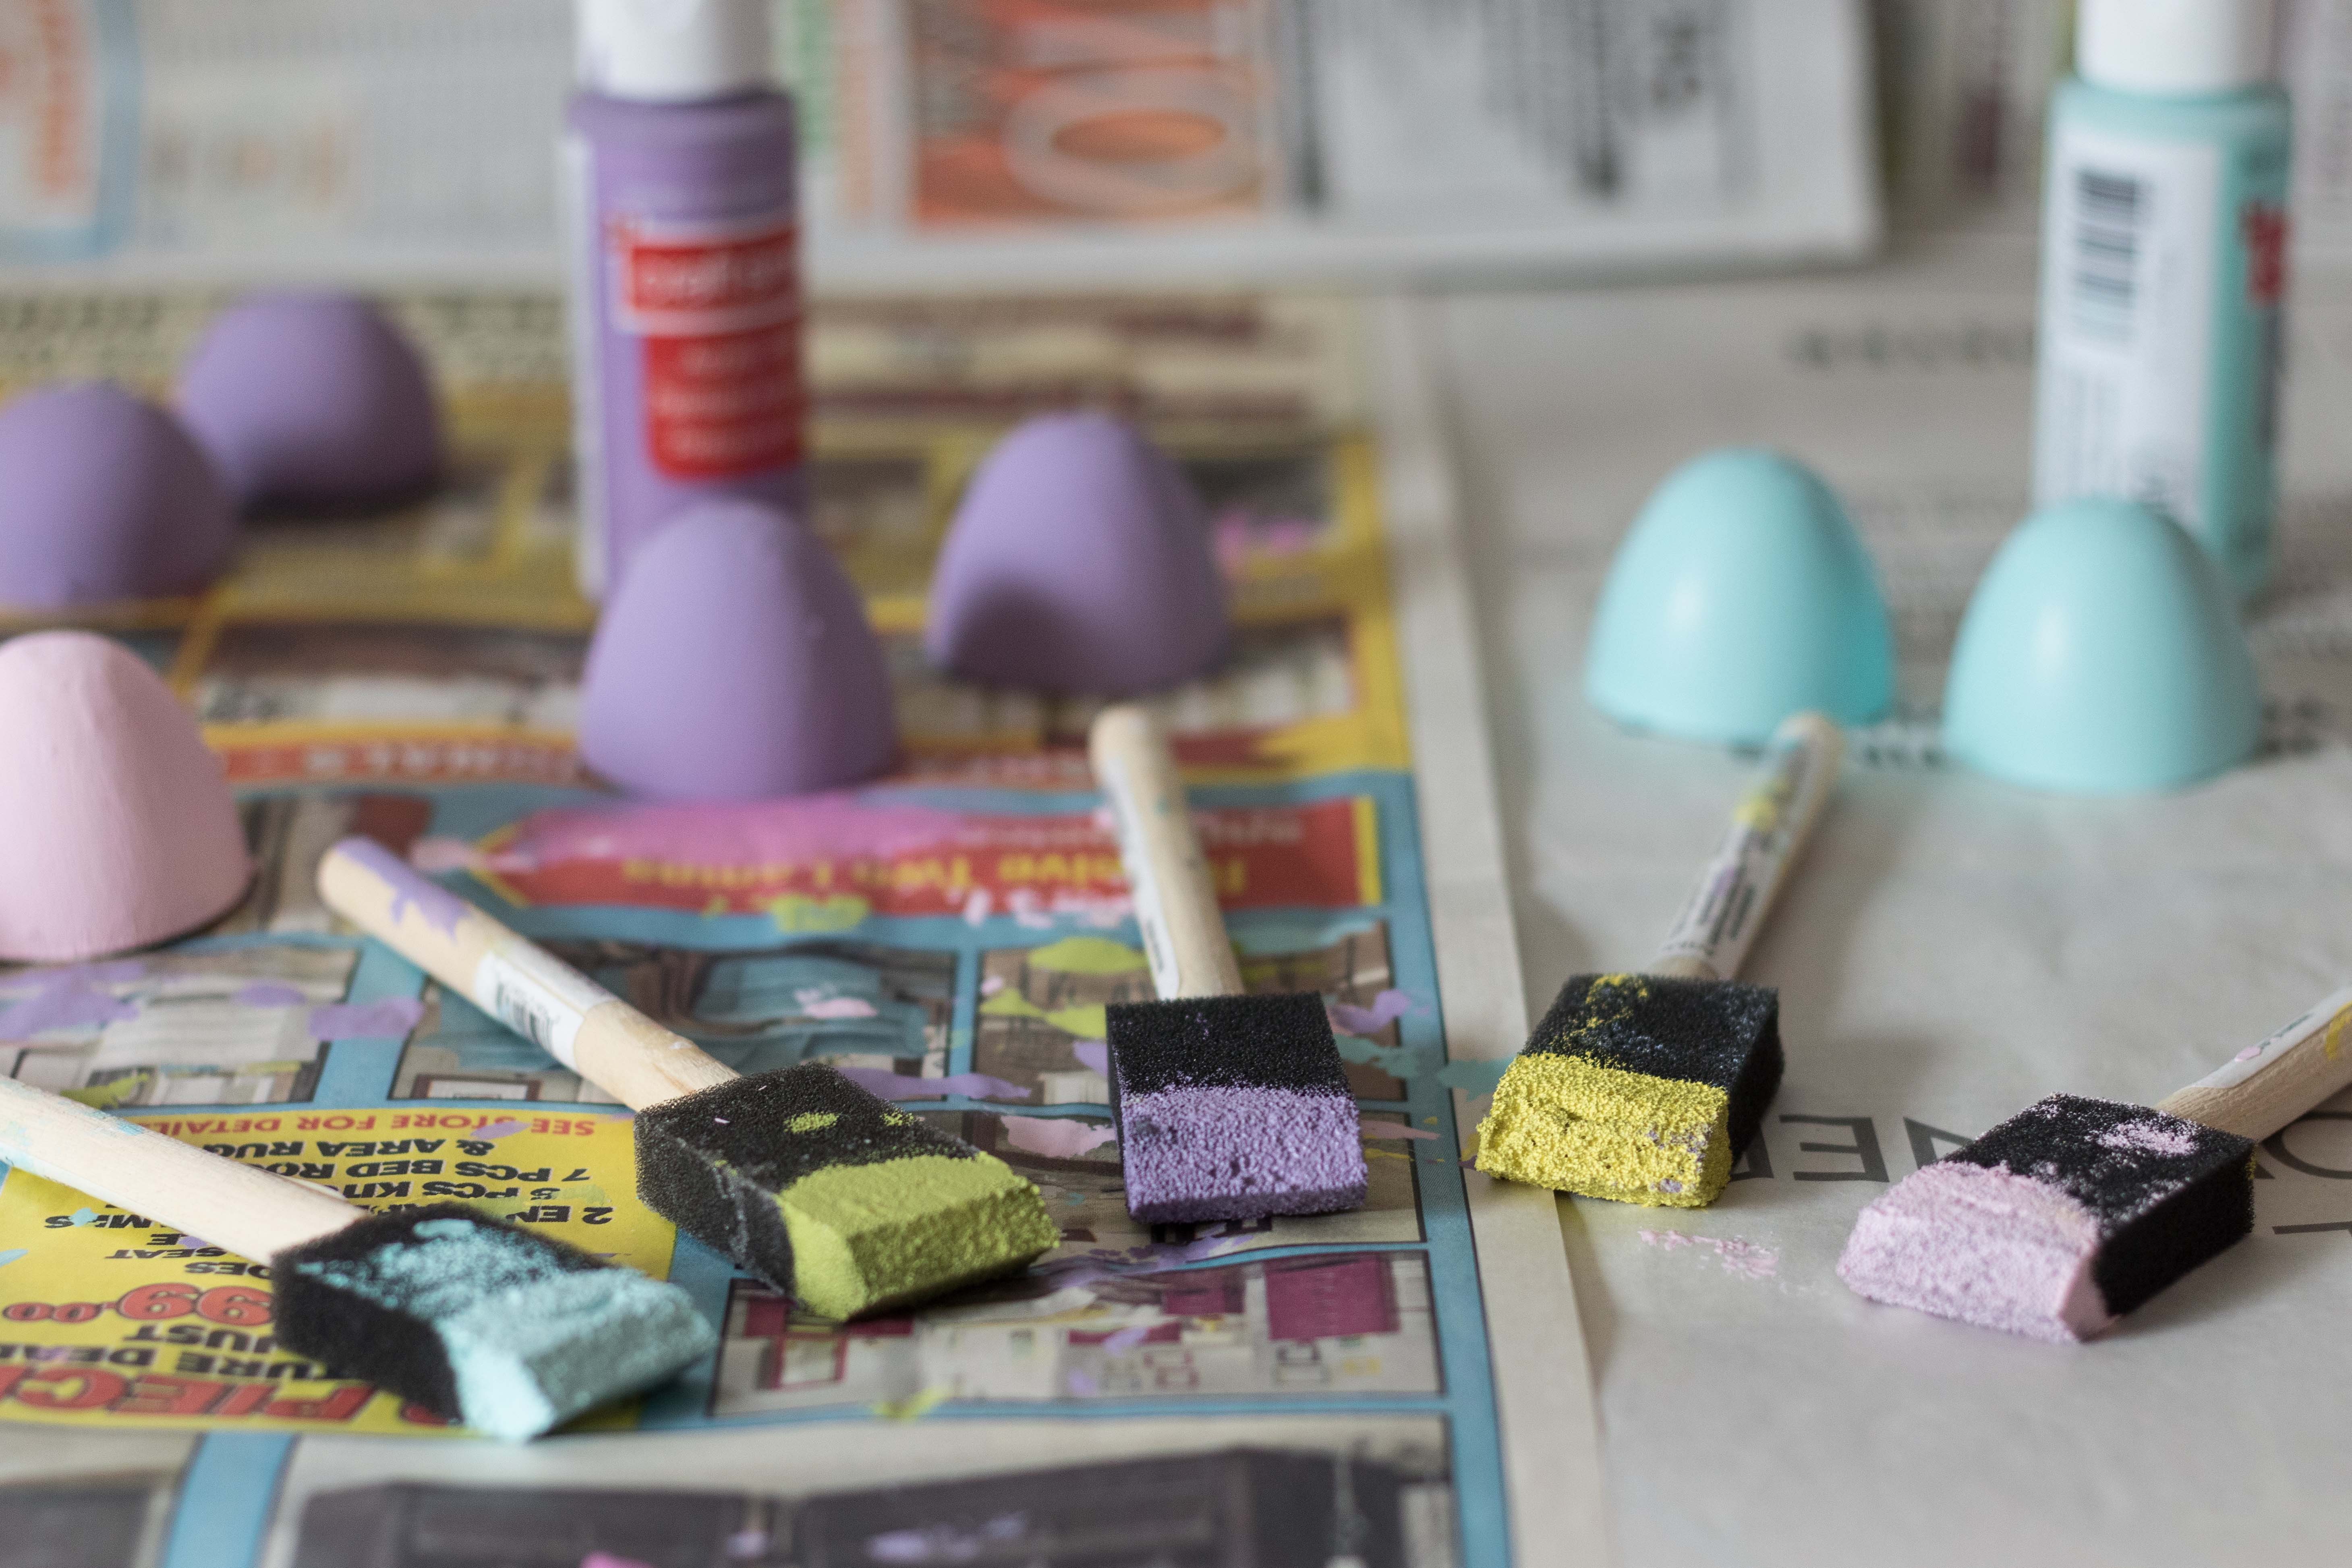
I squeezed out a small amount of paint onto the top of each egg half for each layer and spread it down onto the egg, adding more paint as needed.
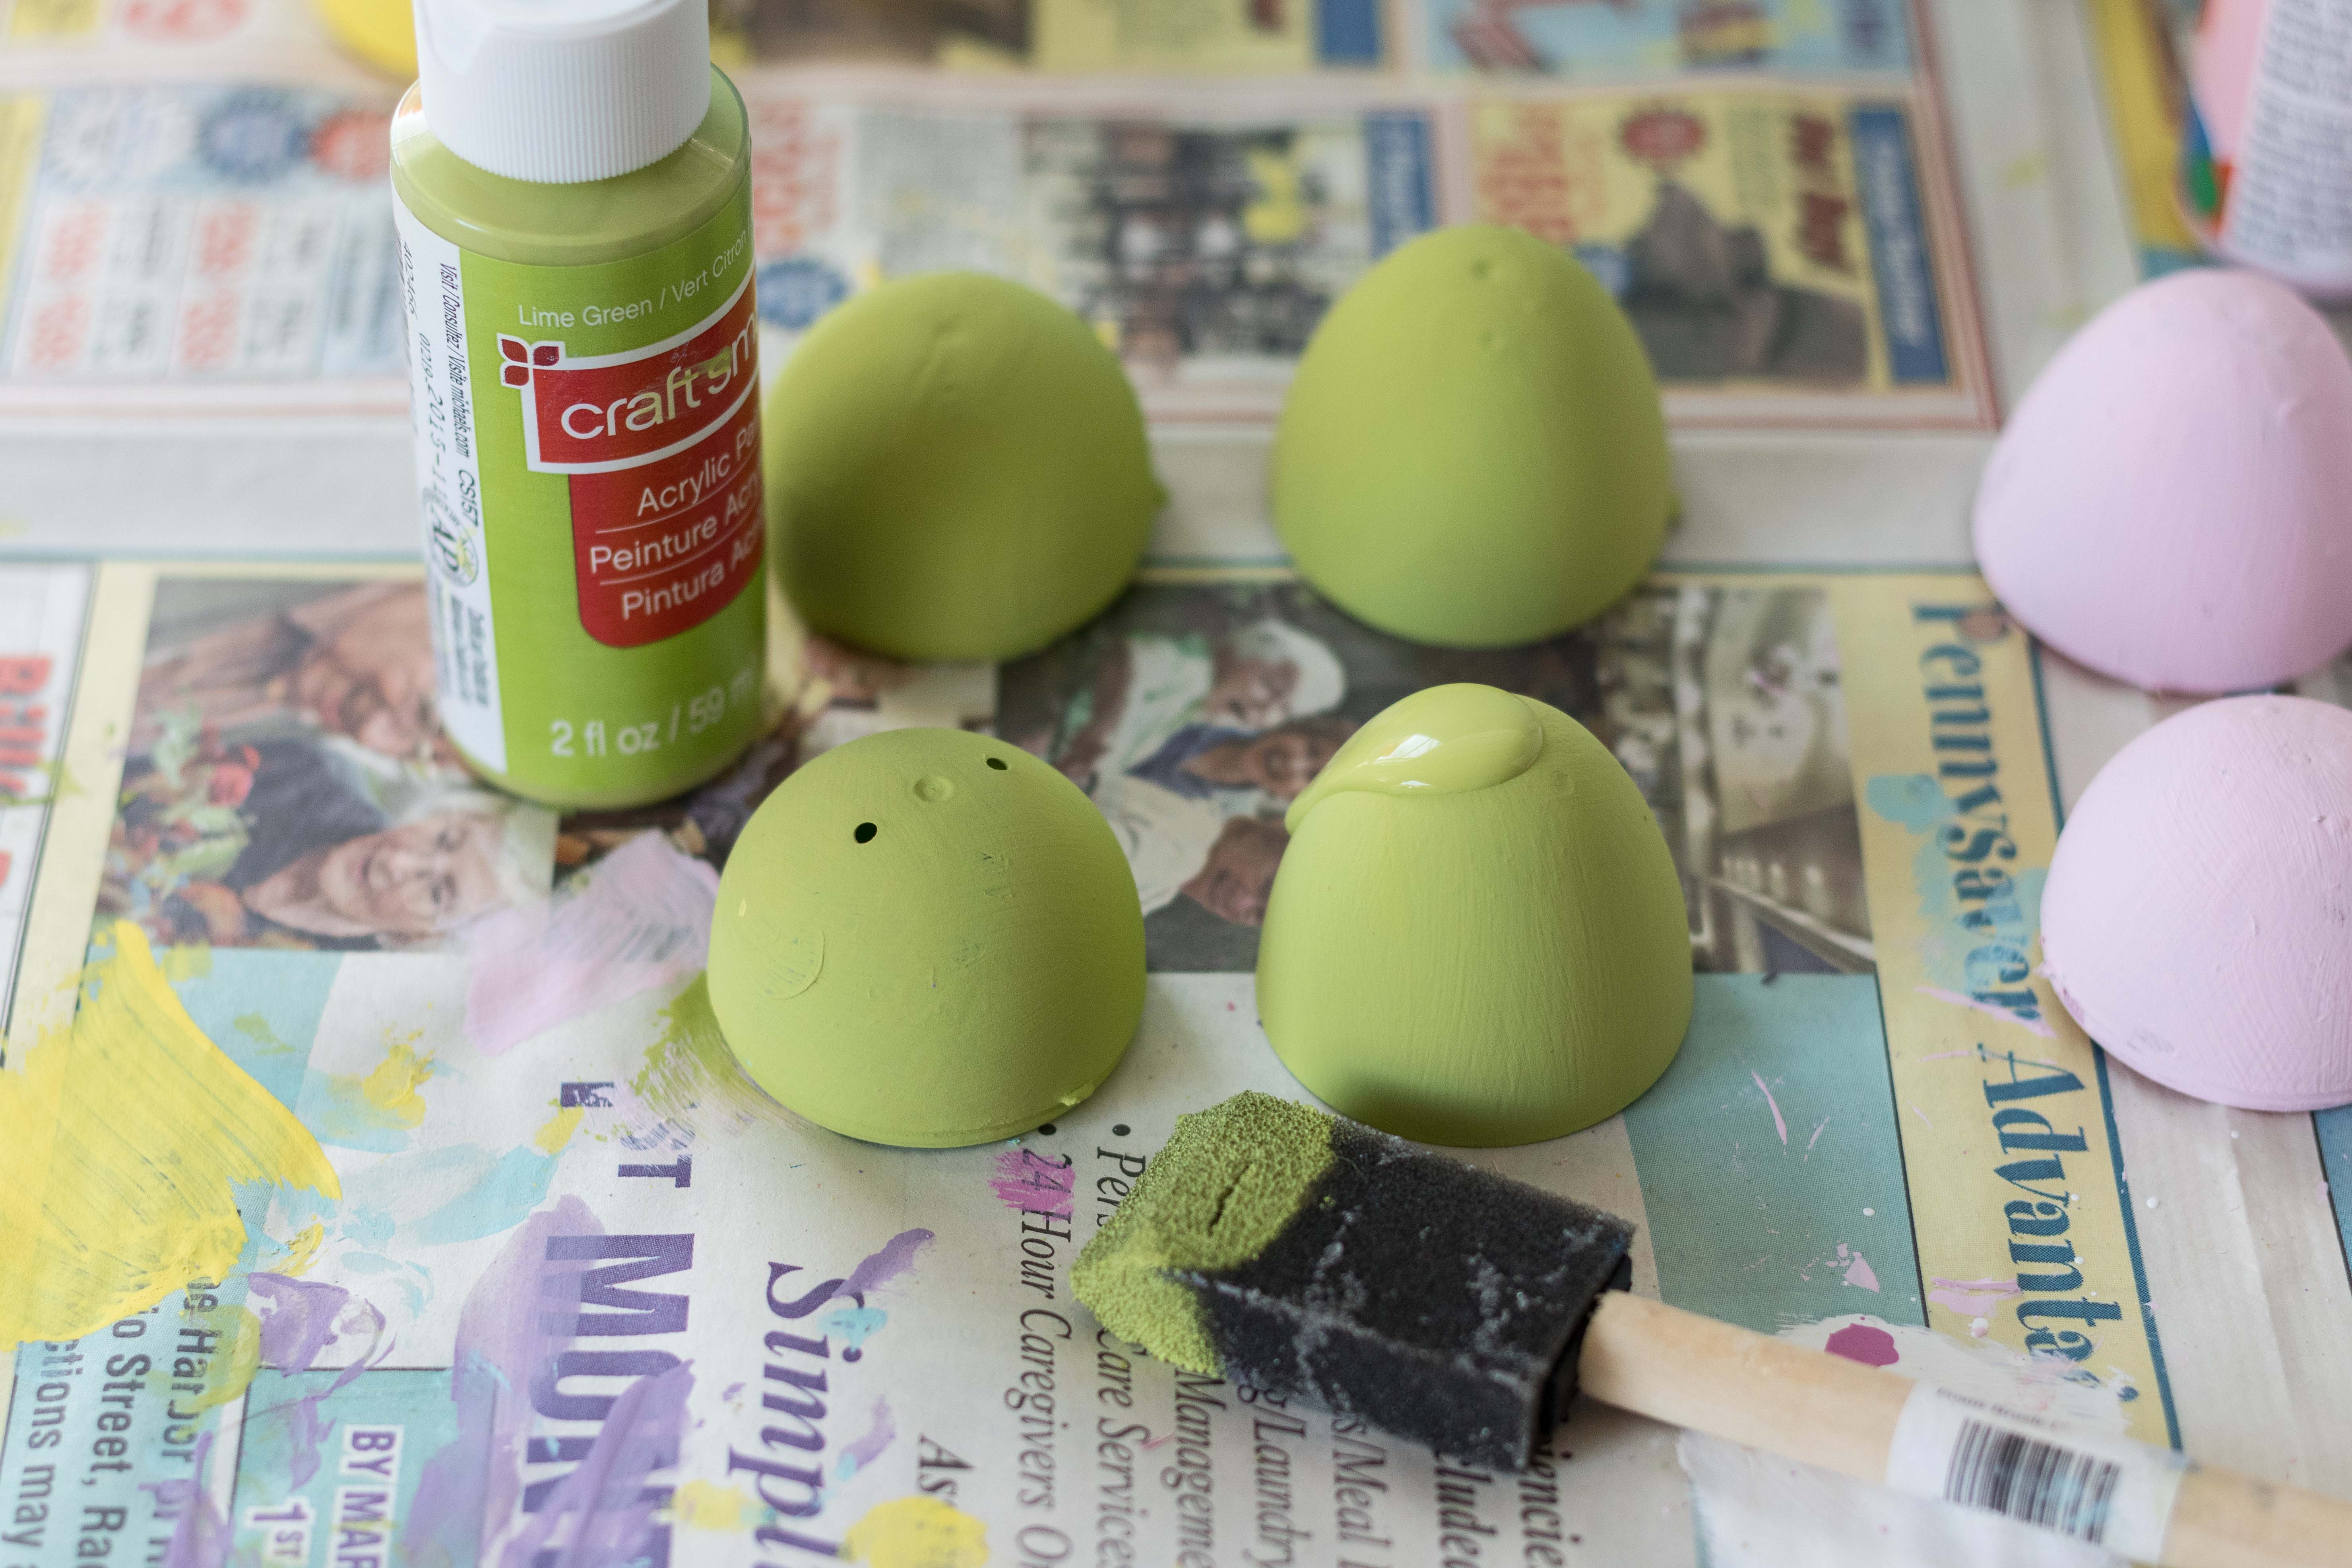
Apply the paint liberally, allowing it to dry completely in between each layer. You don’t want to go too heavy with acrylic on plastic or it won’t dry very well. But you don’t want to go too light because it will just peel right off as you try to paint more layers over it. If some paint peels off as you paint the first couple layers, that’s okay! Each layer will get easier. You should have no more peeling by the time you reach the fourth layer.
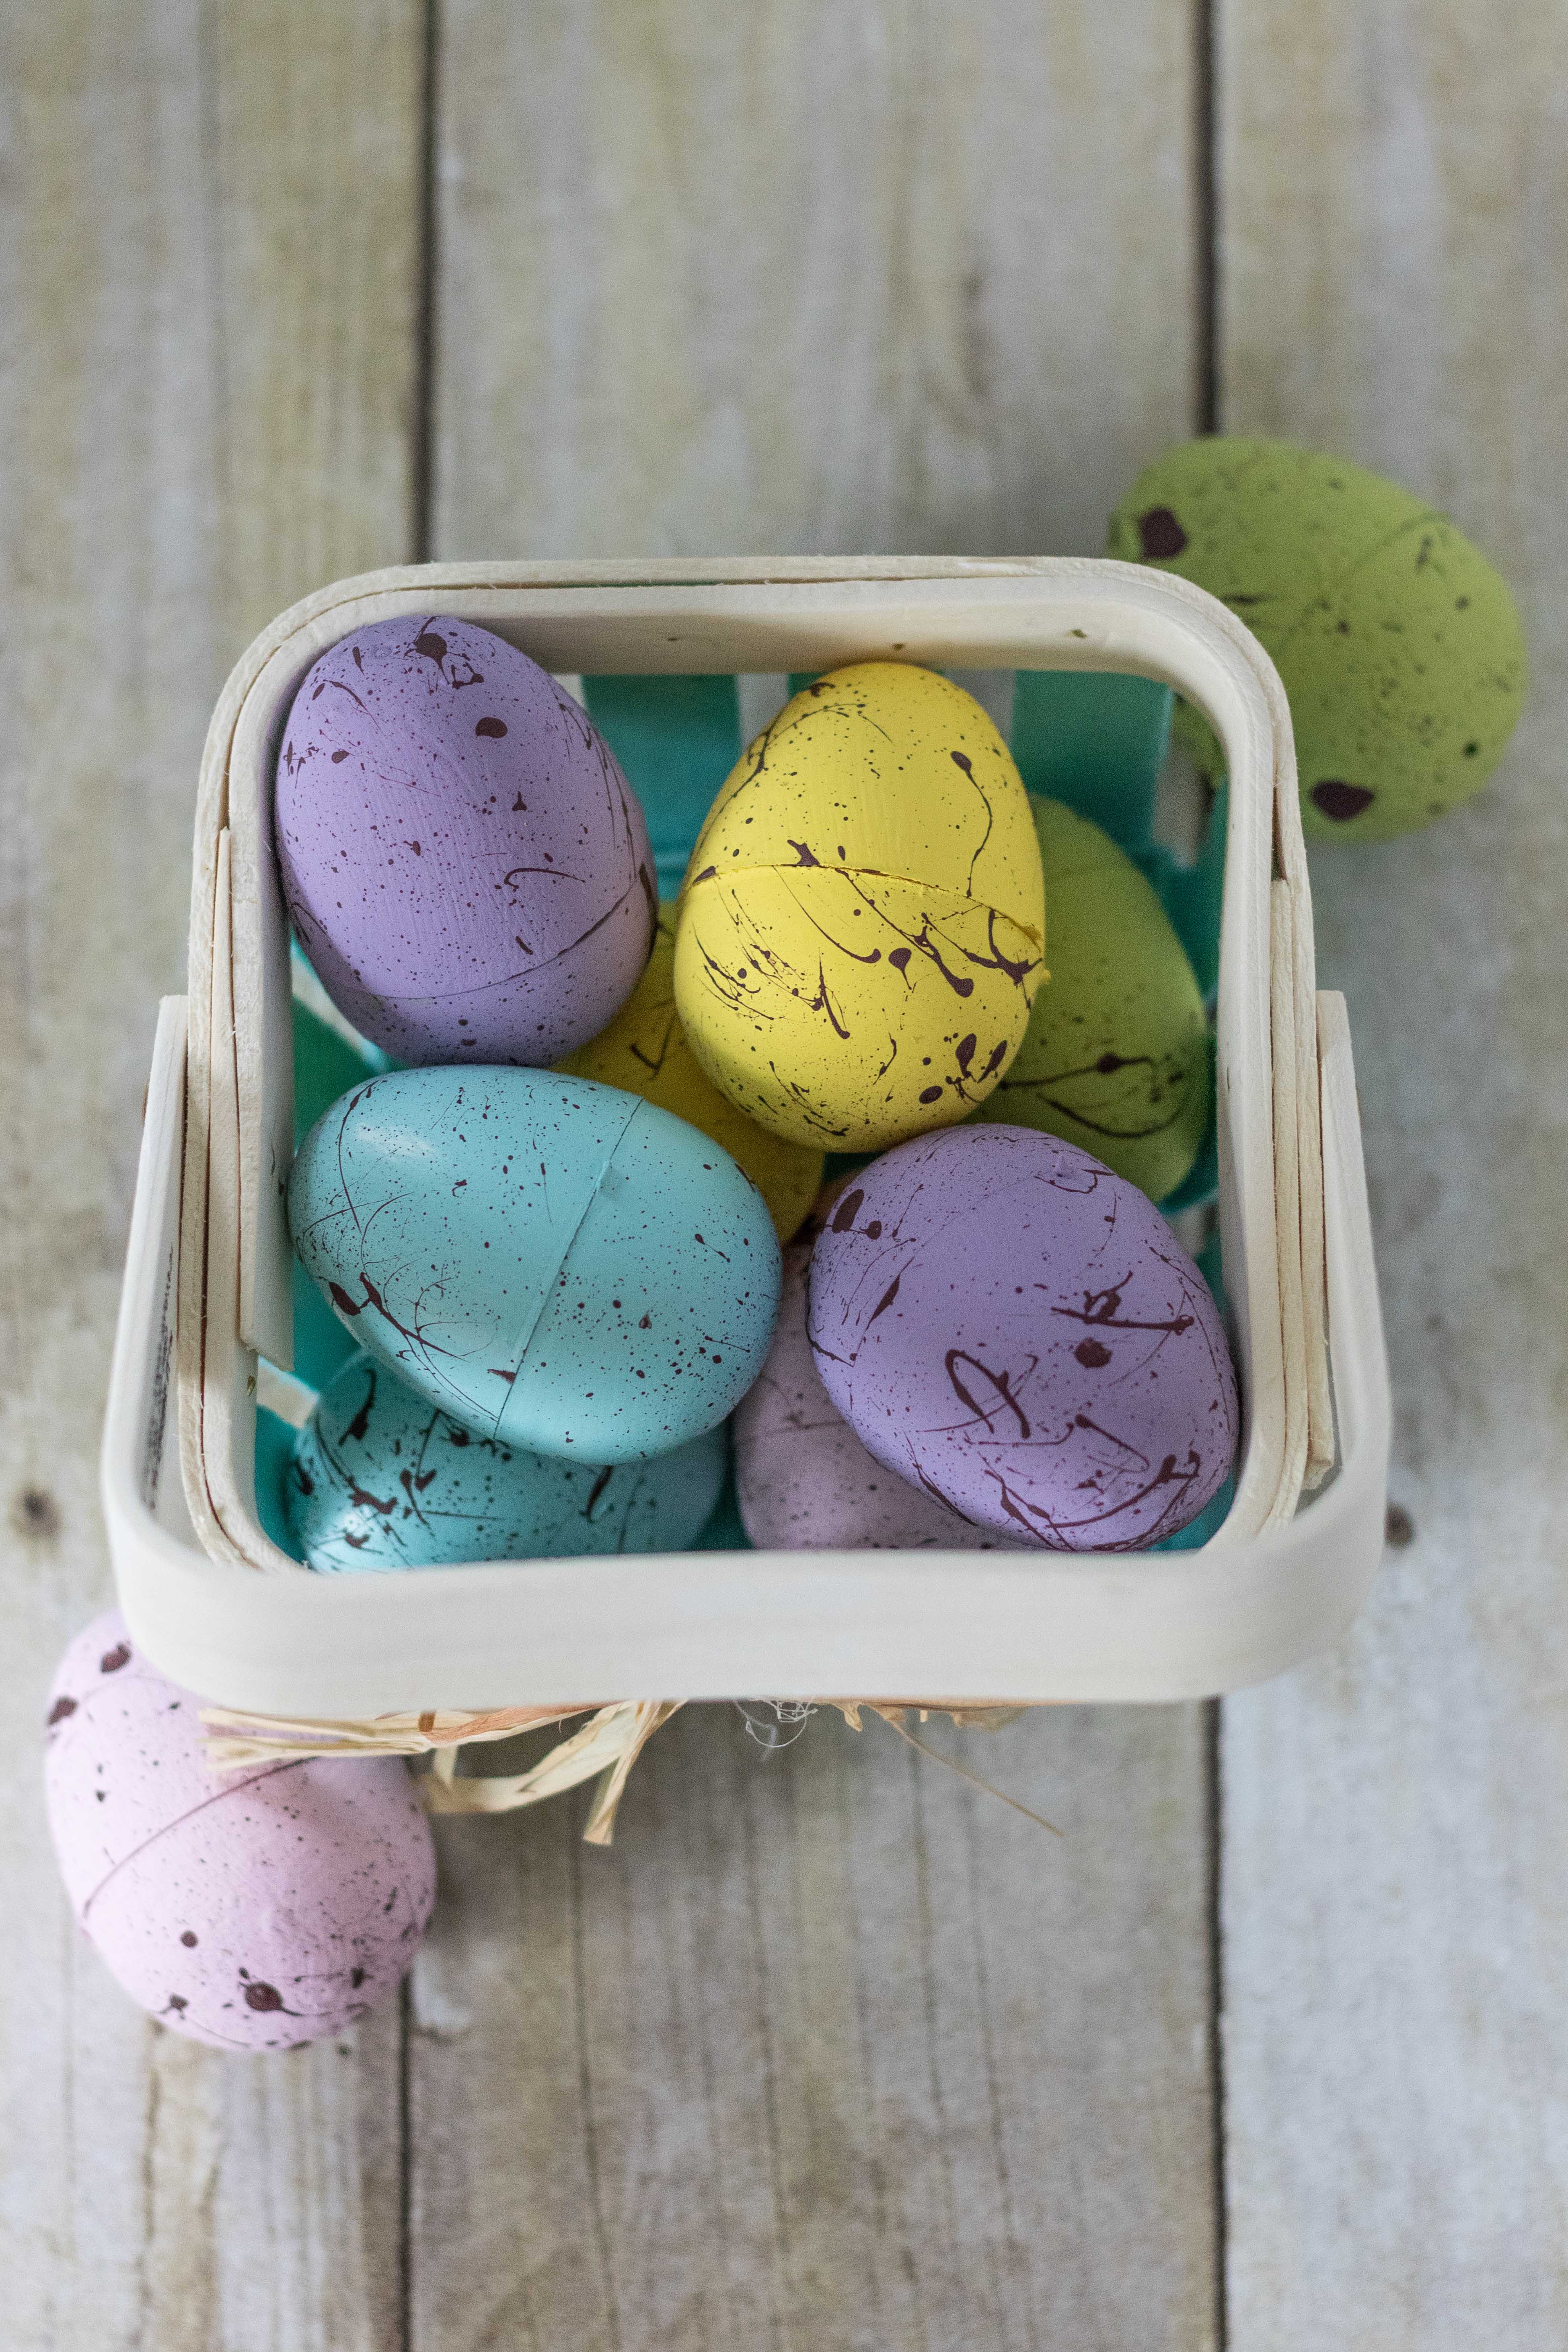
I painted four layers for the yellow, blue, and purple eggs. I added a fifth layer to the green eggs and a sixth layer to the pink eggs, both of which peeled more than the other paint colors and consequently, needed extra coverage. The number of layers you’ll need will depend on the color of your eggs and your paint and the thickness of your paint layers.


As always, I had an ever present kitty helper who, for once, didn’t find this project very exciting.

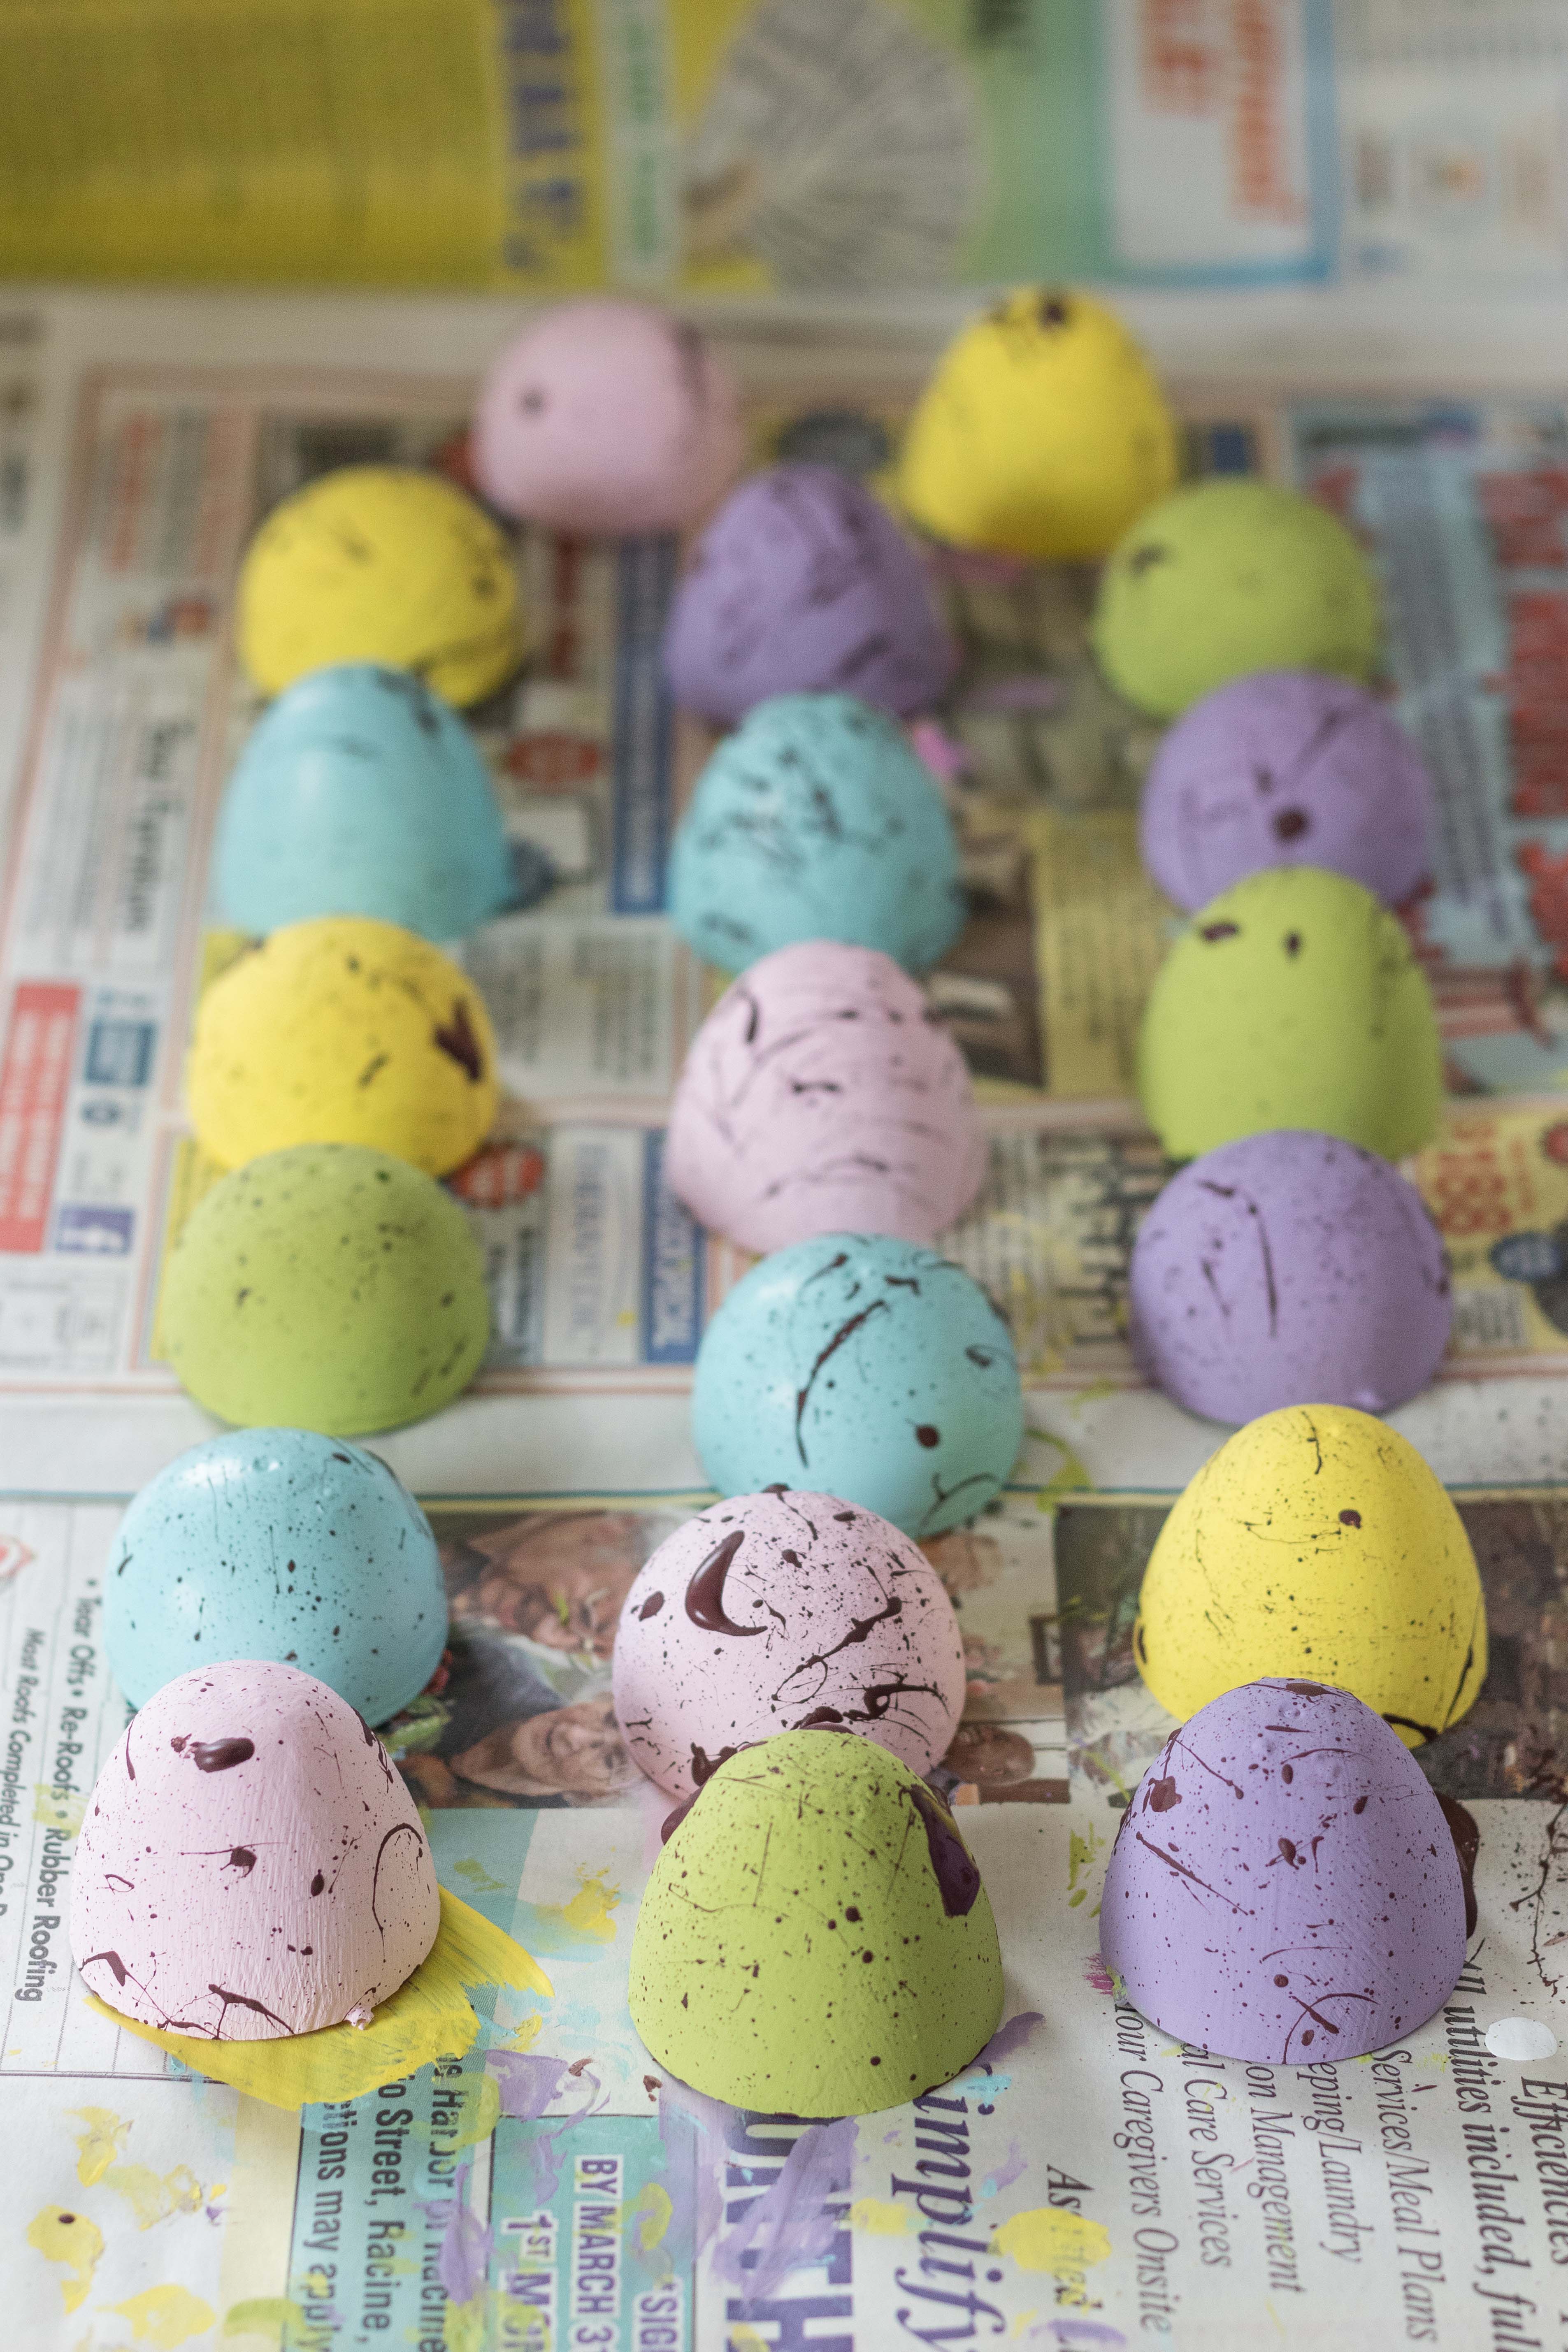
Now you’re ready to add the brown speckles! Make sure your painting area is well covered in newspaper. I added a newspaper covering to my backdrop to avoid splattering it.
Grab your old toothbrush and squeeze a small amount of brown paint onto the newspaper or other painting surface. I started with a small amount and then squeezed more paint as needed so it didn’t dry out. I recommend practicing flicking paint with your toothbrush before painting the eggs, so you can determine how far away to stand and how to apply the paint to create your desired aesthetic.
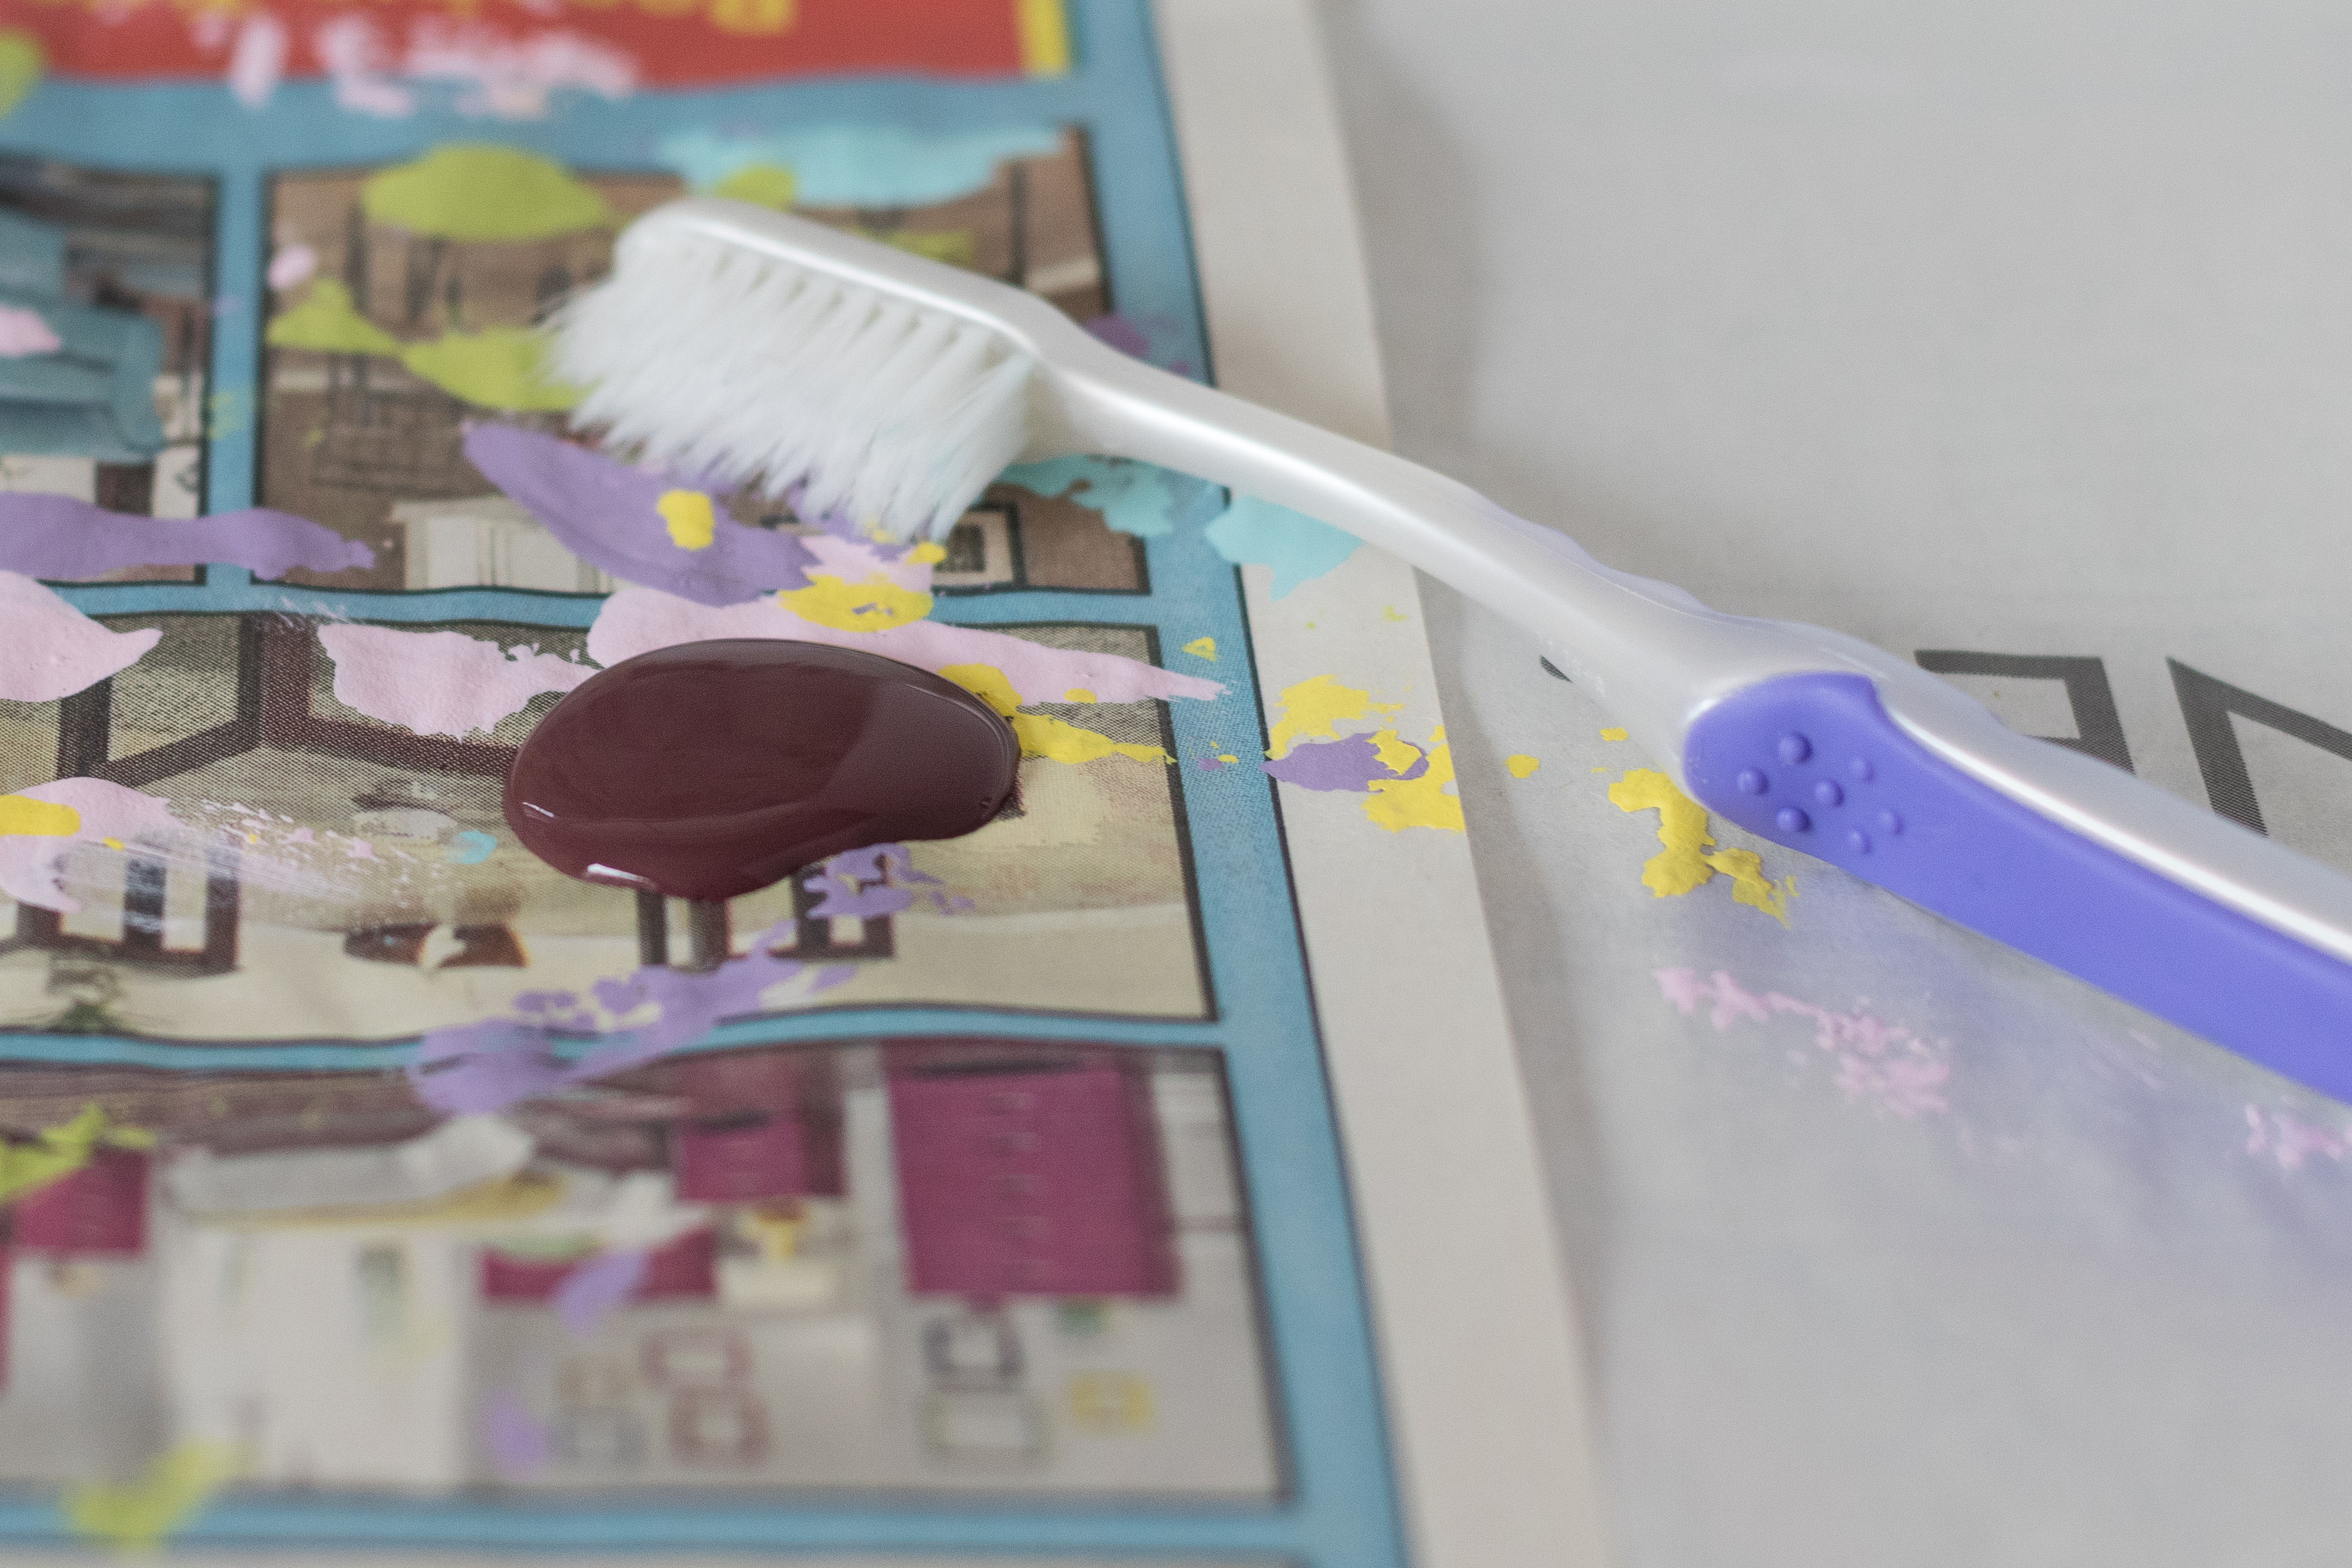
Work slowly. It’s easy to keep adding more speckles as needed. Allow the paint to dry completely when you’re finished.
Close up the eggs carefully. Plastic eggs are cheap, which means they don’t always fit together really well. You may chip off a little paint from the inner edge of the bottom egg halves. No one will ever see these inner edges, so it’s fine if this happens.
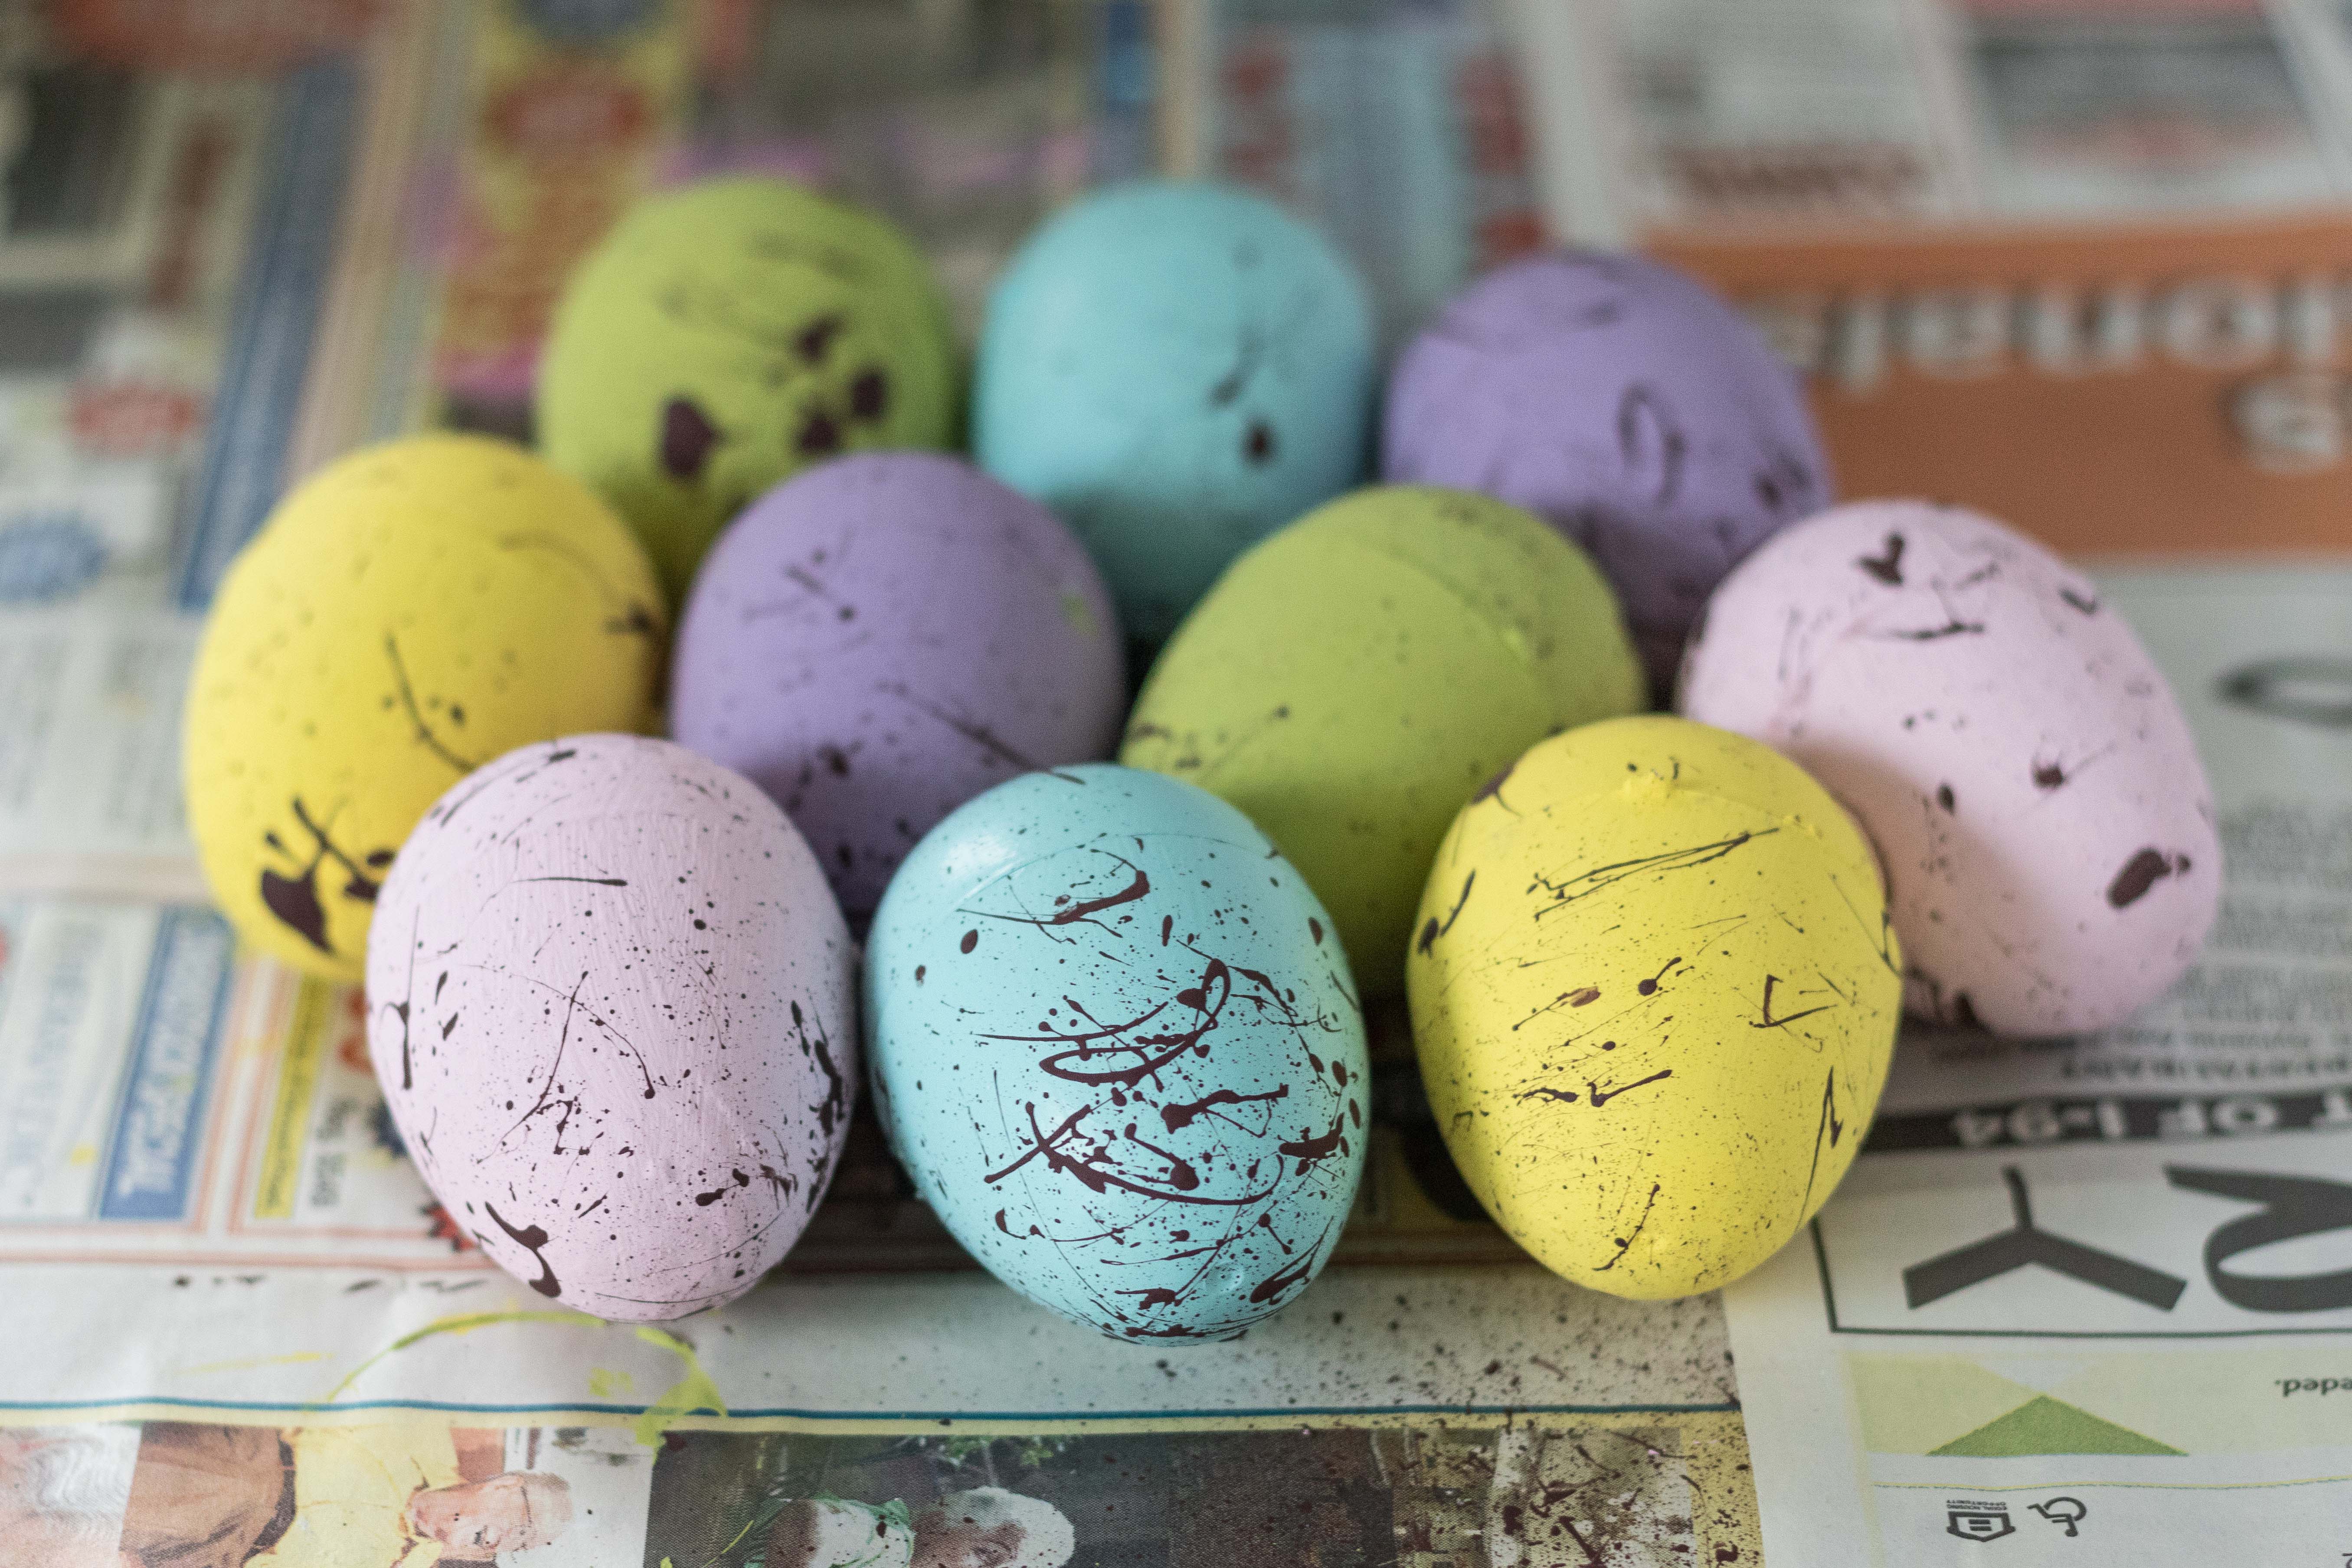
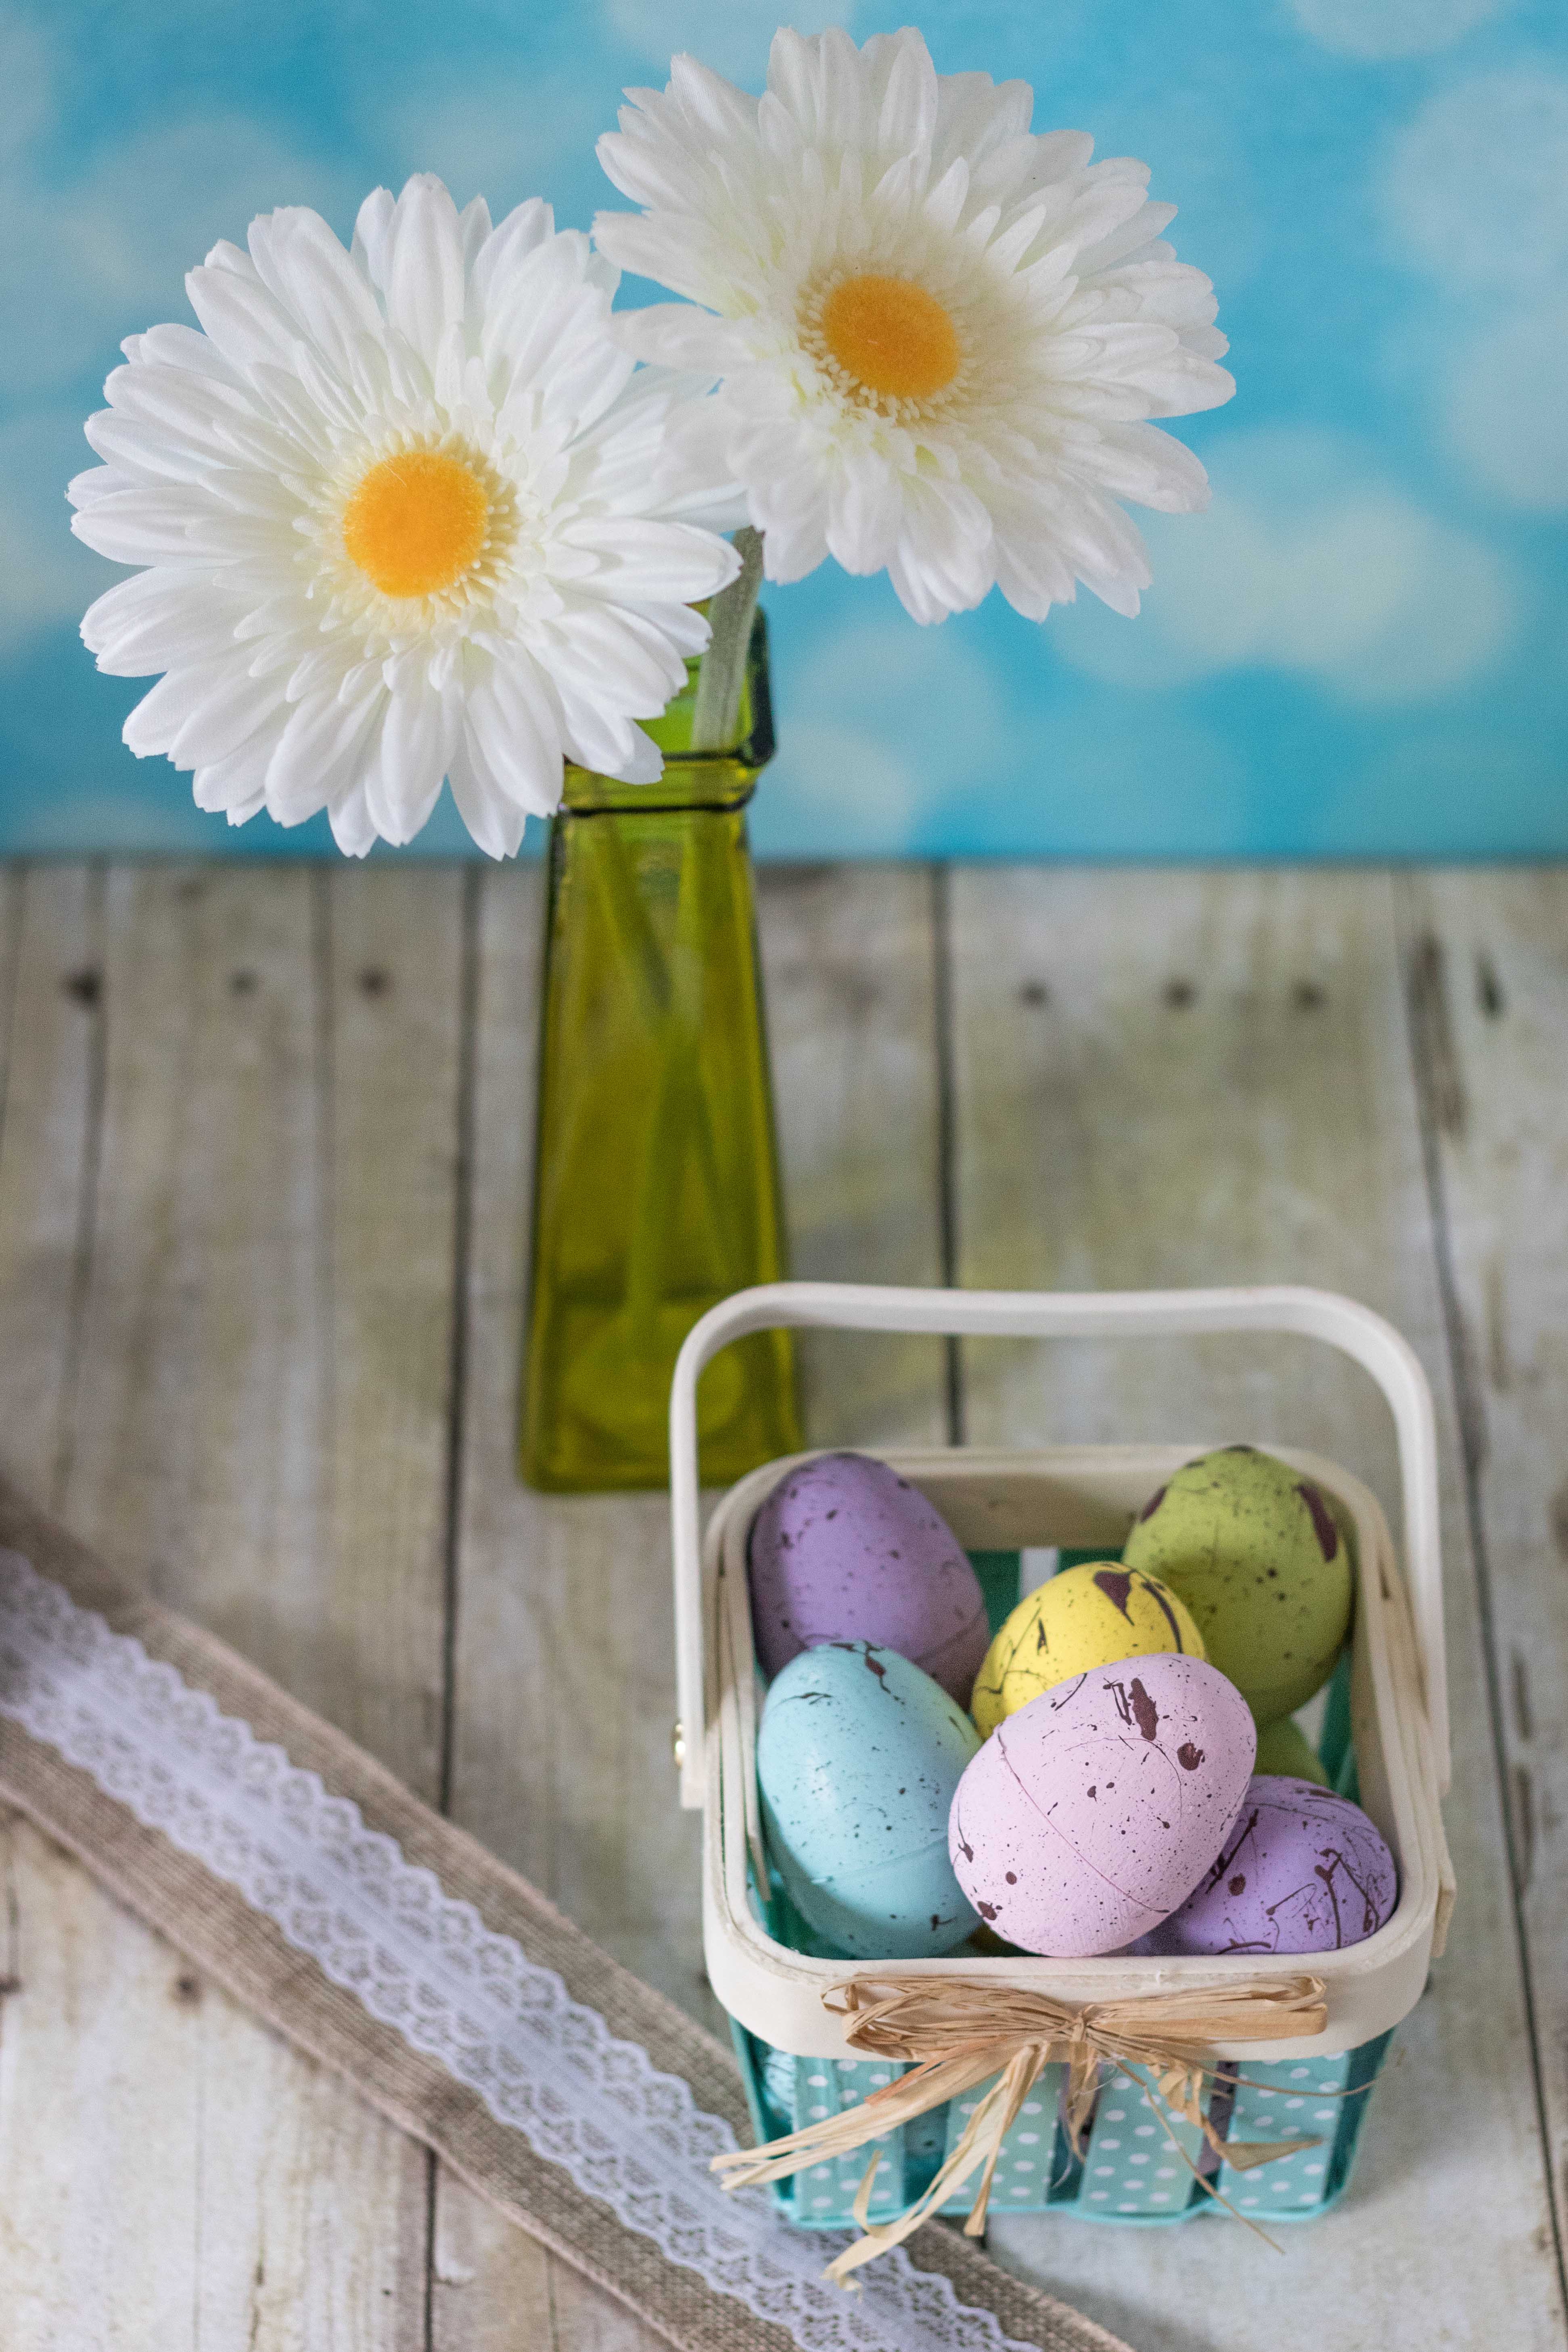
Grab your wicker or wooden basket, and arrange your eggs in it. I painted 10 eggs and found I could arrange roughly five to form a bottom layer and then the other five to form a top layer.
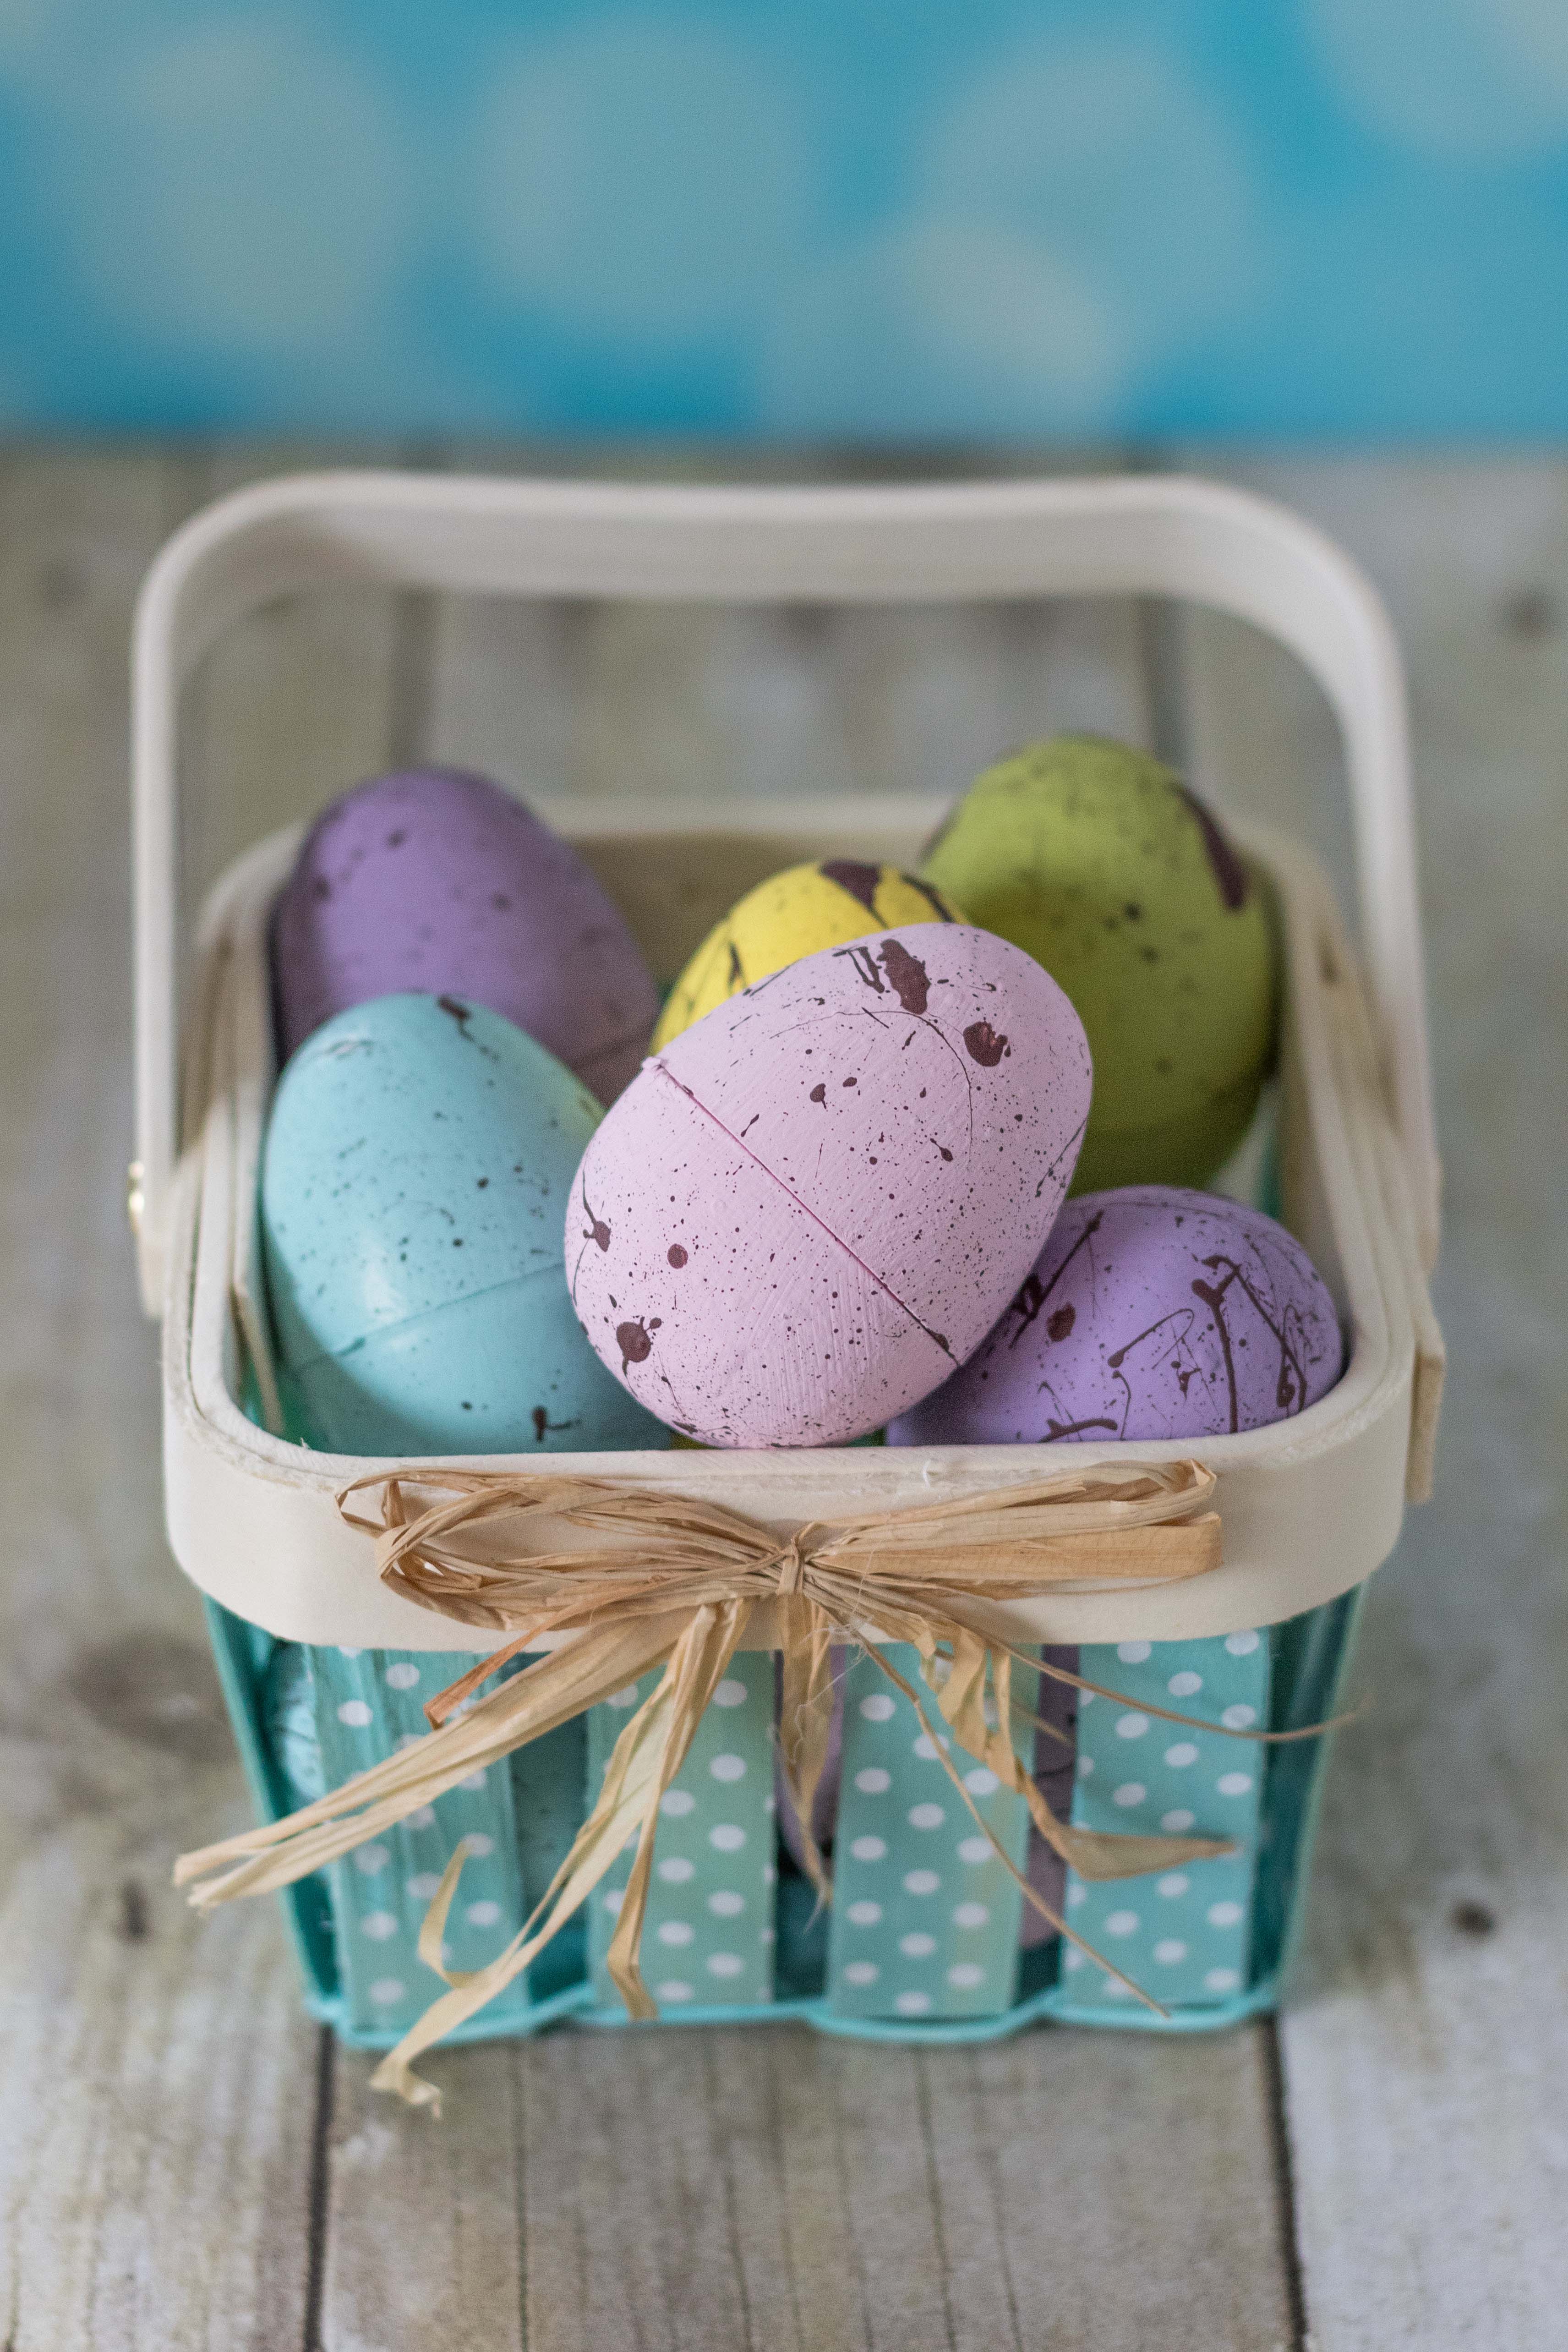
So cute. I’m still in awe that you can create such a great texture on plastic eggs with acrylic paint.
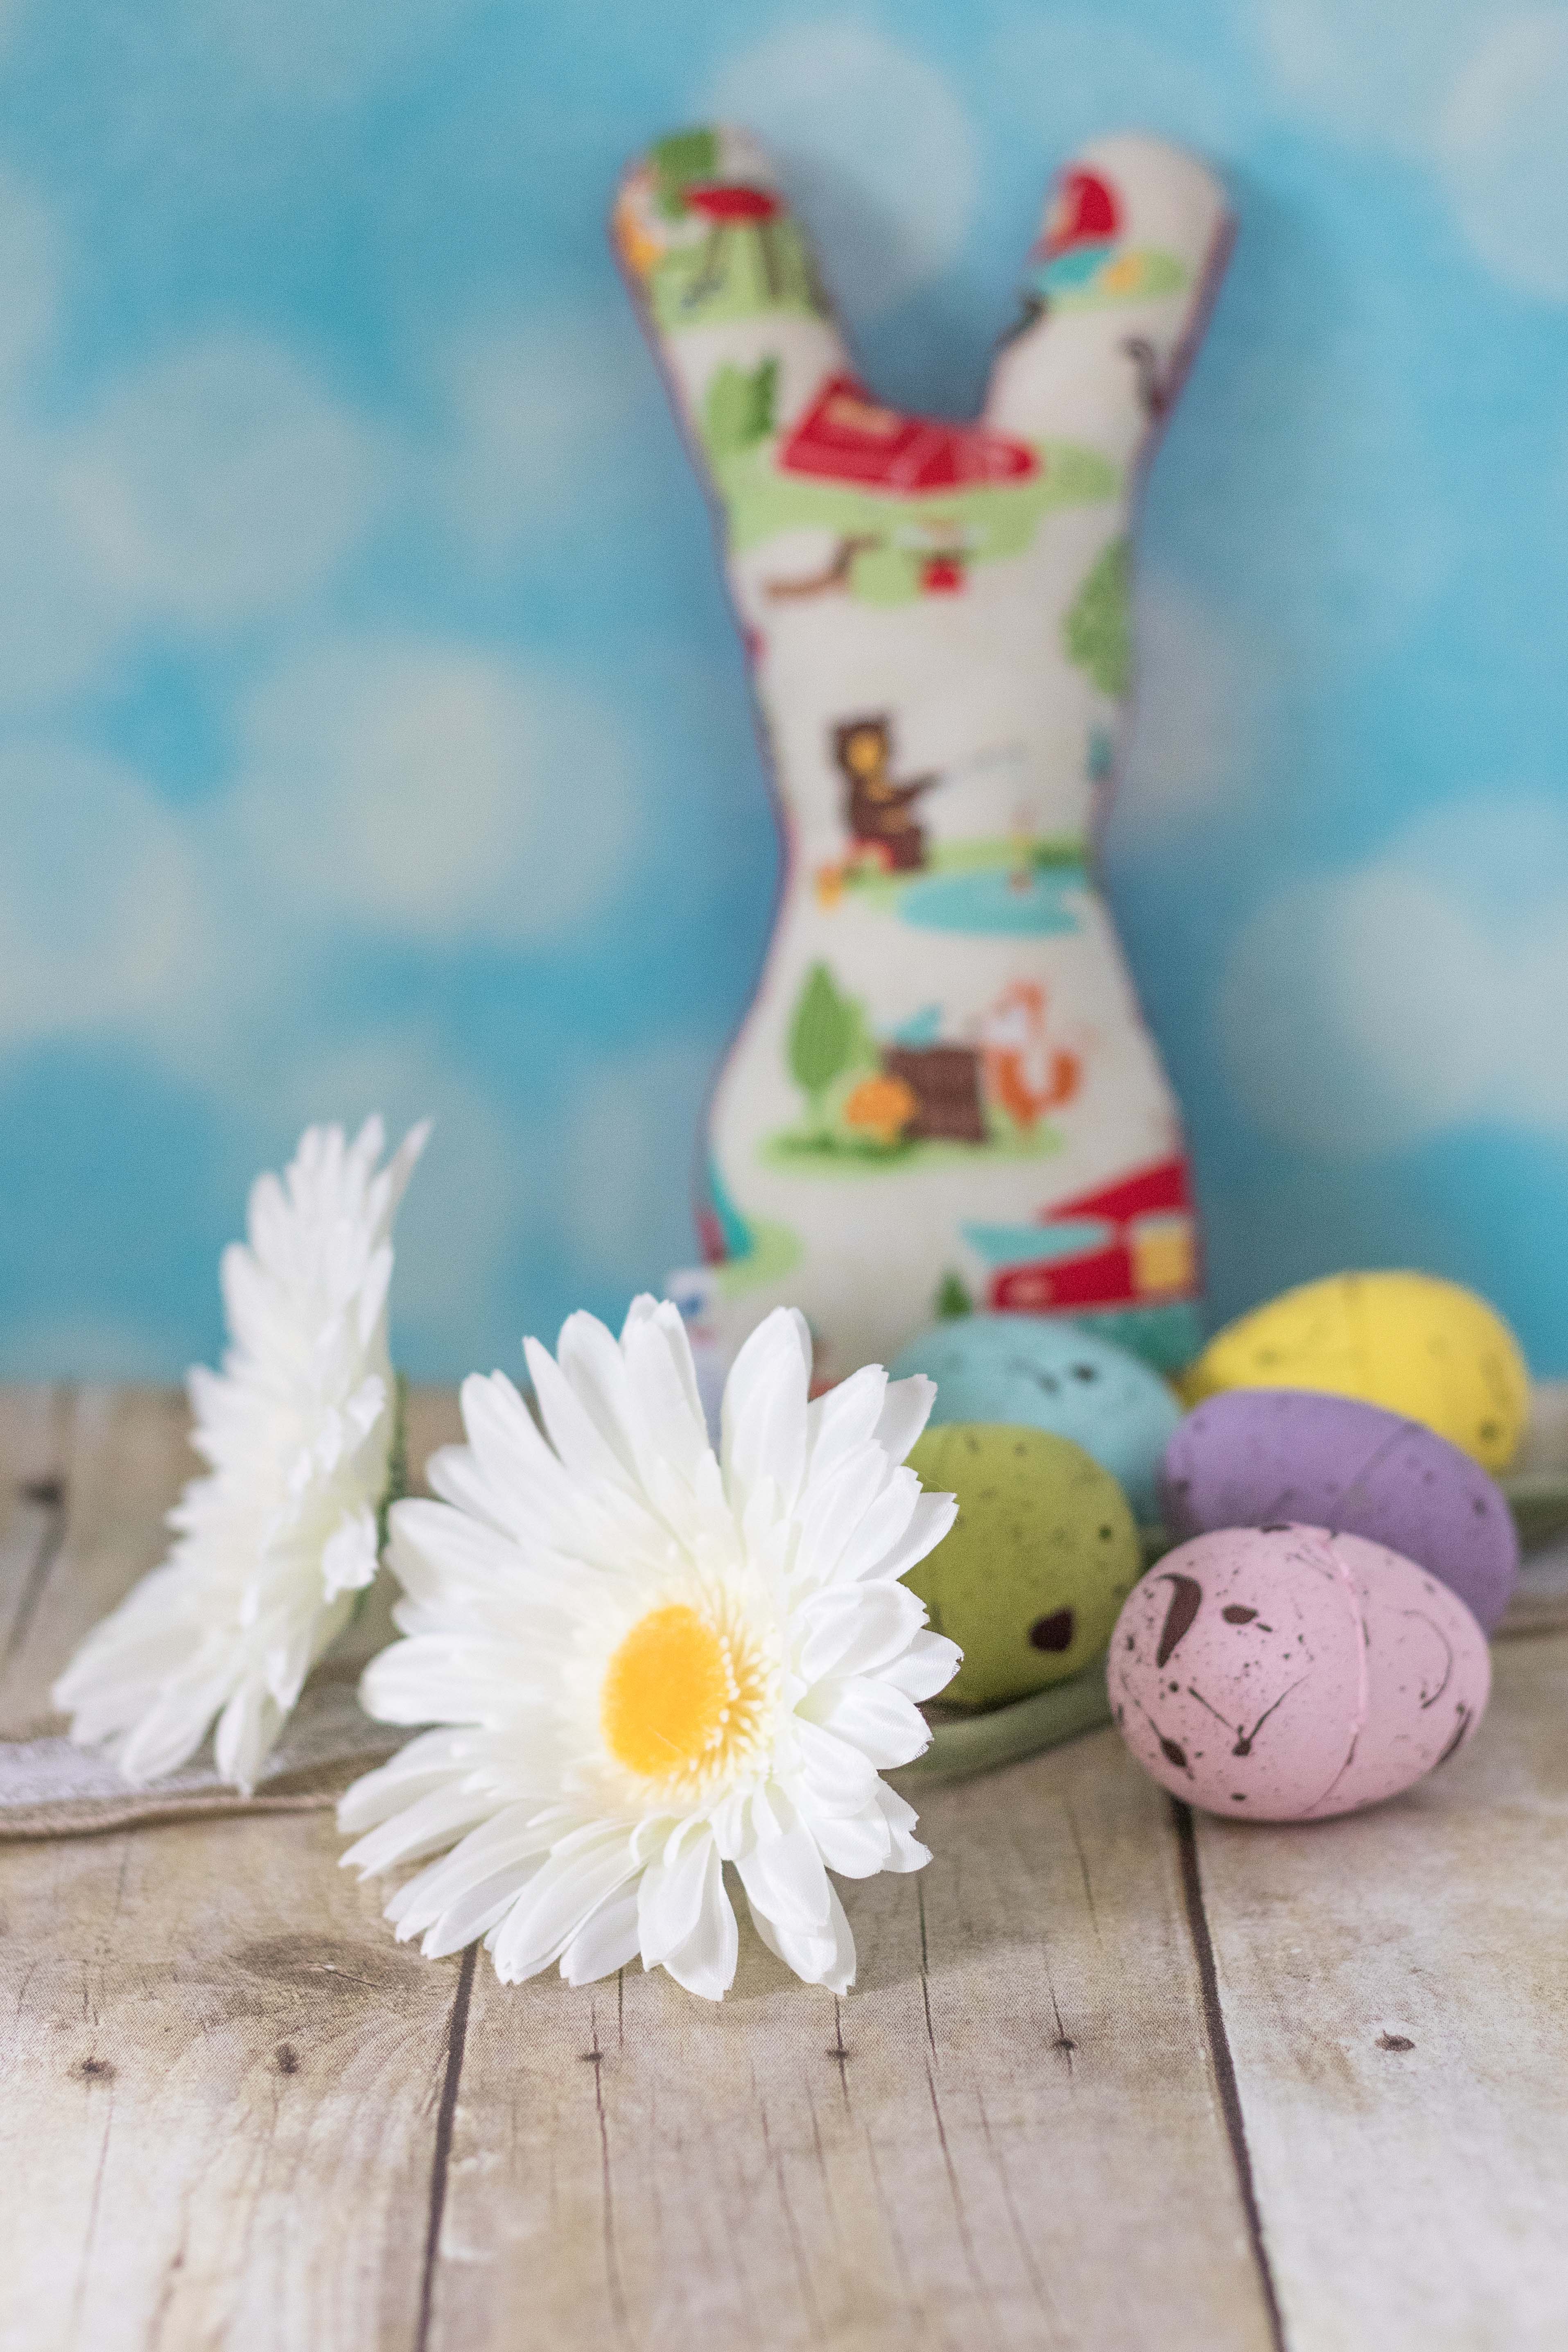
While I was at the Milwaukee Art Museum for Art in Bloom last week (stay tuned for a post next week!), I picked up this adorable little bunny. For their current feature exhibit, Milwaukee Collects, the museum has an all Milwaukee gift shop with lots of handmade items from local vendors. I had seen LiddleHandmade‘s bunnies in an art museum email and couldn’t resist. This one may or may not fit perfectly with our nursery theme. He’ll be hanging out with the new basket of eggs in our entryway through Easter.
Did you make the DIY pastel painted speckled plastic Easter eggs?
I’d love to see them! Post a picture to my Facebook page, tag #RoseClearfield on Twitter or Instagram, or send me a snap (randomcreative).
More Easter DIY!

DIY Easter Bunny Canvas Wall Art
So cute and much nicer than the original plastic version! I love adding paint specks with a toothbrush – I do it whenever I paint starscape watercolors.
These are adorable and I love all the great photos for the step-by-step process! Great idea and thank you for posting!
I love the way these look! I would have never thought they were the plastic eggs. I can’t wait to do this.
I had to tell my cats off today for trying to wreck the joint while I painted. I know the pressures of an ever present kitty “helper”. 🙂
These turned out great by the way!
What a great idea. I love the way they turned out!