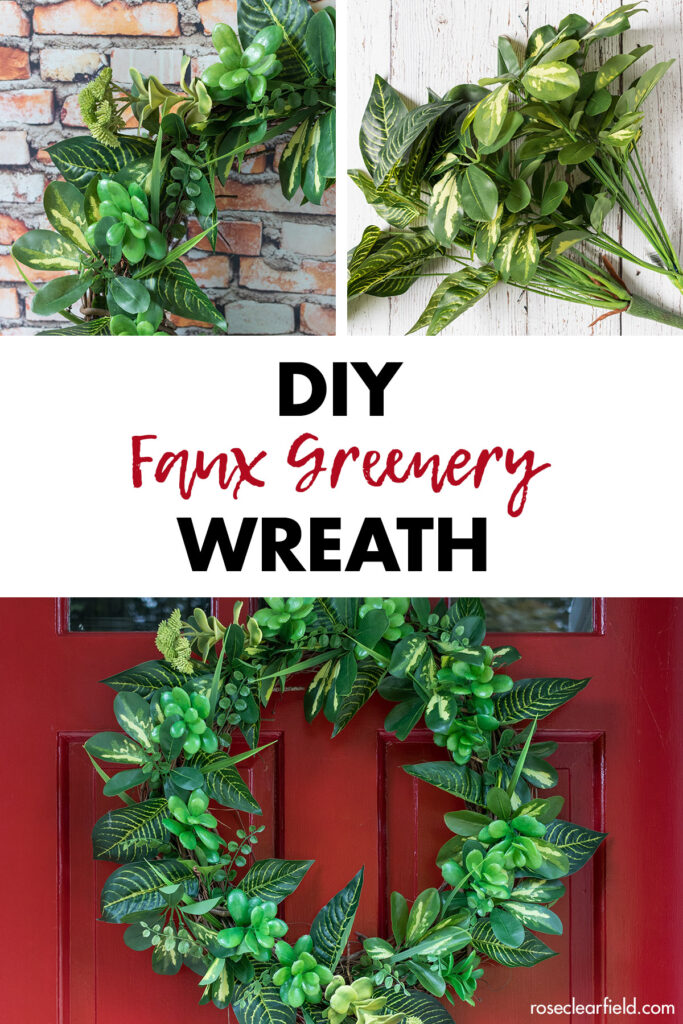


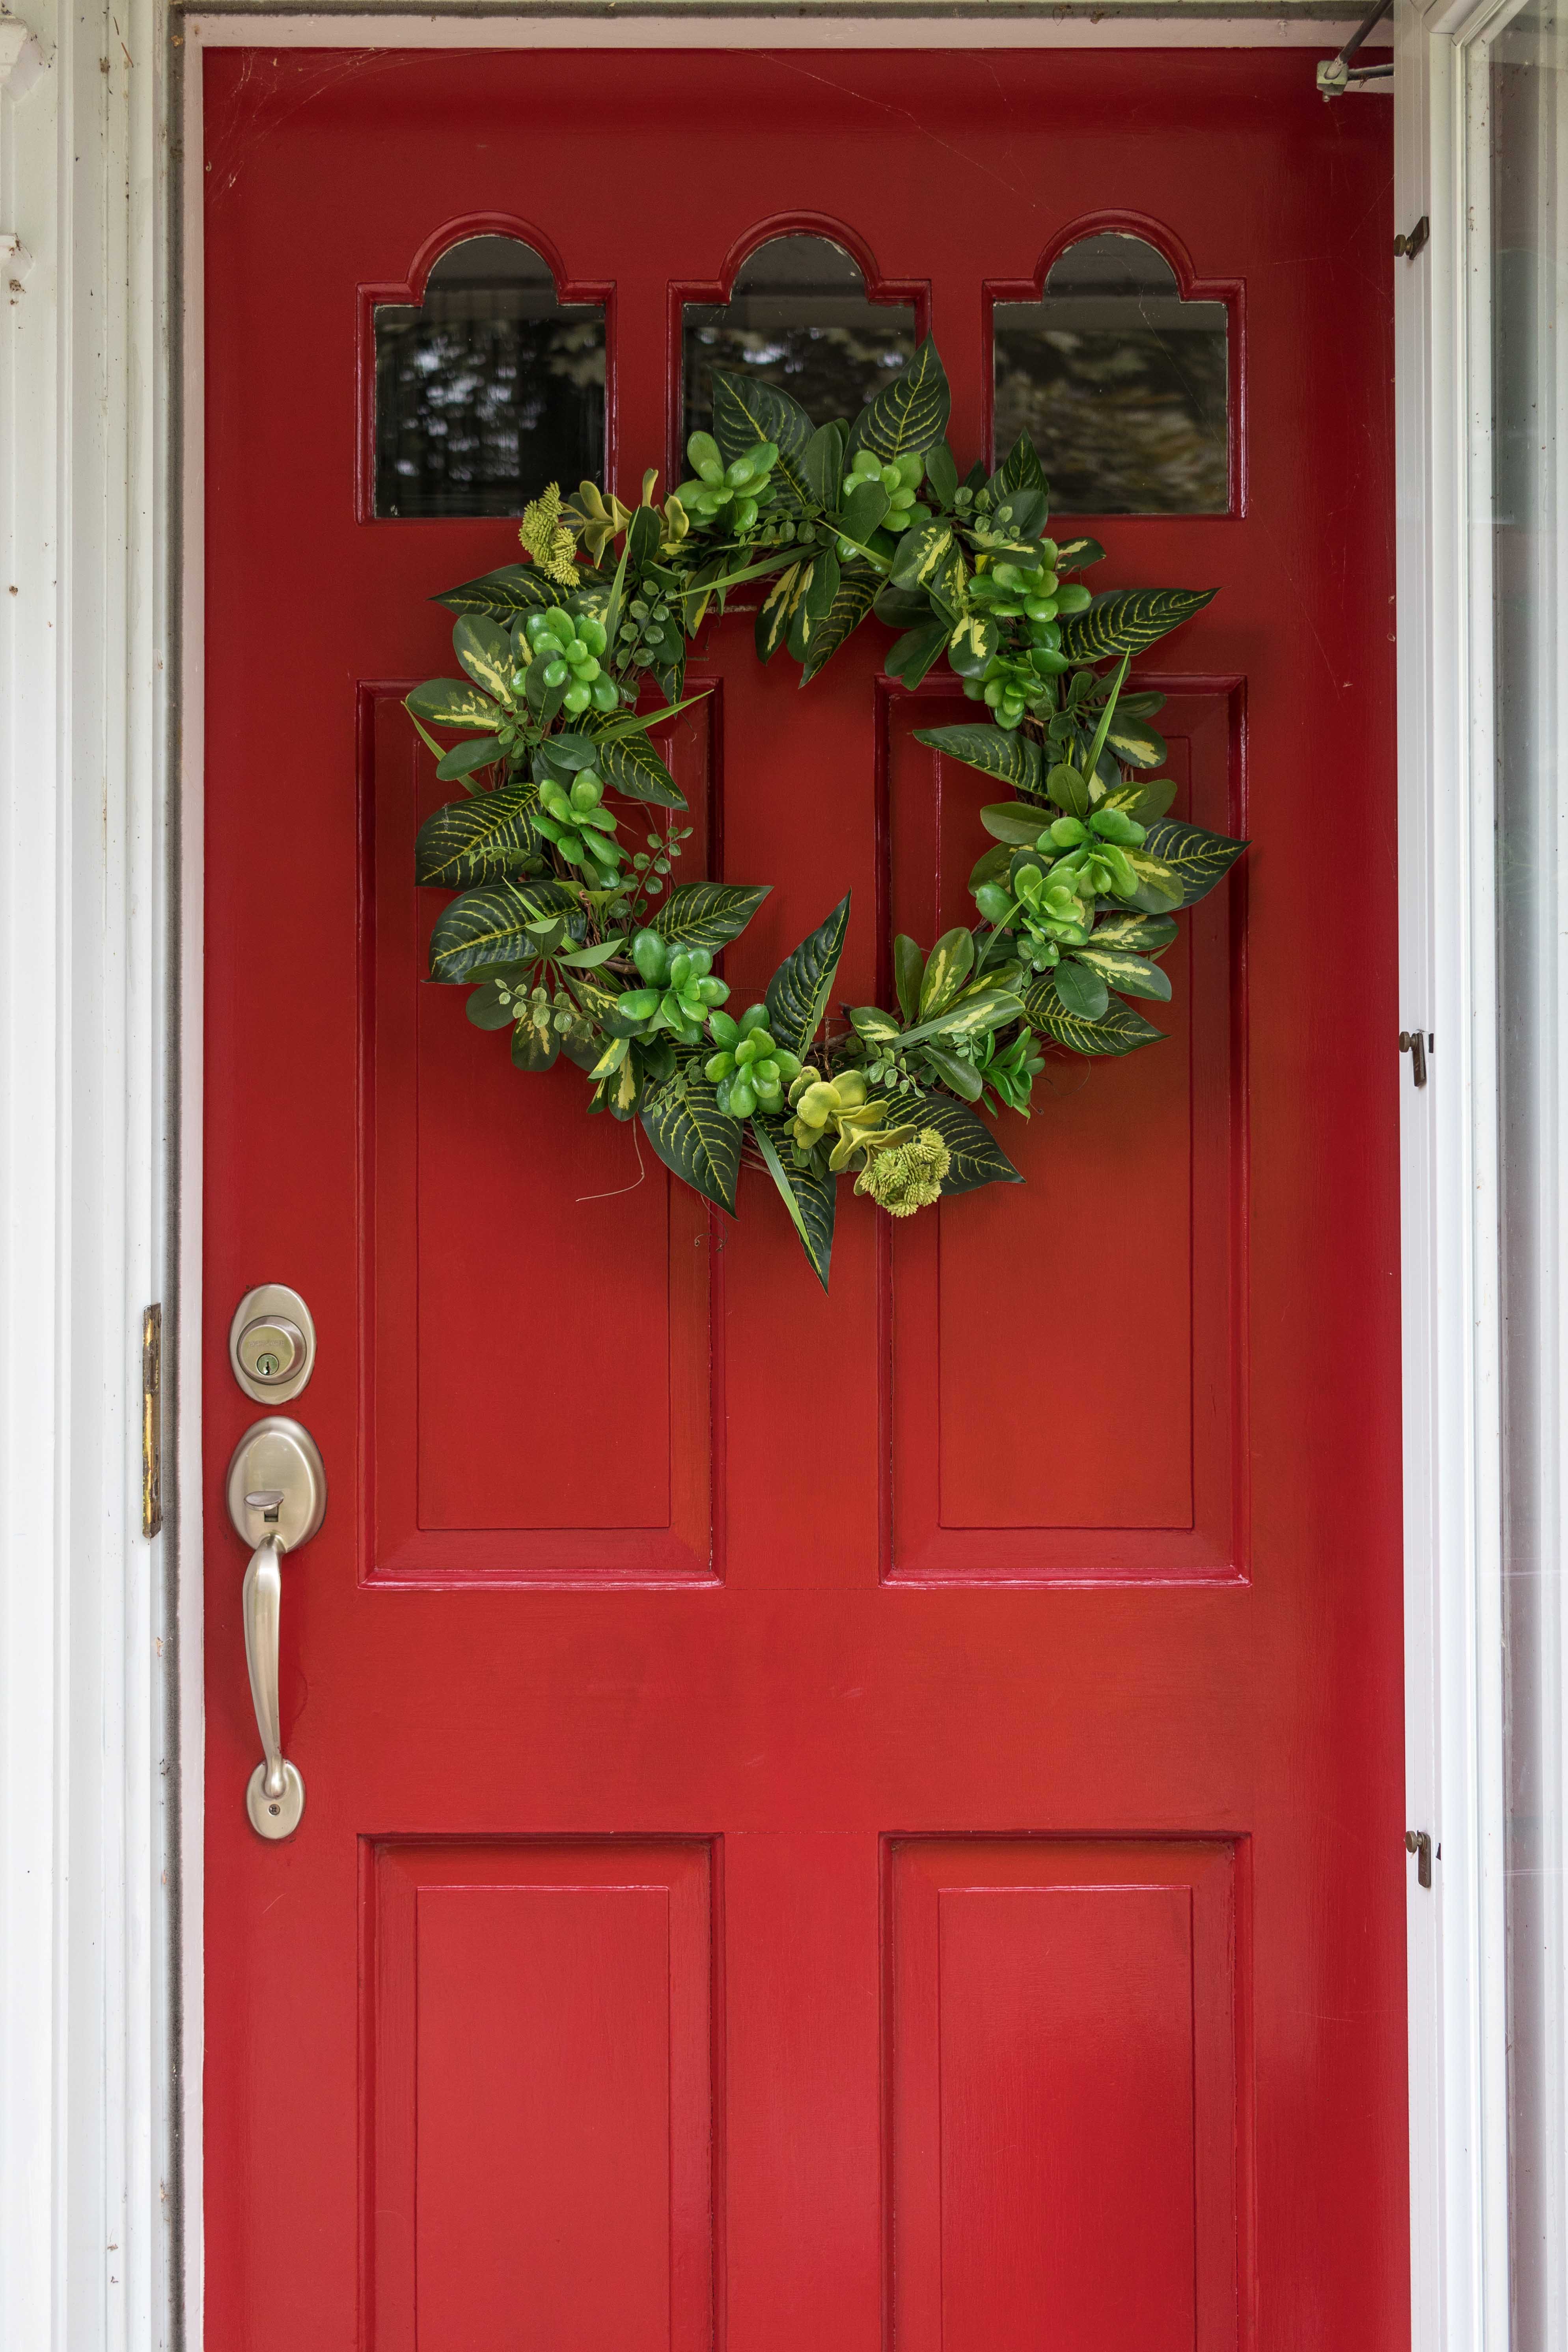
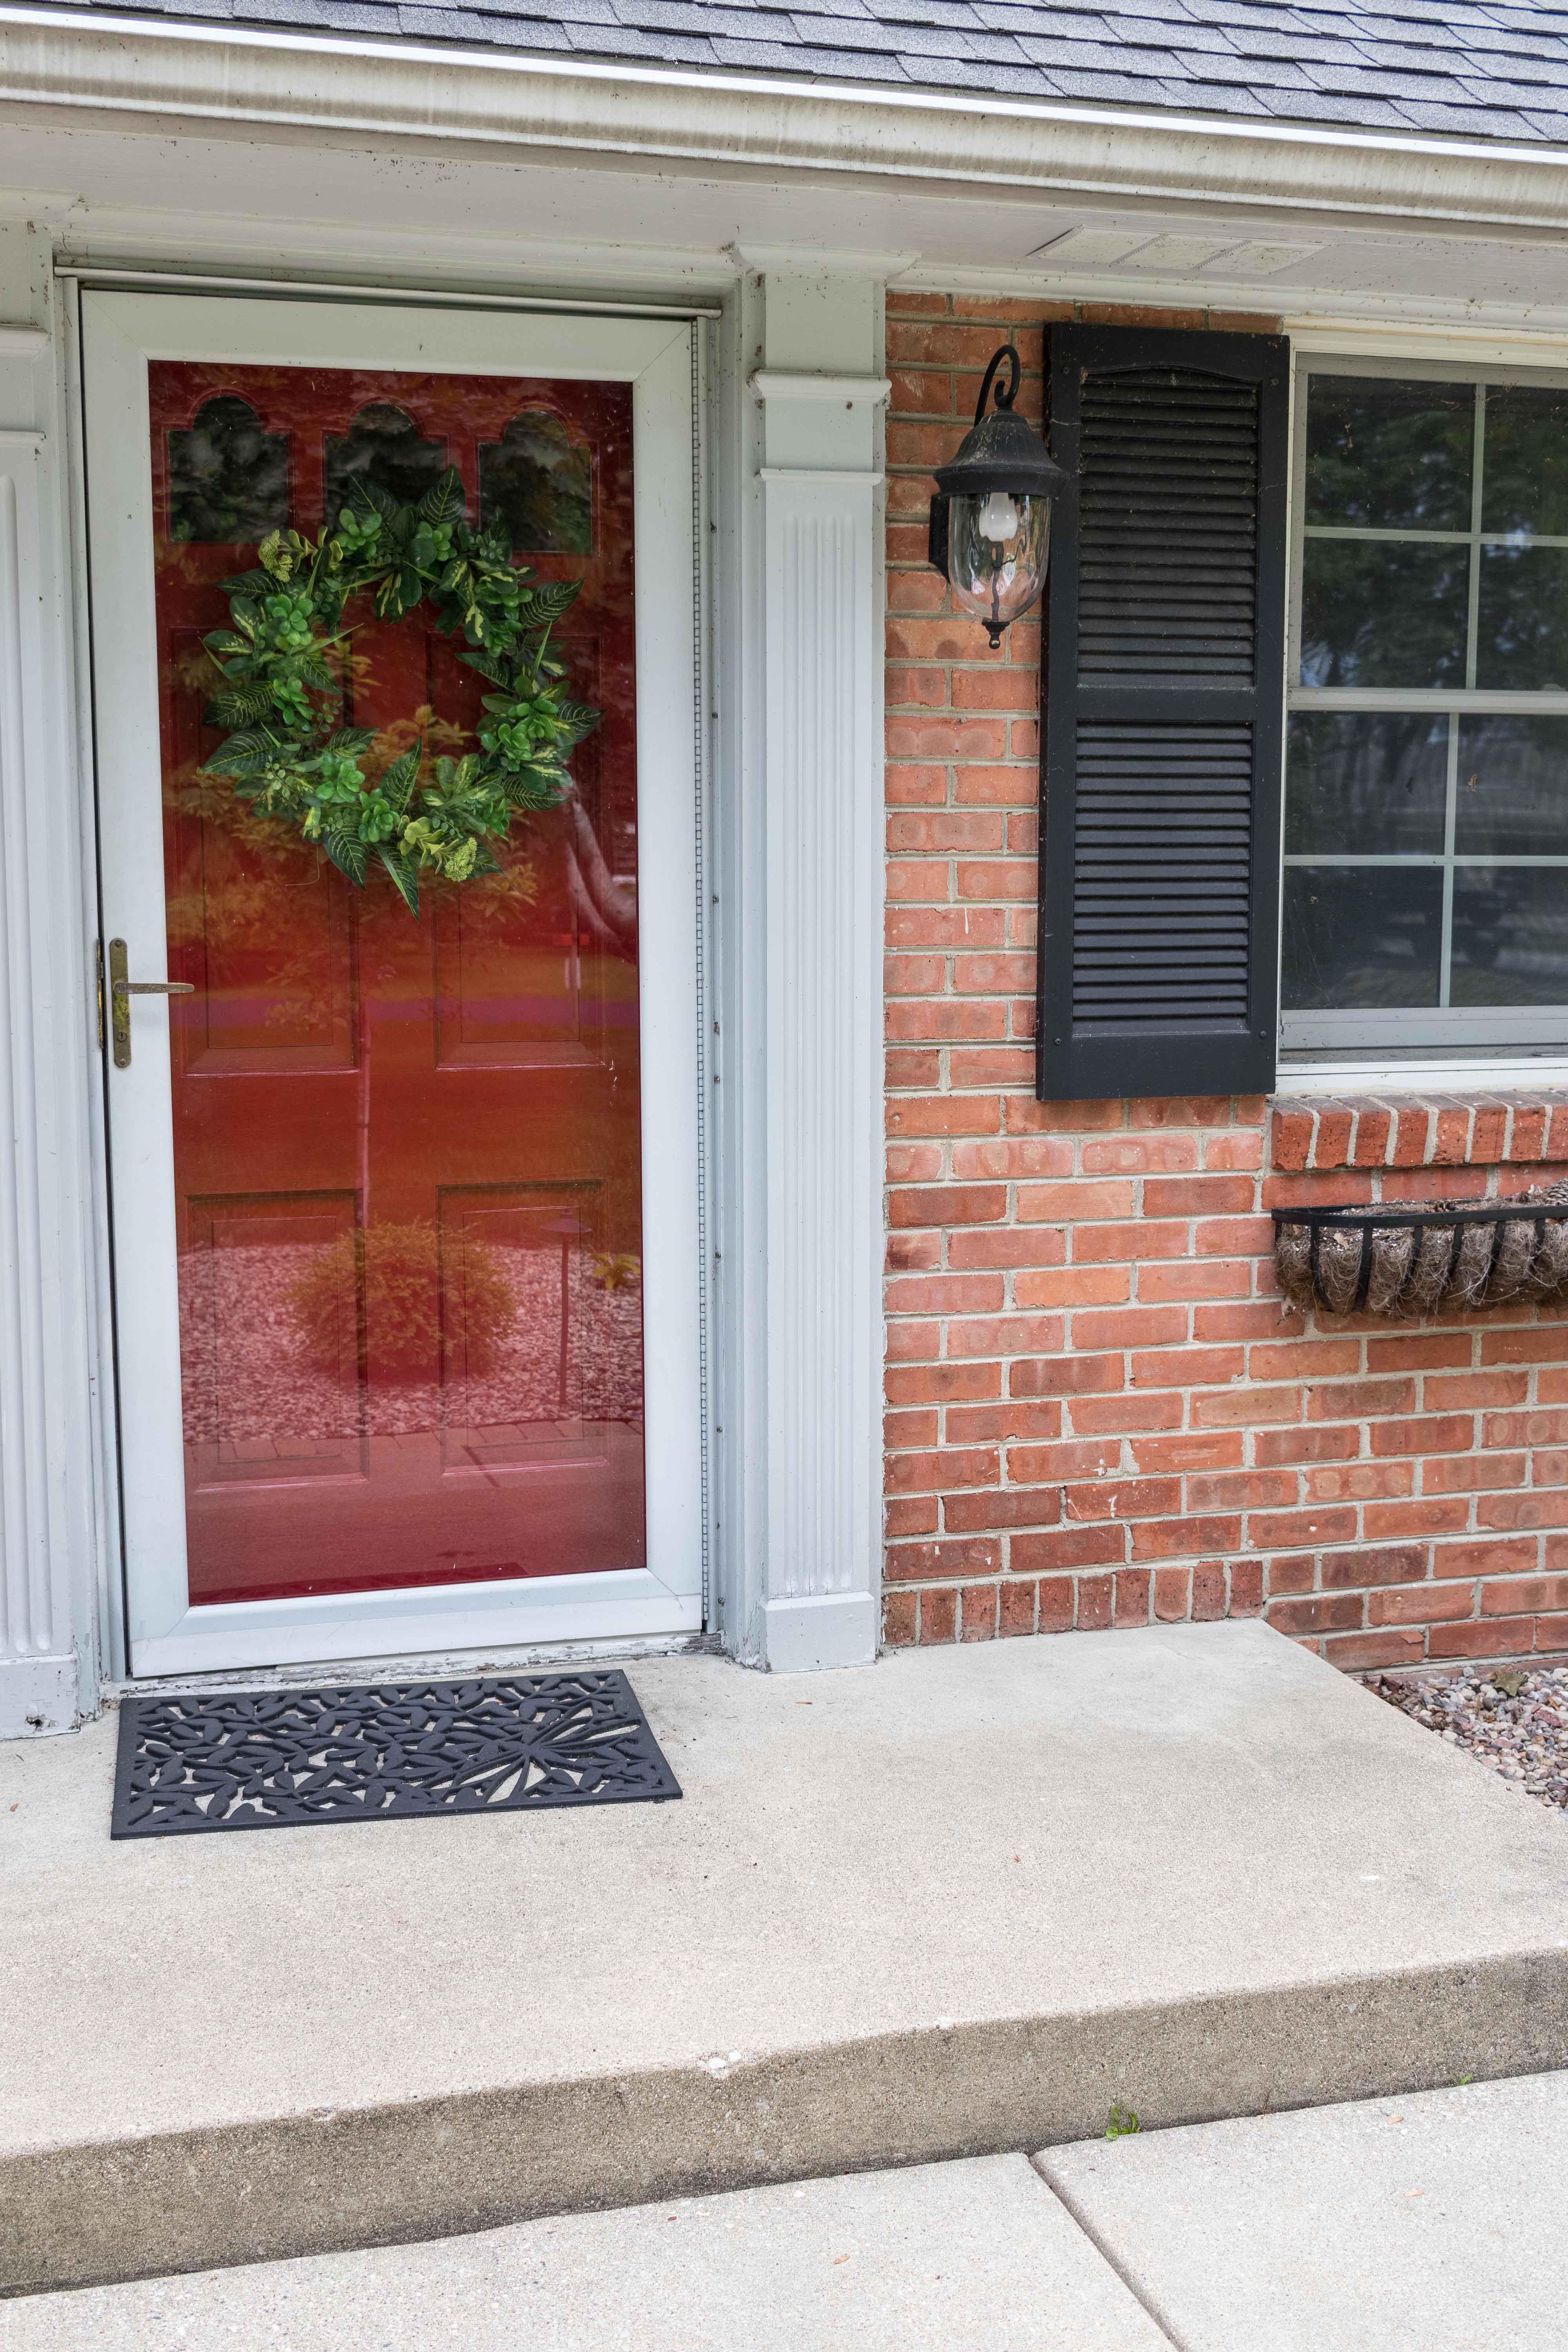
I finally made my own front door wreath! How did it take me until 2018 to make a wreath?
One, I’m super picky about wreaths. I think that there are a lot of really weird wreath ideas out there and then just a lot of wreaths that aren’t my style. Two, florals aren’t my thing. I do all right decorating with faux flowers, but I know very little about gardening and tend to steer clear of it as much as possible. This year I got it together to make a DIY faux greenery wreath and could not be happier with the results. If I can make this wreath with no floral arranging experience, you can make it, too!
Obviously, if you’re checking out my DIY faux greenery wreath post right after I wrote it, you know that I made it for summer. But it’s an ideal piece for spring or summer. Depending on your decor style/decorating preferences, you can even leave it up for both seasons. Most likely next year this is what I’ll do. I love the all green aesthetic because it’s fitting for warm weather and coordinates seamlessly with such a wide range of decor pieces. Switch up your other seasonal decor, and no one will even notice that you’re still rocking the same wreath.

Supplies:
- One twig wreath base. (My wreath measures 18″ in diameter.)
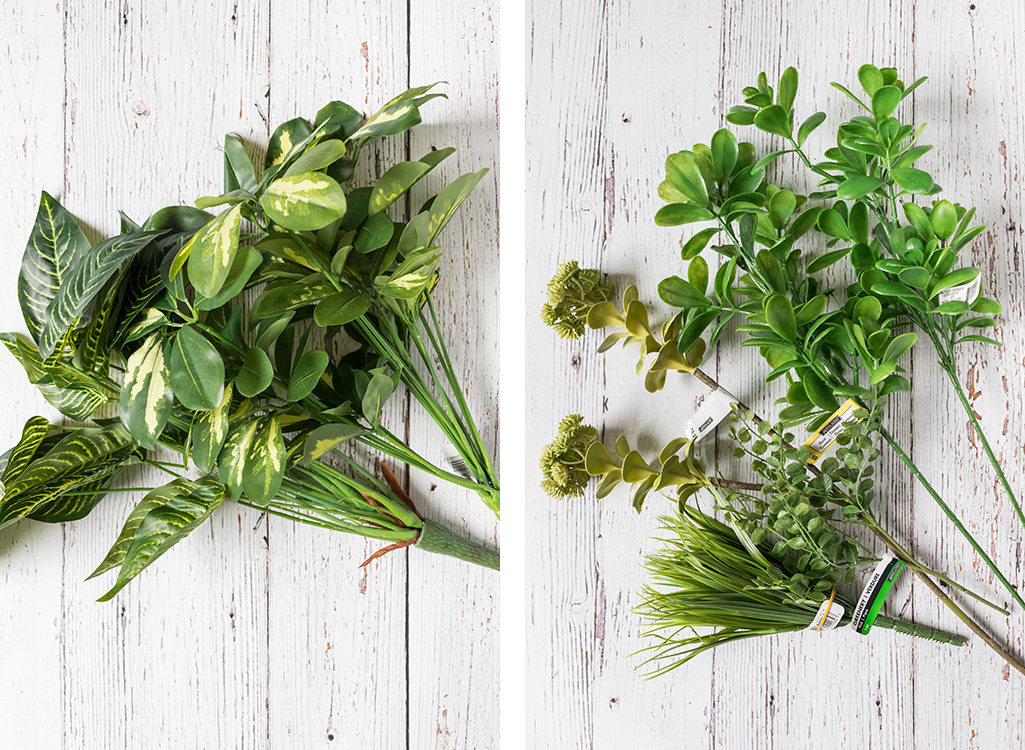
- Assorted faux greenery. I’ve linked one example for you. I bought about eight different types, which was more than enough for my wreath.
- Wire cutters. I used a pair of jewelry wire cutters. You don’t need heavy-duty wire cutters for this DIY project.
- Hot glue gun and glue stick. One glue stick is more than enough for this project.
- Optional: floral protectant spray. I used Krylon Ultra UV floral protectant.
While I have linked a few products above, you can purchase all of the supplies that you need to make the DIY faux greenery wreath at Michaels. I already owned some of the supplies, like the glue gun. But I picked up the wreath base and all of the greenery in a single trip.
A few tips:
- Take your time selecting your greenery. When you’re at Michaels or the store of your choosing, don’t rush the process of choosing greenery. Browse the selection and then start gathering pieces, considering which ones will work best together. It may take some trial and error to determine the best combination.
- Arrange your greenery before getting out the hot glue gun. Unless you have mad floral arranging skills and you’re confident in your arranging abilities right from the start (which I’m definitely not), I recommend arranging your stems and making tweaks as needed before gluing them in place.
- Start with the largest greenery and work your way up to the smaller pieces. There is no one correct way to create a DIY faux greenery wreath. But it tends to go most smoothly working from largest to smallest.
- Strive to fill up the wreath, but don’t stress about covering every last twig. As long as most of the wreath is covered, it will look full and lush.
- Aim for a medium amount of glue. You don’t want to skimp on the glue, but you don’t want large blobs of glue either.
- Please use wire cutters, not scissors. Scissors work, but it’s not a fun or pretty process using them to snip floral wire. Get the right tool for the job.
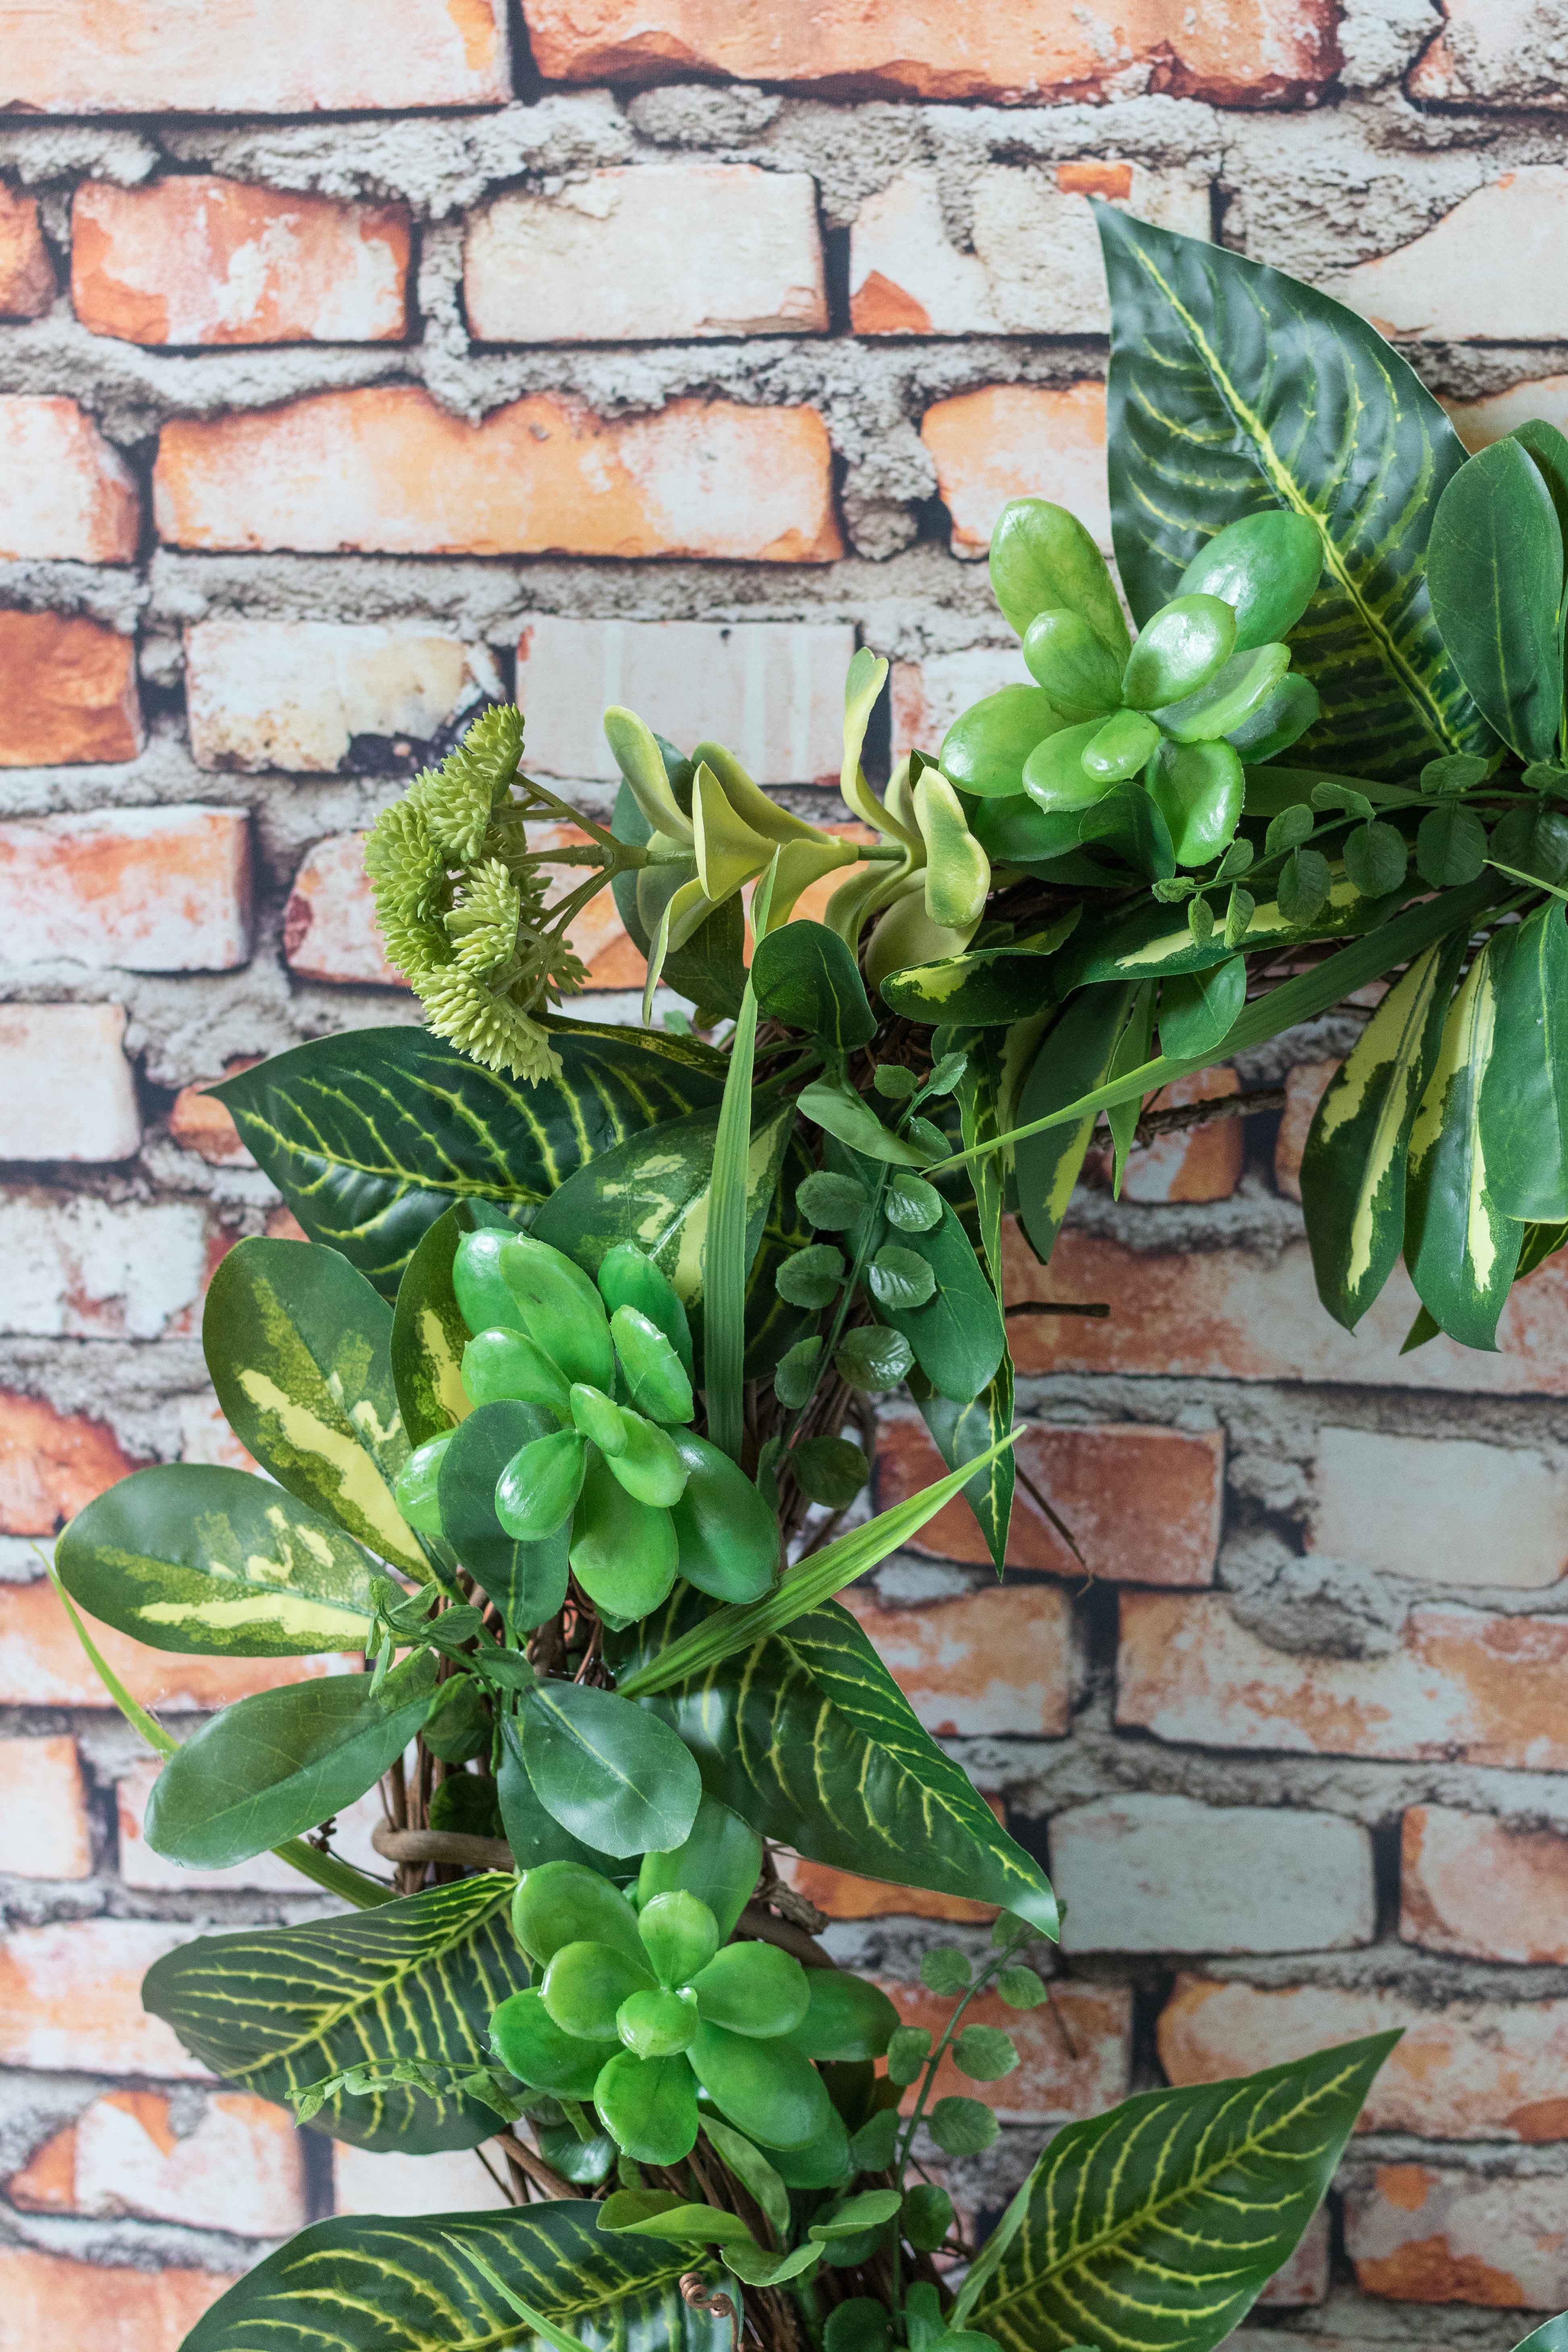
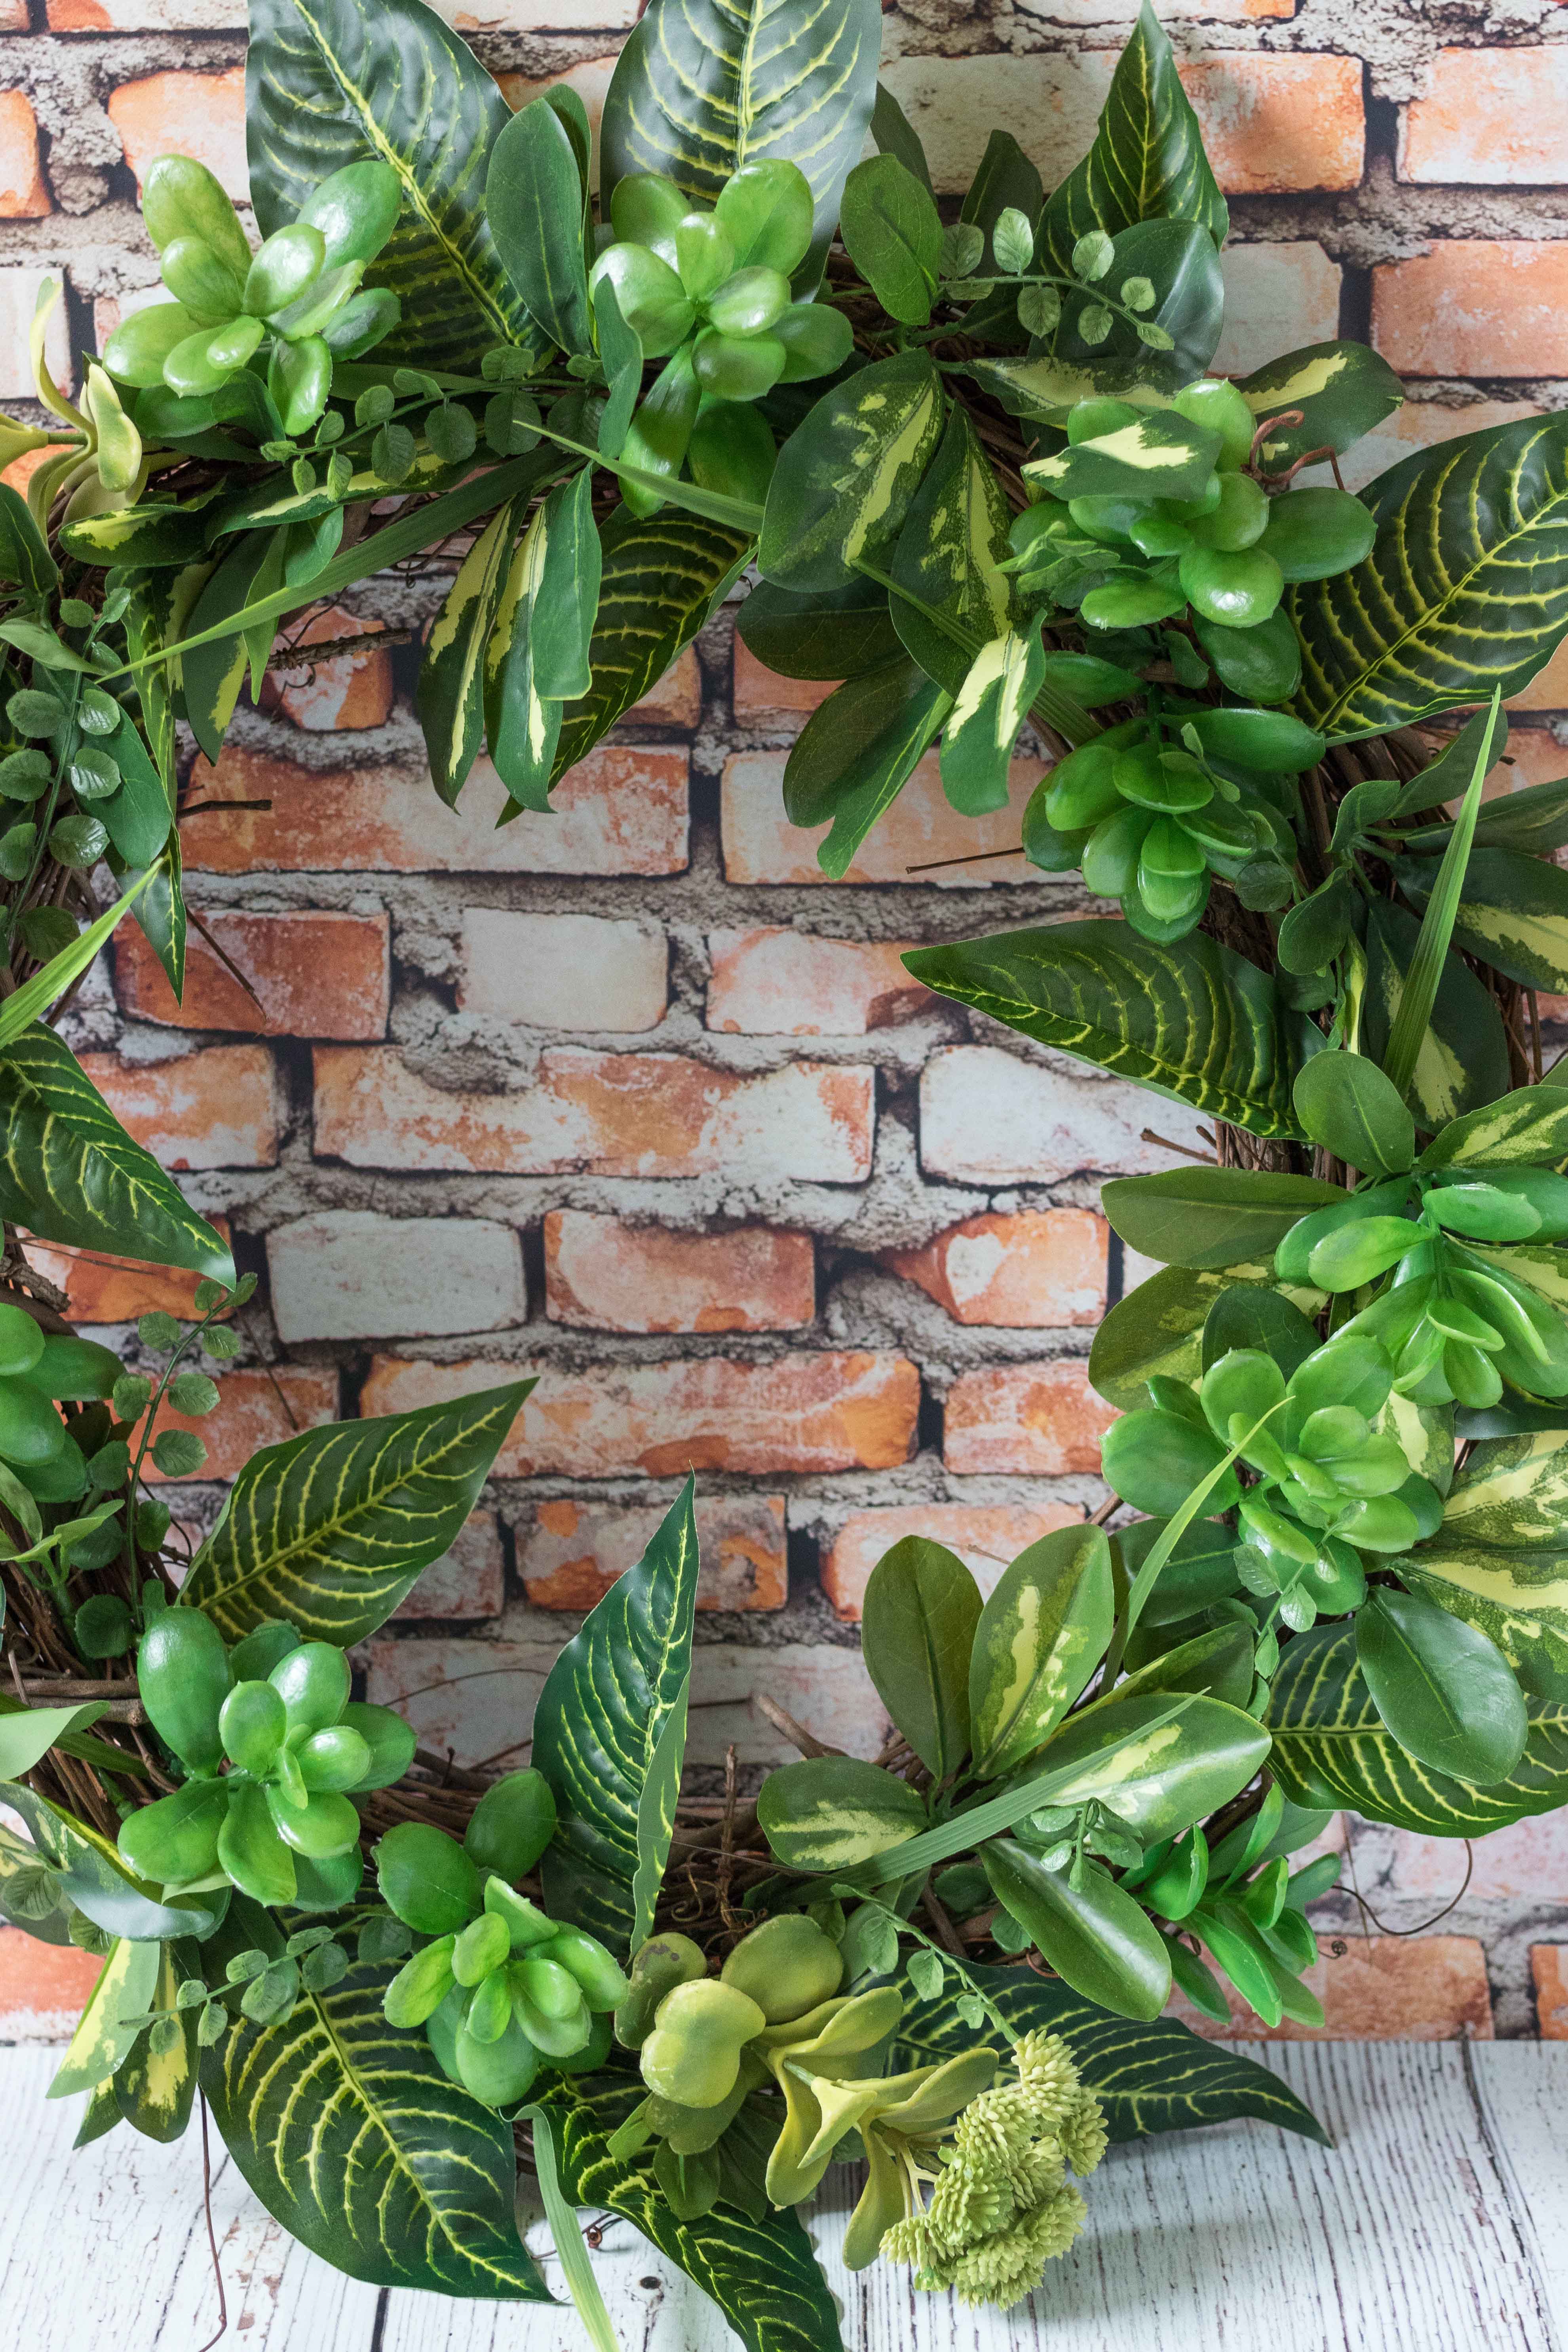
Creating a DIY faux greenery wreath layer
The basic process for creating a layer of the DIY faux greenery wreath is as follows.
- Select the greenery you want to use for a particular layer.
- Use your wire cutters to snip off leaves or blooms carefully. Leave enough stem that you can weave it in the twigs but not too much that it will poke out of the back of the wreath.
- Arrange the greenery on the wreath. Adjust as needed until you’re happy with the arrangement.
- Use the hot glue gun to secure the greenery.
Step by step process for the DIY faux greenery wreath
In the following photos, I take you step by step through my layers progression to create my DIY faux greenery wreath. Obviously, unless you choose the exact same greenery as me, your steps won’t look exactly the same. I hope that my process will help you decide on the order for adding your greenery to create a beautiful wreath.


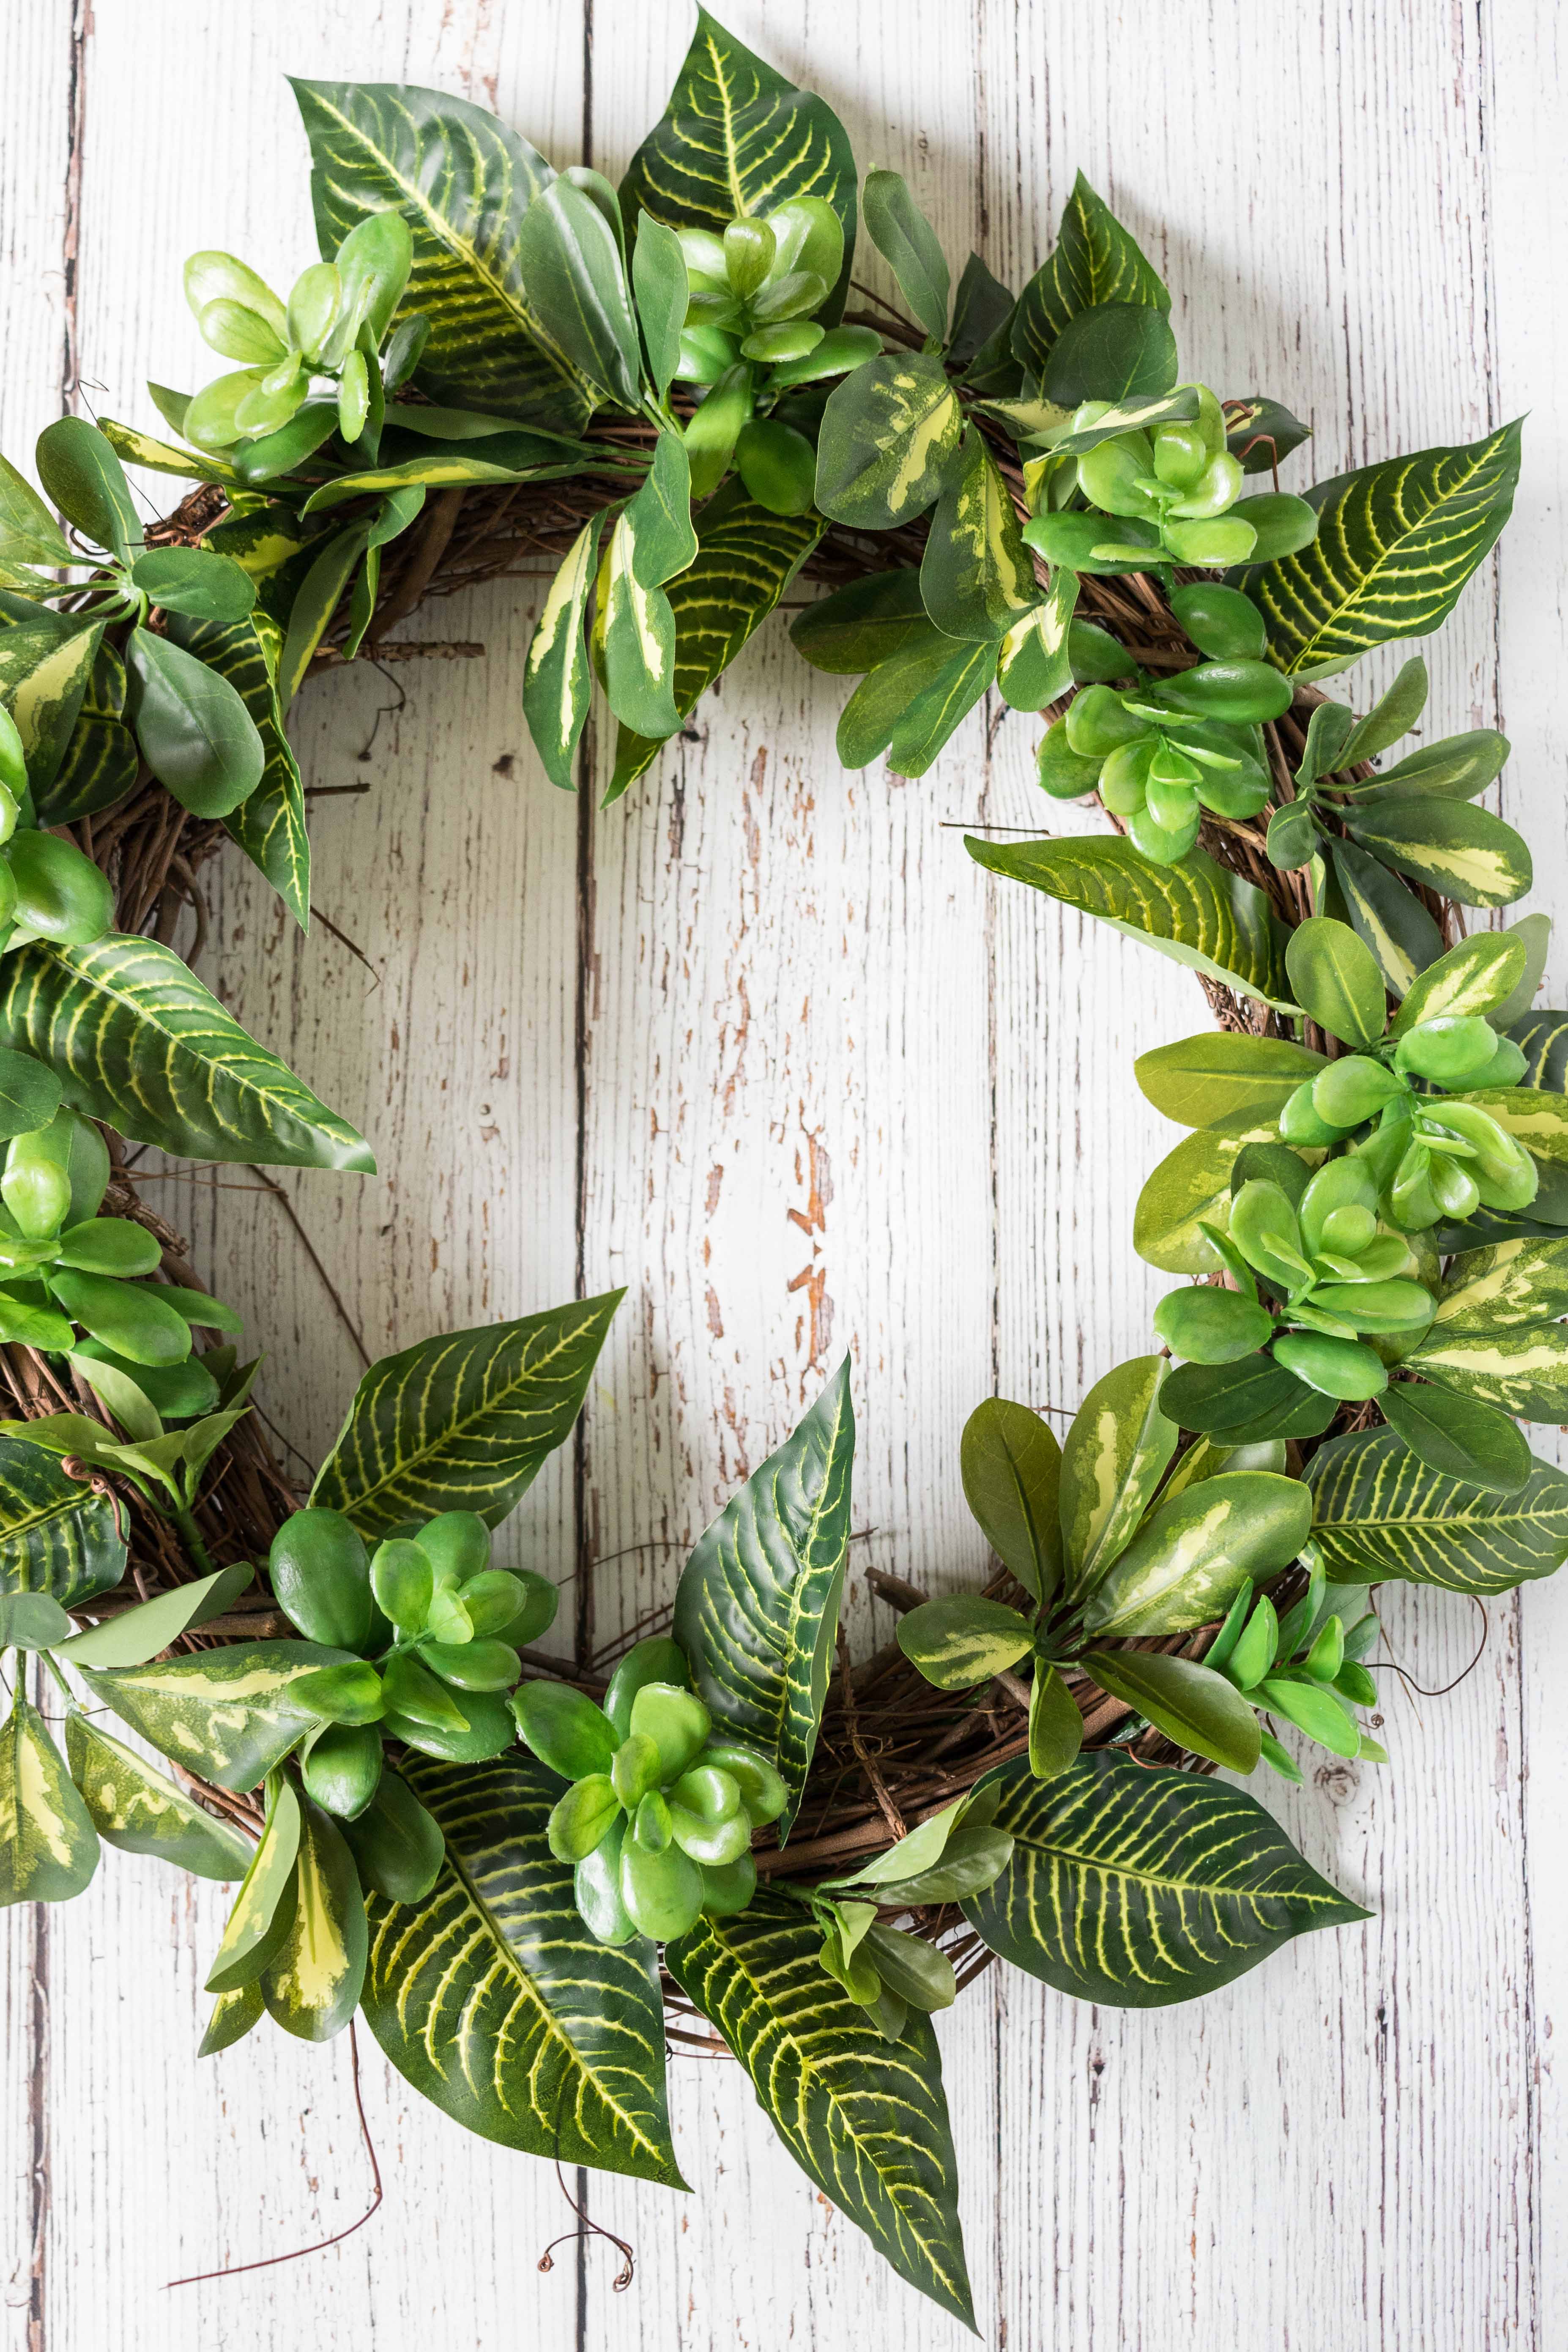
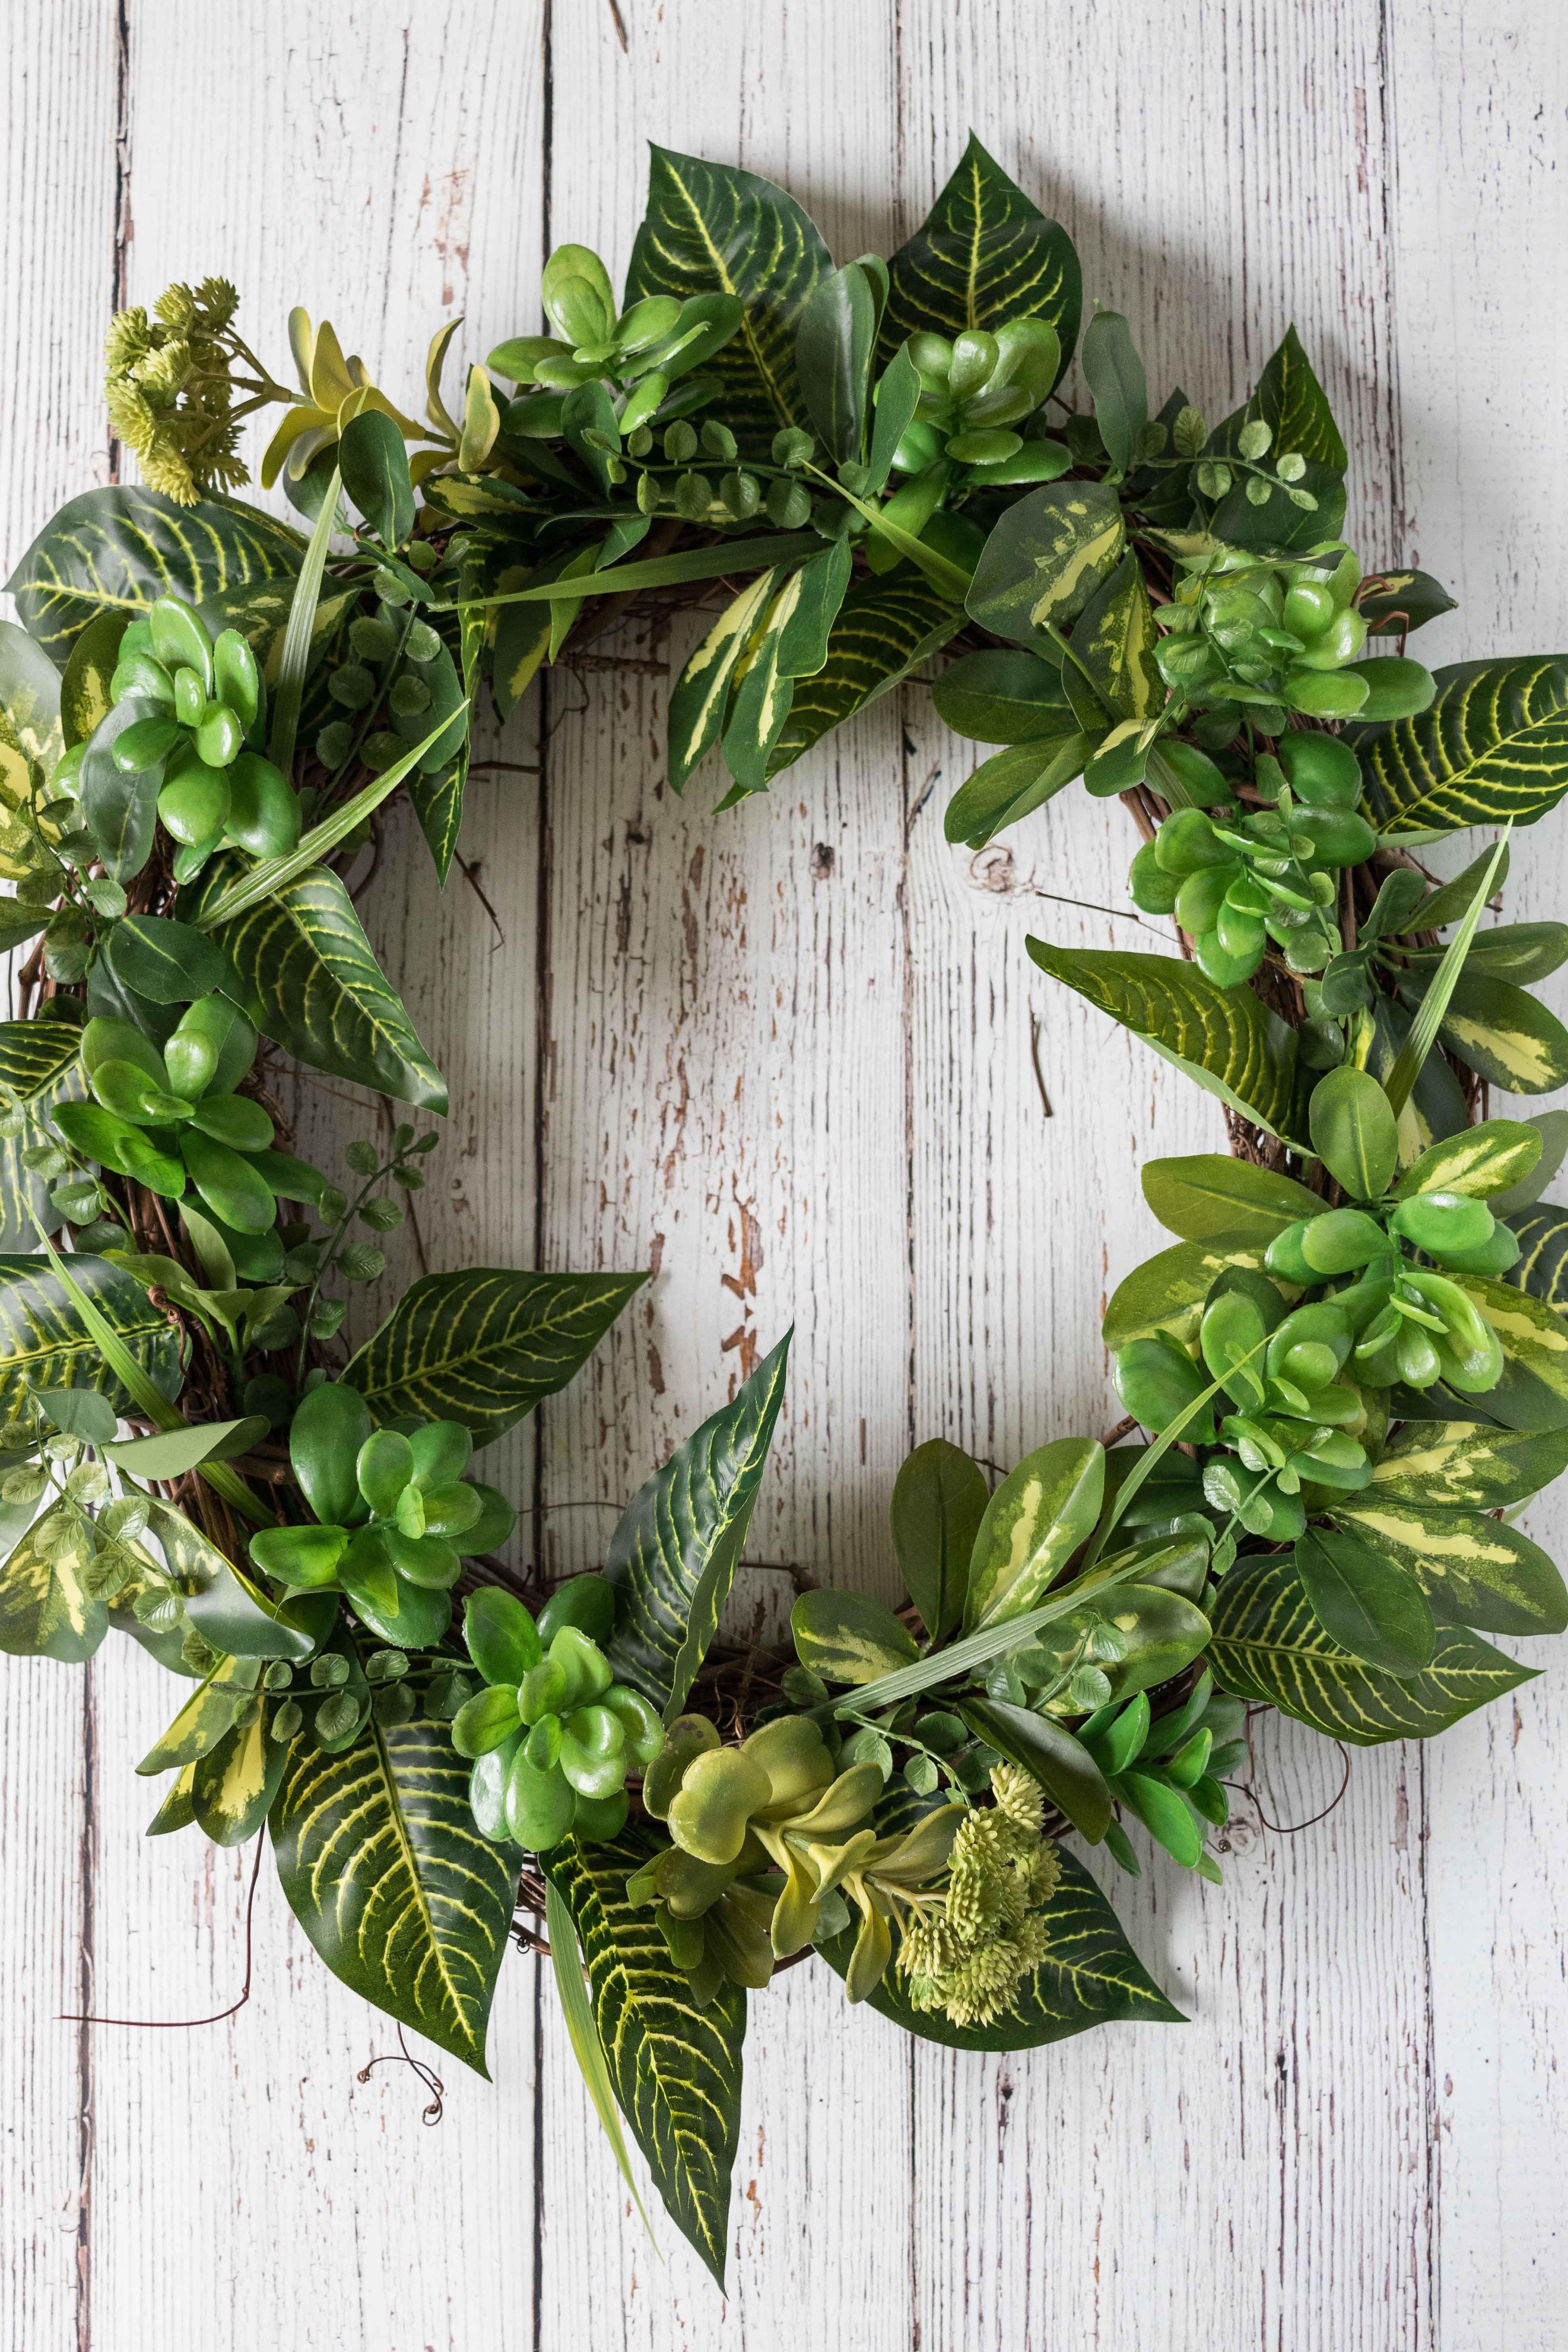
As hot glue dries very quickly, there’s no need to wait in between layers. As soon as you’ve finished one layer, you can move onto the next.
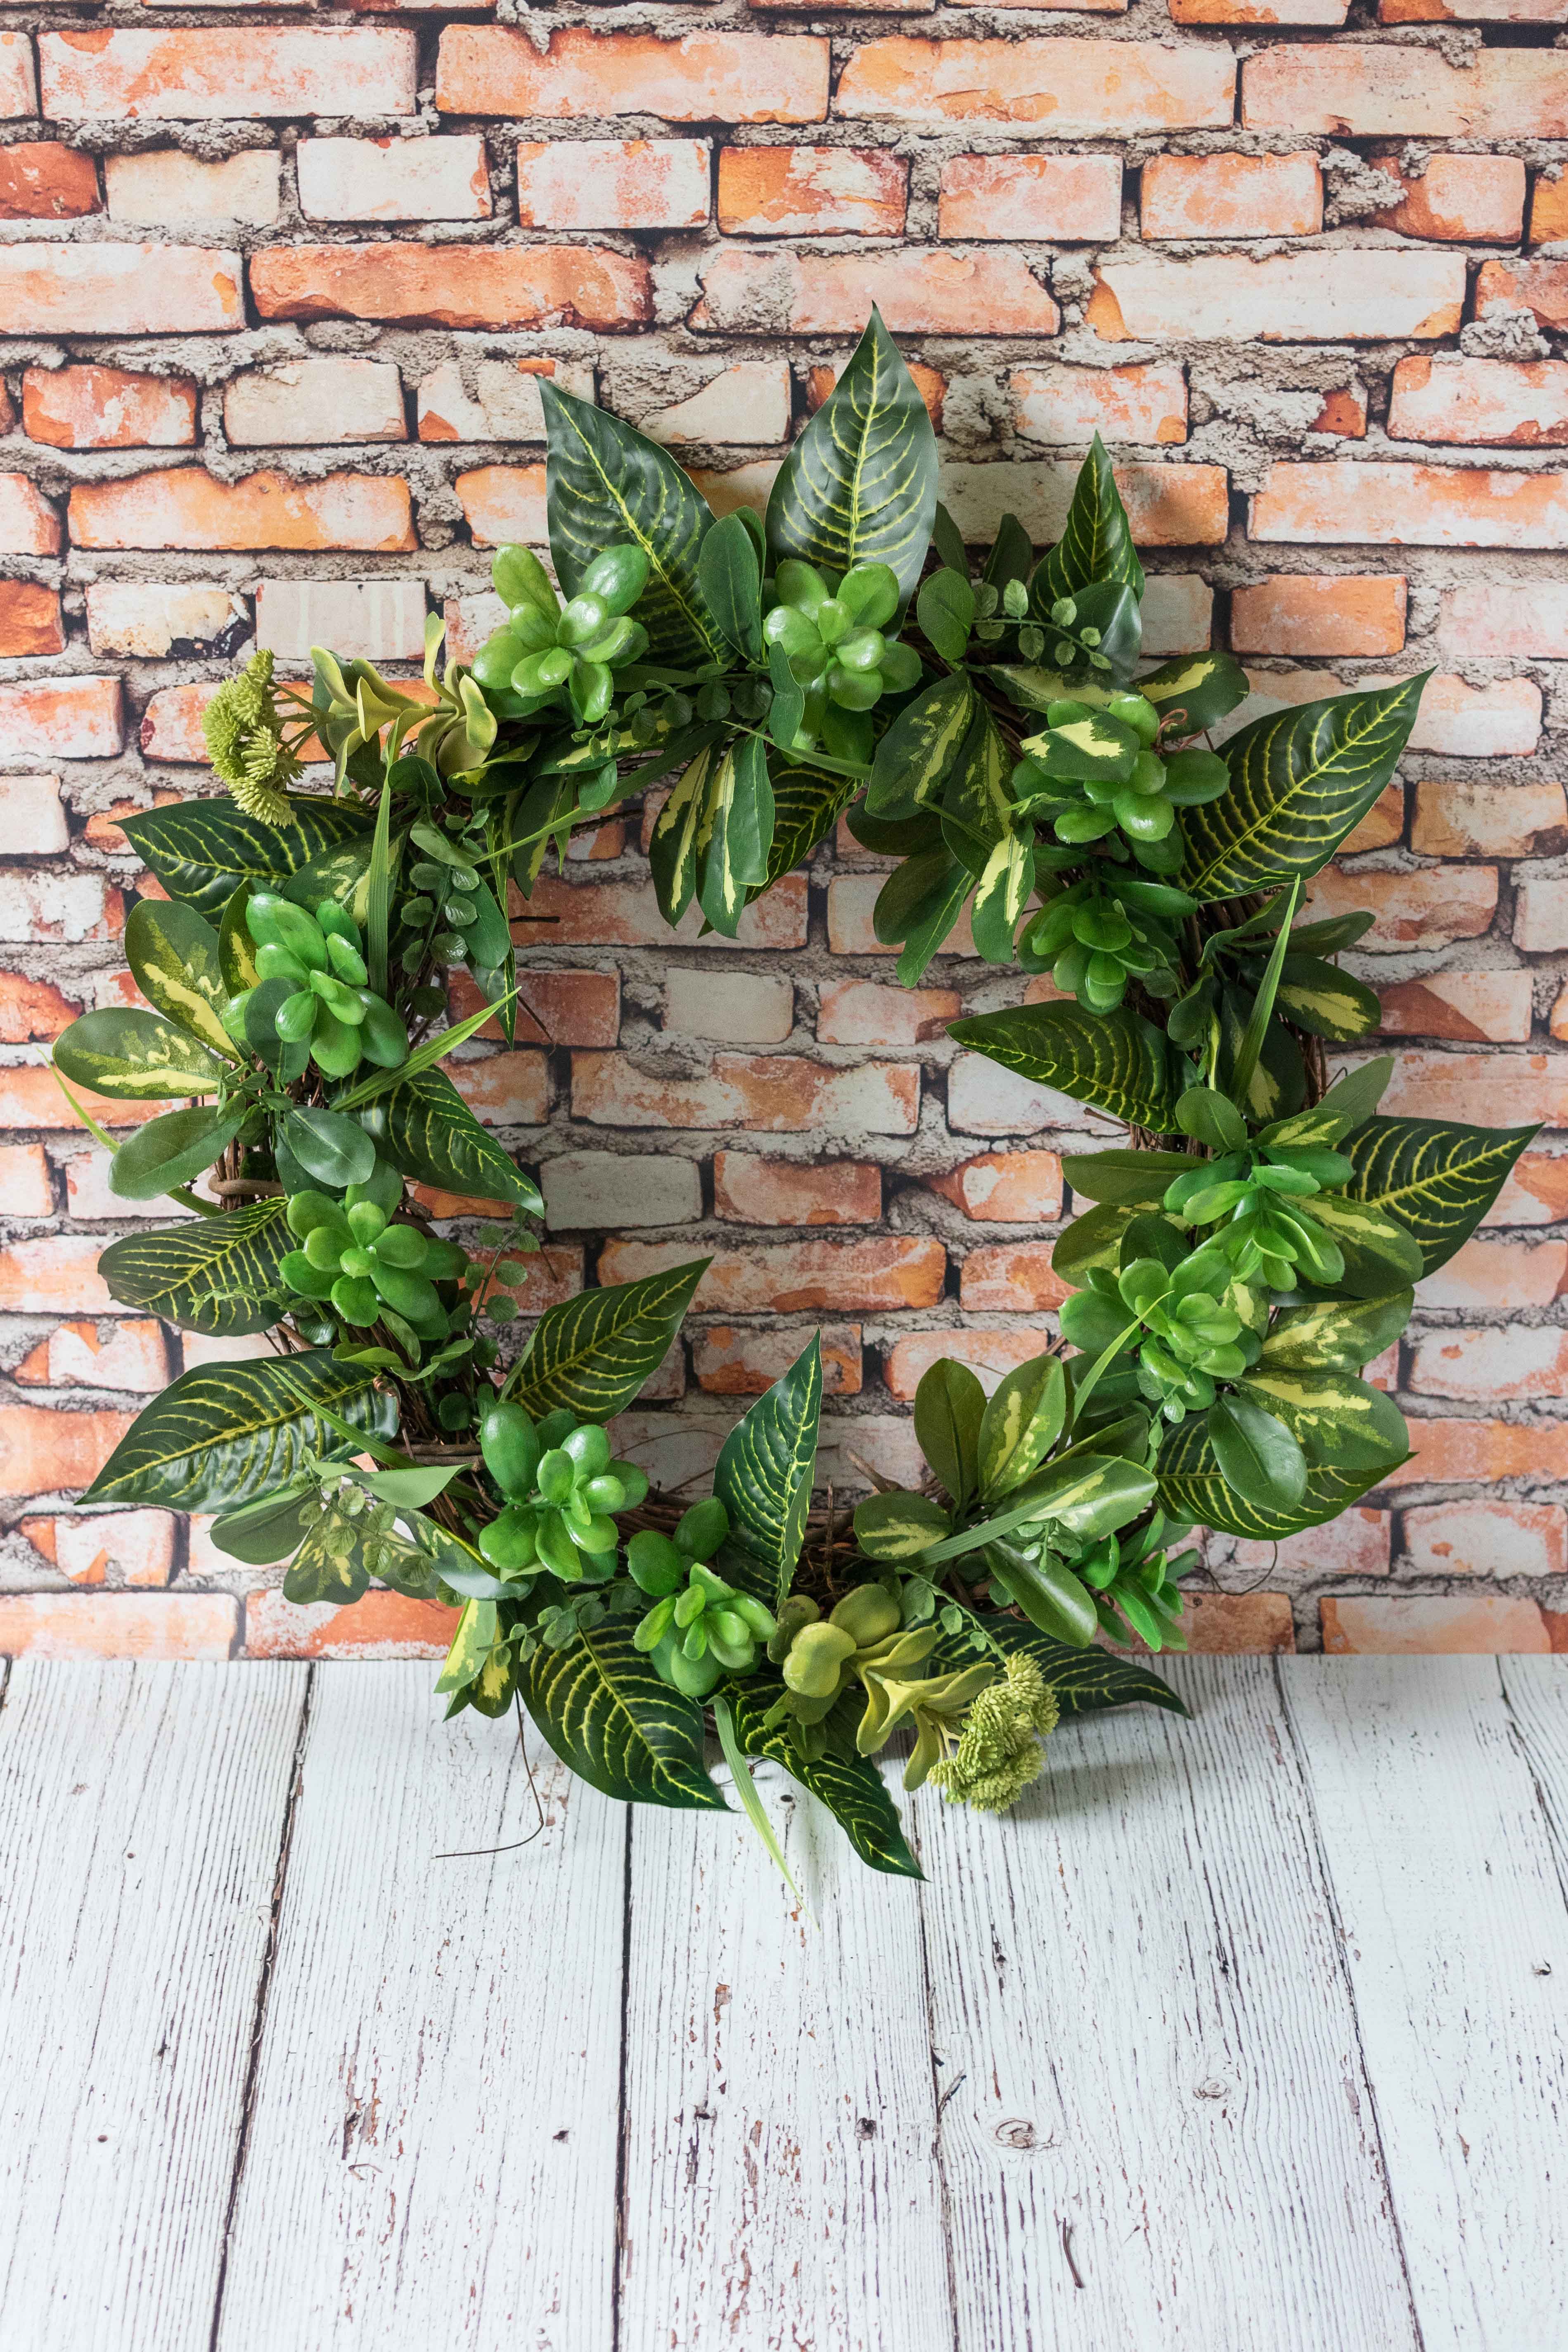
Once you’ve finished your DIY faux greenery wreath, you may wish to give it a couple of coats of floral protectant spray to preserve it. I picked up my spray in the floral department at Michaels. Make sure to follow the directions on the can.
Now you’re ready to hang up your wreath! I choose to hang my wreath on the front door. It would also look great in an entryway, kitchen, or living room.
Did you make the DIY faux greenery wreath?
I want to see it! Tag your images #RoseClearfield on Instagram or Twitter or post a photo to my Facebook page.

[Disclaimer: This post contains a few affiliate links. Thanks for your support!]
Pin this post for easy access to the DIY faux greenery wreath tutorial later!