When you’re trying to step up your photography game, sometimes it’s hard to know where to start. You know that there’s room to improve, but what elements will take your images to the next level? While there’s no limit to the number of ways you can improve your photography, I’ve selected just a few of the most common photography mistakes photographers make and how you can avoid or fix them.
This photo is one of my first attempts at back lighting a subject, a brand new skill for me.
When I published 5 Tips for Improving Your Photography back in July, Natasha mentioned in a comment that an additional tip should be to never stop learning. Her tip is so fabulous that I’m devoting an entire post to the topic. It is way too easy to stagnate in any field, creative or otherwise. If you don’t make a conscious effort to keep improving your skills, you’ll flatline. Over time, bad habits may creep in and you’ll even decline. Regardless of your skill level, it’s so important to keep learning everything you can about your field.
Keep an article open on your smartphone
You never know when you’ll find yourself with a few minutes to wait while you’re checking out at the grocery store or your kid is finishing soccer practice. Using these precious minutes to read about photography is a great way to work on your skills and stay current in the field without a lot of effort. Save articles on Pinterest to read as you have time and/or bookmark sites with regular photography blog posts or articles such as Fstoppers or PetaPixel.
Keep a couple ebooks on your Kindle or other eReader
Personally, I find it refreshing to mix up reading longer fiction and nonfiction with shorter photography ebooks. It’s easy to read a couple chapters here or there without losing your momentum because there is no overarching story. Last year I bought a photography Ultimate Bundles pack, which is going to keep me set for photography ebooks for quite a while. I checked out the bundle because it included Tasty Food Photography, which is a must read for any photographer, even if you never plan to photograph food. More recently I picked up the first and second books in David McKay’s new series, both of which are great. (Of course, you can also read my photography ebook, too. No pressure.)
Subscribe to a few favorite photography YouTube channels and/or podcasts
Subscribing to a YouTube channel or podcast is a simple way to support a content provider while keeping up on their latest releases. Currently, the only photography YouTube channel I follow closely is Photorec TV. I know that you’re probably already sick of me talking about Photorec here, but Toby is awesome and I love being part of his supportive community. I also recommend KelbyOne and Tony & Chelsea Northrup. If you want to start listening to photography podcasts, check out this list from the Digital Photography School. There are also tons of stand-alone webinars and video photography resources such as this workshop from Shuttertalk.
Read your manual
DSLR and mirrorless cameras are extremely powerful. Most likely you don’t use quite a few of your camera’s functions. This could be a great opportunity to understand more about the light meter and how to use it or to learn back button focusing. If you don’t have a specific skill to work on or component of your camera that you’d like to understand better, read your manual anyway. You never know when you’ll pick up a new tip or trick to improve your skills.
If you don’t want to read your camera manual, think about reading the manual for your flash or another piece of gear. Again, flashes and other DSLR and mirrorless accessories are powerful and often feature manual settings that can really transform your photography.
Experiment with new gear
New gear is a slippery slope. Getting new gear is always fun. It doesn’t necessarily make you a better photographer, even if it’s a high-quality piece of gear. However, it can get you out of a creative rut or force you to try a new technique. For example, maybe you’ve always wanted to work on your landscape photography but are lacking a wide angle lens. Or maybe you want to step up your portrait game but don’t own a high-end prime lens. Maybe it’s time to take the plunge.
Renting is a great way to experiment with new gear for a fraction of the cost of buying new gear. You can simply have the fun of playing with gear that’s way out of your price range or can try before you buy. Some sites, including both of the following sites, have opportunities to put rental charges toward future purchases. I’ve used BorrowLenses several times and been very happy with them. Their prices are competitive, and you can opt to ship your package to the local FedEx store right at checkout so you don’t have to worry about being at home to sign for a package. Lumoid is another great option.
Try a new editing technique
There are virtually limitless editing techniques and Lightroom and Photoshop tricks to learn. Search your favorite YouTube channel and watch a few videos you may have missed before, and do a general YouTube or Pinterest search for videos on a technique that’s always interested you but you’ve never attempted.
Seek out new photographers to follow on Instagram, Flickr, etc.
If you’ve grown tired of your current Instagram or Flickr feed or you just don’t feel like you’re learning much from the current mix of photos, add a few new accounts into the feed. One of my favorite ways to find new accounts to follow on Instagram is to check out the “following” tab under the favorites section to see the photos the accounts I follow are liking. The explore feature is another way to gain exposure to new accounts that may fit your interests.
Mix up your routine or find a new challenge for yourself
Virtually all of the previously mentioned suggestions will inspire you to mix up your routine or seek out a new challenge to help you keep learning new technical, composition, and editing techniques. If you don’t want to do something as involved as renting or buying new gear or learning a complex editing method, simply take a walk in a new area of town or challenge yourself to edit a whole set of photos in black and white. Look into opportunities to attend conferences and events, too. Connecting with other photographers may be just as inspiring as sitting through great presentations or visiting exhibition booths.
Do you have any tips to stay current in the photography field?
How do you keep learning new shooting and editing techniques?
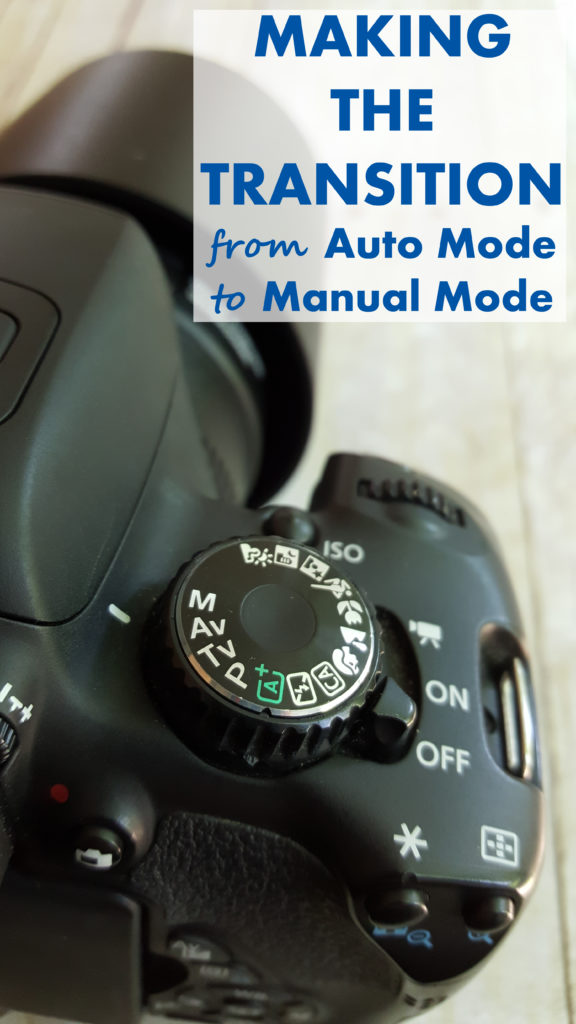
For most beginner or amateur photographers, making the transition from Auto Mode to Manual Mode is scary. You’ve heard the terms ISO, aperture, and shutter speed before, but you don’t really know what they mean and you definitely don’t understand how they work together. It’s tempting to leave the camera on Auto mode all the time because you believe the camera will make better settings choices than you will. However, as you begin to learn your camera settings, you’ll quickly start making better choices, ultimately creating higher quality images. It’s not an easy process to learn Manual camera settings, but it’s well worth the investment.
And yes, I understand that it’s really hard and often really frustrating. When I first bought a DSLR, I had very little understanding of Manual camera settings. It’s taken me years of practice and a lot of trial and error and mistakes to feel comfortable with Manual mode. (And believe me, I still make plenty of mistakes.) It wasn’t until I started shooting in Manual mode the majority of the time that I really started to appreciate the power and freedom of Manual mode. Start taking the plunge today, and I promise you that you’ll be glad you did.
Please keep in mind that I am not a professional photographer. I am simply sharing tips that have worked for me and other photographers I know for making the transition from auto mode to manual mode. I hope that they will be of help to other photographers, too.
Learn everything that you can about Manual camera settings
Learning as much as you can about ISO, aperture, and shutter speed and how these three elements work together as the “exposure triangle” will help you start adjusting the settings yourself. There are lots of free resources available online, such as this article from Fstoppers. I have also learned so much about the exposure triangle from Tasty Food Photography and Photography Demystified: Your Guide to Gaining Creative Control and Taking Amazing Photographs. ISO, aperture, and shutter speed as complex concepts, especially when you try to manipulate them at the same time. You may need to revisit exposure triangle resources over and over again before the terminology feels natural.
Start paying attention to your settings while shooting in Auto mode
If you’re shooting with a DSLR camera, the settings will display in the viewfinder when you press the shutter button halfway. If you haven’t been paying attention to the settings, start paying attention. While your camera won’t always make the best settings choices, its choices will be a general guide for varying light conditions and common photography environments in your life (i.e. a nearby park).
If you’re shooting with a smartphone and haven’t adjusted any of the settings yourself, most likely you’ll have to open the photos in an editing program to view the settings, which isn’t very helpful for learning to make adjustments on the fly. Pay attention to the quality of the photos and think about how you could adjust the settings to improve problem areas. For example, if a photo is too dark, you may be able to adjust the ISO to create a brighter image.
Start using your settings as a guide for shooting in Manual mode
When you’re first shooting Manual mode, you may not have any idea what settings to use, which is very overwhelming. Take a test shot in Auto mode, and then view the image with the settings information. (If you don’t know how to pull up the settings information in your photo viewer, consult your manual.) Say the camera selected ISO 200, f/4.0, shutter speed 1/125, and the image turned out a little darker than you’d like. Switch to Manual, dial in these settings, and then adjust from there. Most likely this process will be much easier than it would be to dial in the settings all on your own.
Again, the process of using the settings as a guide isn’t very helpful for smartphone shooters who are still using a full Auto mode. Again, you should pay attention to the final images the camera produces in Auto mode and start making manual adjustments as needed.
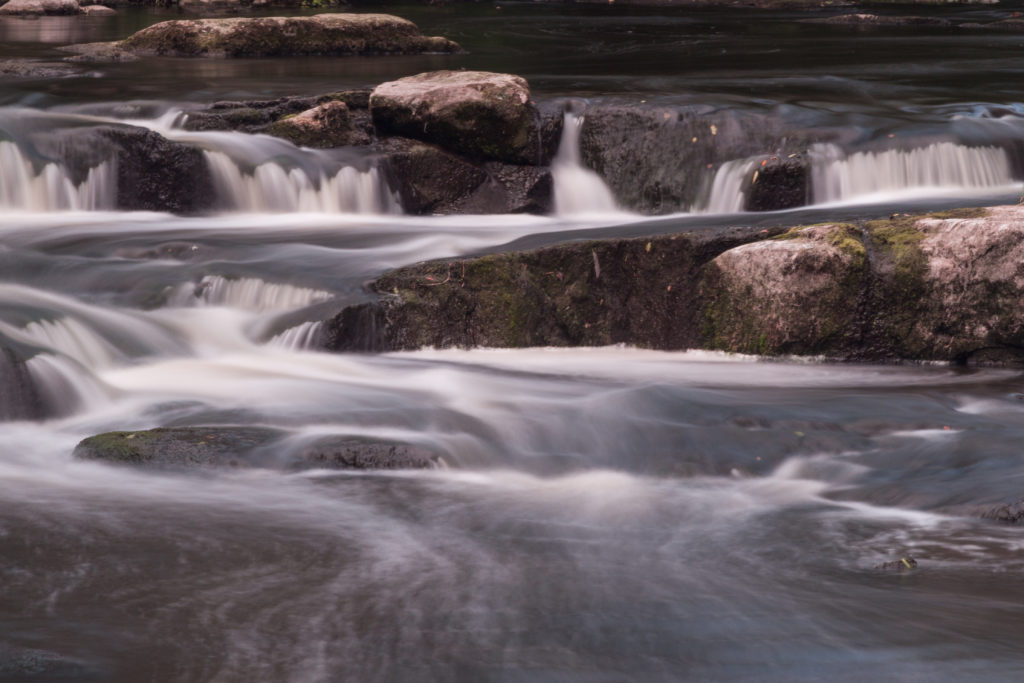
Waterfall in Cedarburg, WI, ISO 100, f/22, 5 seconds
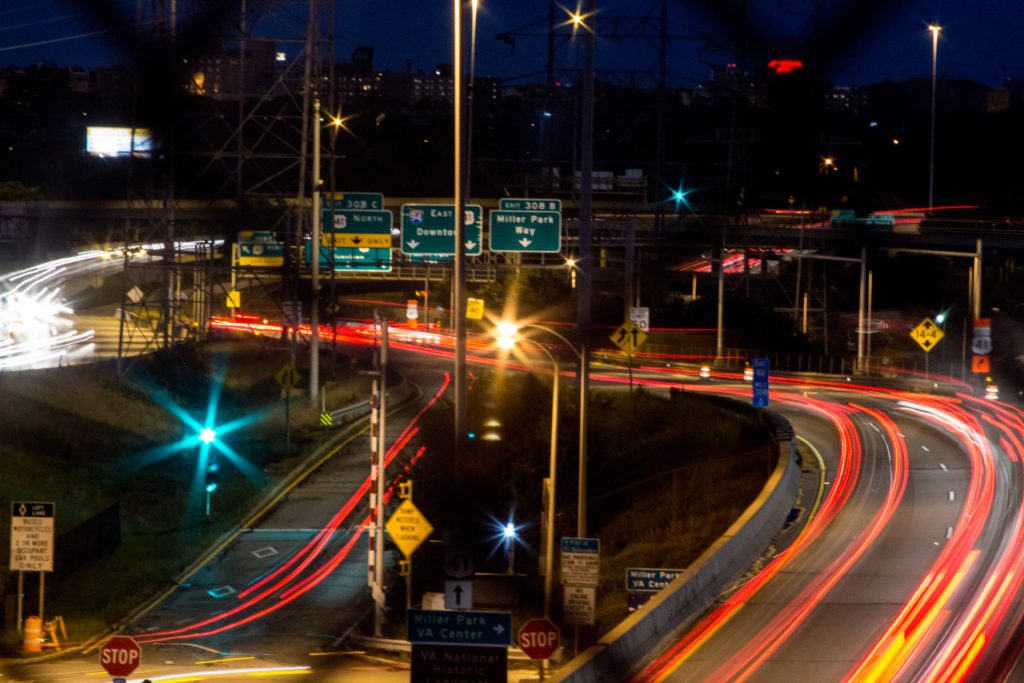
I-94 Bridge, ISO 800, f/22, 6 seconds
Attempt shots that require you to use a Manual mode
Typically cameras do a pretty good job shooting in Auto mode when there is ample light. However, certain types of shots simply aren’t possible in Auto mode, namely long exposures. The camera may choose a shorter shutter speed to fit the current light conditions, but it will never choose a shutter speed long enough to create either of the long exposure effects I’ve created above. Initially, you may be satisfied shooting in shutter priority mode and letting the camera set the ISO and aperture for your long exposures. Over time, start challenging yourself to set the ISO and aperture as well for your long exposure shots. As long as you have a tripod, you can even shoot long exposures on your smartphone!
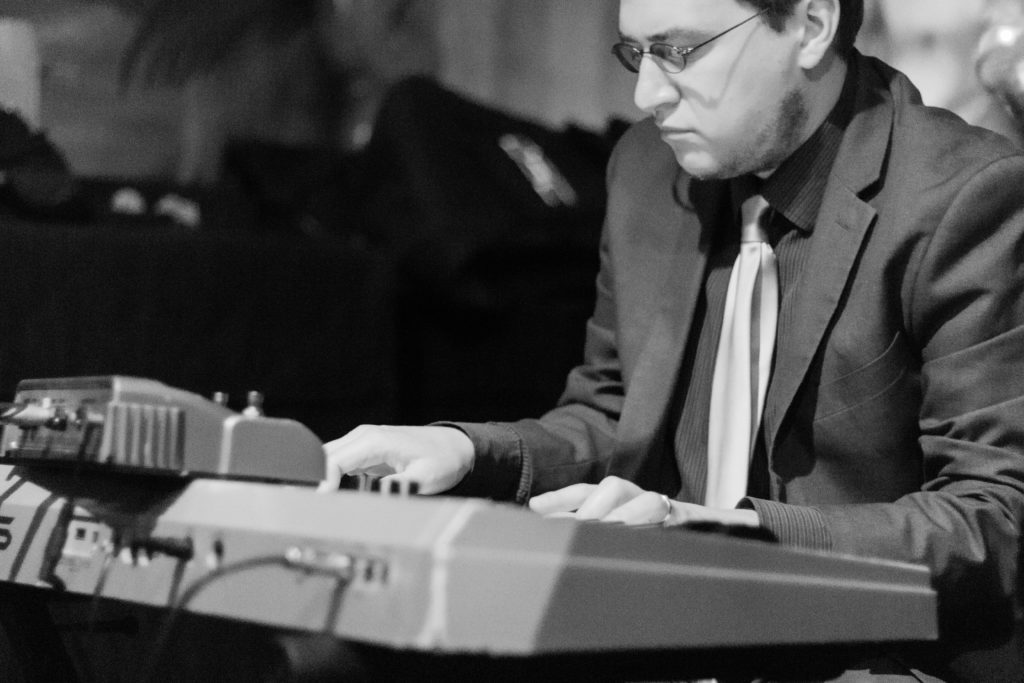
My brother @ the Green Mill, ISO 6400, f/1.8, 1/100 sec.
Button Charm Bracelet, ISO 800, f/2.8, 1/80 sec.
Shoot in Manual mode in controlled light settings
Shooting in Manual mode in a controlled light setting is MUCH easier than shooting in Manual mode when the light levels change constantly. For example, taking pictures of a band in a dark nightclub or shooting product photos with a lightbox is much easier than taking pictures while at the zoo on vacation. Your light levels aren’t going to vary much, if at all, in the lightbox or at the nightclub, which means you can determine your settings and then make minimal adjustments. In comparison, at the zoo, you’ll be wondering in and out of buildings and shooting animals in full sunlight, shadowed light, and interior settings, which requires adjusting your settings constantly.
Seek out opportunities to practice Manual mode on your own or with fellow photographers
It’s awesome to spend time at a museum with your family or enjoy a picnic with friends at the park. However, gatherings with family and friends aren’t always conducive to early practice with Manual settings. Your family may get frustrated when you start lagging behind at the zoo or you may miss whole chunks of conversation with friends at the picnic because you’re too busy fiddling with your camera. Eventually, you’ll get to the point that you can adjust your settings fairly seamlessly. However, until you do, keep the camera in an Auto or semi-Manual (i.e. shutter priority) mode during social gatherings or special events and practice Manual mode when you’re by yourself or with fellow photographers.
Finally, at some point, you just have to dive in and start shooting in full Manual mode, at least for short periods of time, even if you don’t feel ready. There will be a lot of trial and error, and you’ll make a lot of mistakes. That’s okay! I owned a DSLR camera for three and a half years before I felt comfortable shooting in full Manual mode most of the time, and I still make a lot of mistakes.
Do you have any tips for making the transition from Auto mode to Manual mode? Feel free to leave them in the comments!
One question I get asked all the time is what advice I can give for improving photography skills. Of course most people want to hear that I improved my skills by purchasing a better camera or taking a class. While upgrading your camera gear or taking a class or classes can certainly help you improve your skills, these steps won’t magically improve your photography overnight. We’ve all seen people with amazing photography gear who produce mediocre images. On the flip side, there are also lots of people creating stunning images on their smartphones with free editing apps. I am far from an expert in photography, but I can offer a few simple tips that will help you start improving your photography today.
1. Take lots of pictures
Memory is cheap. The amount of memory you have should never limit the number of photos you take. If you’re shooting with a modern smartphone, you should have ample storage space for hundreds, if not thousands, of photos. If you’re shooting with a camera, I highly recommend picking up a couple of 64GB cards. SanDisk Extreme is a reliable, affordable option.
Taking lots of pictures allows you to make a lot of mistakes. Don’t be afraid to experiment with different angles, lighting, and settings. You can always delete the photos you don’t like later.
2. Start editing your pictures
Most people don’t realize that the vast majority of photos they see on websites and blogs and in magazines and other publications are edited. Even when you take well composed photos with the proper camera settings, most likely you’ll want to do a little editing or post processing. Learning how to crop a photo and adjust the light settings is a great start. Get in the habit of editing photos before you share them online. If you’re editing on your computer, Google Photos and PicMonkey are both great free software options. If you’re editing on your smartphone, you can also use Google Photos or one of many other photo editing apps like Snapseed (Android | Apple) and Afterlight (Android | Apple).
3. Challenge yourself
Regardless of your current skill level, it’s easy to stagnate and keep taking photos without really improving. Sometimes it may be helpful to set goals or challenges for yourself. A challenge can be anything from taking architecture shots to adjusting your ISO and white balance manually. In 2011 and early 2012, as I was building up my skills before purchasing a DSLR, I participated in several weekly and monthly photography challenges. While I didn’t produce a ton of great shots from the challenges themselves, they pushed me to consider a lot of subjects and perspectives that I wouldn’t have photographed on my own, which was integral to bringing my skills to where they are today.
Fat Mum Slim’s Photo a Day has remained one of the most popular challenges for five years or so. Check out the current challenge list right here. I also have a (not recently updated) long list of daily, weekly, and monthly challenges over here.
For some people, a class may be a great option, too. If you want more accountability and companionship for specific assignments, think about a class. There are numerous local and online classes, many of which are very affordable. To get started, check out Alisa Burke’s Snap Shot Delight.
4. Share your photos and be open to critique
Putting yourself out there creatively is scary. Even professional photographers still have those “but what if everyone hates it?” moments. At some point, you just have to start putting your photos out there, even when you’re still an amateur. Typically family and friends are really supportive and will encourage your creative pursuits. (If not, maybe you need some new family and friends.) This encouragement can be the push you need to stick with photography.
Getting constructive feedback is also important to keep developing your skills. Personally I’ve gotten some of my best feedback from Toby of Photorec.tv and his Patreon only Facebook support group. Many photography communities are largely focused around gear rumors or “pixel peeping,” which is an industry term for picking apart photos just for the sake of being a snob. Toby has cultivated a supportive community that offers helpful tips without being condescending. It’s critical to find fellow photographers who will build you up and make you better.
5. Follow really good photographers
A tried and true method to improve any creative skill set is to study the best people in the industry. One of my favorite ways to follow photographers and process large quantities of photos each week is Instagram. I love having a single feed filled with fantastic images and very little distractions (i.e. minimal personal updates, no incessant article sharing, limited ads). To get started, try using the Explore function and typing in subjects of interest such as Chicago or Rocky Mountains.
I try to stay conscious as I’m viewing images, considering what I do and don’t like about different images and how I can apply their techniques to my own work in a way that’s meaningful and original. If Instagram isn’t your thing or you’re looking for another place to create a stunning photo feed, Flickr, DeviantArt, and Tumblr are also great options, and they’re all available as smartphone apps.
Should I invest in a DSLR or mirrorless camera to improve my photography?
Returning to the gear topic, if you’re shooting with a smartphone or a basic point and shoot, I encourage you to learn all of the settings. Newer smartphone cameras have an impressive array of settings in the built-in camera. You can also download an app like Manual (Android | Apple) for further control. Get comfortable using these settings. It will help you make the transition to a mirrorless or DSLR camera more smoothly because you won’t be as reliant on Auto modes.
If you’re really serious about becoming a great photographer, there will come a point when you’ve exhausted what you can do with a smartphone or point and shoot camera. At this point, think about investing in a mirrorless or DSLR camera. I have more info about the gear I currently shoot with on my resources page.
Do you have any basic tips for improving your photography? Feel free to leave them in the comments!


 My brother @ the Green Mill, ISO 6400, f/1.8, 1/100 sec.
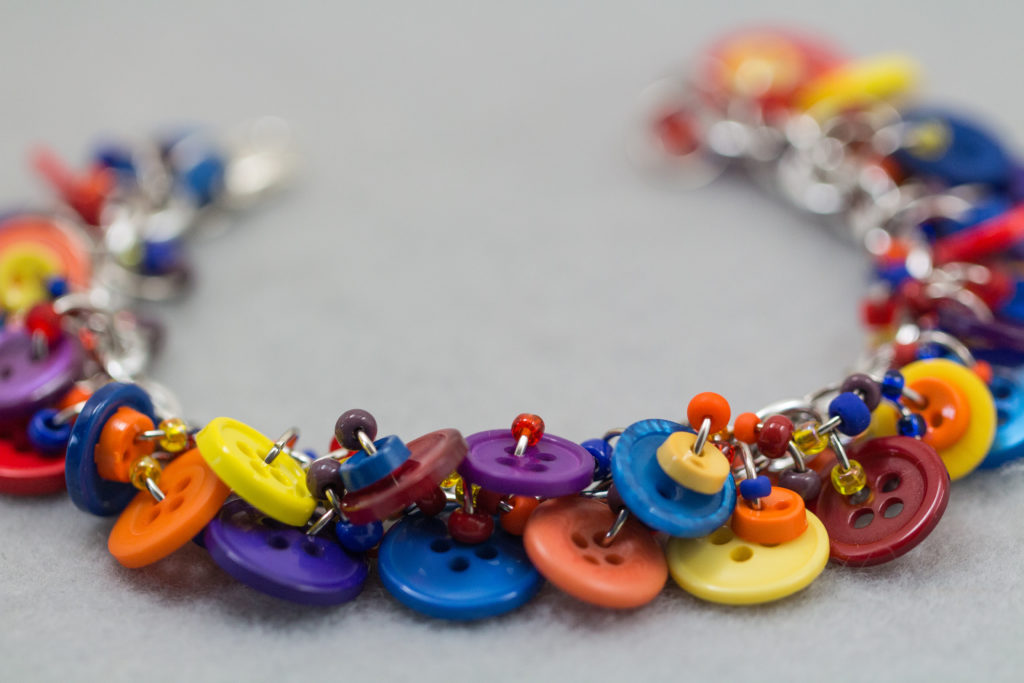 Button Charm Bracelet, ISO 800, f/2.8, 1/80 sec.