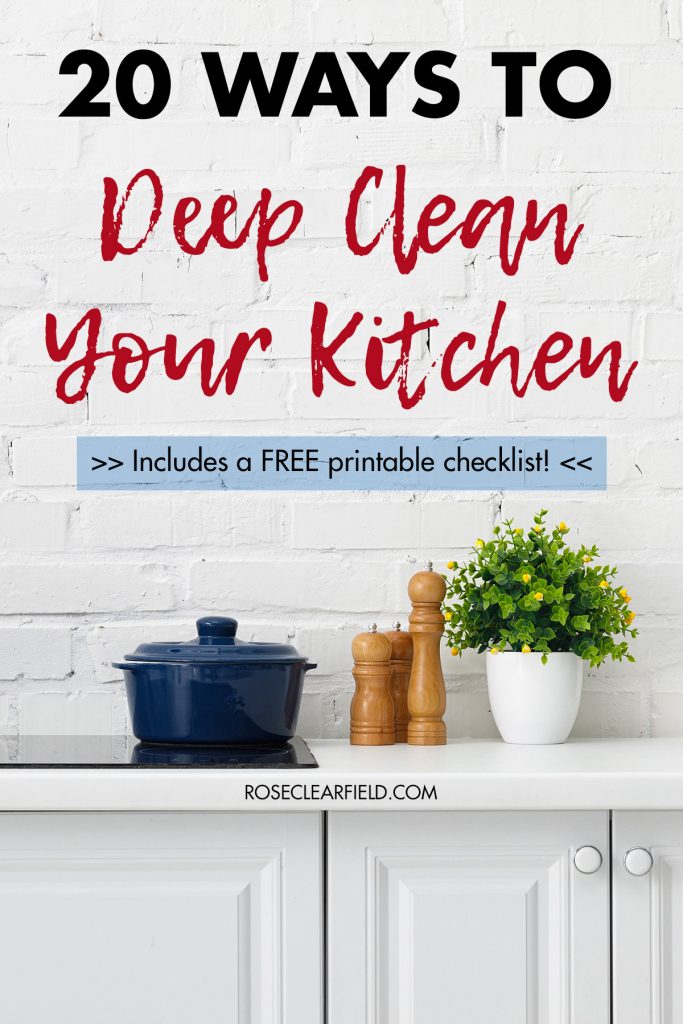


Keeping a list of deep cleaning kitchen tasks ensures you tackle tougher cleaning chores on a regular basis to maintain a spotless, sanitary kitchen.
With the current situation in the world, many people are at home a lot more and are working to keep their houses cleaner than normal. It’s an ideal time to tackle deep cleaning kitchen tasks and other deep cleaning household chores that normally don’t make it to the top of your weekly to-do list.
I’ve put together a list of the top 20 deep cleaning kitchen tasks to help you keep your kitchen space as clean as possible. At least once or twice a year, it’s good to go beyond your weekly cleaning chores and give your home a thorough cleaning. I share my best cleaning hacks to make deep cleaning as easy and stress-free as possible while using a minimal amount of chemicals.
I recommend tackling a maximum of 1-2 deep cleaning kitchen tasks per day, spreading out the list over a month or so. Depending on your work schedule, you may prefer to tackle 3-4 tasks on each of the weekend days and leave the weekdays for daily cleaning tasks. It’s completely up to you. Either way, I would space out the work, so you don’t get overwhelmed and burned out.
At the end of the post, I have a free printable checklist to help you keep track of which deep cleaning kitchen tasks you’ve accomplished.
In a number of the deep cleaning kitchen tasks, I mention microfiber cloths. I own this set of microfiber cleaning cloths and love it. It’s nice owning a large set, so you have them on hand throughout the week for various cleaning tasks. Simply throw them in the washing machine and run them with your next load or collect them in a basket for your next towels load.

20 deep cleaning kitchen tasks
1. Countertops
Most likely you’re already in the habit of wiping down the countertops after meals and when you do the dishes. But it’s probably been a while since you cleaned your entire countertops. Move appliances and other kitchen items, so you can clean the full surfaces. Warm soapy water or a general all-purpose kitchen surfaces cleaner, such as Mrs. Meyer’s, works well for countertops.

2. Kitchen sink
The kitchen sink is another area of the kitchen that many people clean weekly or even daily but don’t often take the time to deep clean. For regular kitchen sink cleaning, I do a round of Bar Keeper’s Friend and then a round of baking soda. This set of steps leaves the sink sparkling clean every time.
![BAR KEEPERS FRIEND Powdered Cleanser 12-Ounces (1-Pack)']](https://m.media-amazon.com/images/I/512R2t6q59L._SL160_.jpg)
At least once or twice a month, clean the kitchen drain and garbage disposal rubber component as well. I take an old toothbrush and baking soda to get in all the nooks and crannies of the drain and garbage disposal rubber piece.
If your garbage disposal is smelly, you may want to clean it, too. DIY garbage disposal tablets make this job quick and easy.
3. Toaster
If you use your toaster daily, get in the habit of wiping off the crumbs at least once or twice a week. Then once or twice a month, do a deeper clean. Start by emptying the crumb trays. Wipe down the entire toaster. Finish cleaning the toaster by polishing it up with a little baking soda. Wipe it down completely to avoid leaving streaks behind.
4. Microwave
Take out the glass microwave tray and spinner piece. I always hand wash them with hot soapy water, but I imagine most microwave components would hold up in the dishwasher. If there are tough bits stuck to either component, soak them first.
While the tray and spinner piece are out of the microwave, wipe down both the inside and outside of the microwave with a damp paper towel or microfiber cloth. Don’t use chemicals. You may need multiple towels/clothes to remove everything. If there are tough bits that won’t come off, heat two cups of water on high for a few minutes and let it sit in the microwave for five minutes. The steam will help loosen those bits.
5. Stovetop
The best way to keep your stovetop in good condition is to wipe it down after every single use. The less grease and food that builds up over time, the less deep cleaning you’ll have to do. Even with good daily maintenance, it’s important to deep clean the stovetop periodically as well.
If there are removable burner components, take them off and clean them separately. Fill up the kitchen sink or a large bucket with warm soapy water. After soaking the stove components, scrub them and rinse them clean.
A mixture of baking soda, kosher salt, and dish soap works well to remove grease and food from the stovetop. If you have particularly stubborn areas, let it sit for 20-30 minutes before you attempt scrubbing.
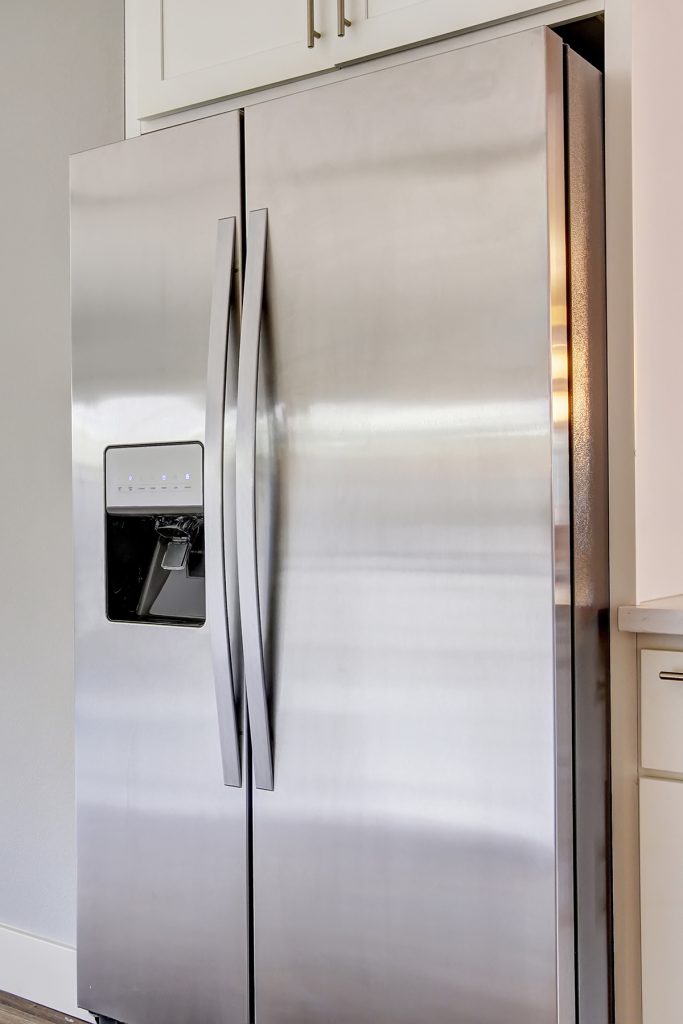
6. Stainless steel appliances
When you’re cleaning stainless steel appliances, ALWAYS rub in the direction of the grain to minimize the risk of scratching the surface.
Cleaning
The first step for stainless steel appliances is to clean them. Mix a few drops of dish soap in warm water and rub down the appliances to remove dirt, debris, and fingerprints.
If you’re facing years of grease and fingerprint build-up, you may need to use something stronger after cleaning with dish soap. WD-40 is a good choice.
Polishing
Once your appliances are clean, you may want to polish them to get the surfaces really gleaming. Many people opt for commercial stainless steel polisher. Non-stick cooking spray works well, too.
Tip: Avoid using vinegar on stainless steel, as the acidity will break it down over time.

7. Refrigerator and freezer
Over the course of a few days, go through the entire contents of your refrigerator and freezer. Discard expired items and anything that you no longer need. As you work through the contents, wipe down the shelves with a damp paper towel or microfiber cloth. Don’t use chemicals, as they may seep into the food.
While cleaning out your refrigerator and freezer, think about the organization. Consider re-arranging the shelves and adding a few kitchen organizer baskets or bins to make the space more efficient for your family’s needs.
If your refrigerator has a water/ice dispenser, wipe it down. If the dispenser builds up hard water stains, remove them with vinegar. I let the vinegar sit for a few minutes to make scrubbing easier.
Enlist another family member or two to help you slide the refrigerator out, so you can dust behind and under it. If your household is anything like mine, you’ll probably find a few cat toys and human toys under the refrigerator, too.
When you’ve finished cleaning and organizing the refrigerator and freezer, add a fridge-and-freezer baking soda container to each unit to keep your food tasting fresh for longer.

Should you de-frost your freezer?
Most modern refrigerator/freezer units are frost-free and don’t require manual defrosting. In my entire adult life, I’ve never had a freezer build up frost to the point of requiring a defrost. Depending on your freezer usage, you may feel like it’s necessary. Consult your appliance manual for de-frosting instructions.
8. Cabinets
Over time, kitchen cabinets collect grease and are subject to food splatters. A microfiber cloth with warm soapy water will remove the majority of grease and food on the cabinets effectively. For stubborn bits, use baking soda. You may need to let a baking soda paste sit on the cabinets for a bit.
9. Interiors of cabinets and drawers
Work through one cabinet and drawer at a time. Take everything out of it, and wipe down the entire surface before replacing the items. Don’t forget to wipe down the silverware container and other drawer dividers.
10. Pantry door(s)
The pantry door is one of the most frequently opened and closed doors in the house. As people often open it when they’ve already been handling food, it tends to get dirty. Rub the door(s) down with a microfiber cloth with warm soapy water. Then finish with a round of all-purpose kitchen cleaner to disinfect the door(s). Don’t forget to clean and disinfect the doorknobs as well.

11. Backsplash
If you have a backsplash that shows dirt, you may be in the habit of wiping it down regularly. While it’s nice having a backsplash that doesn’t show dirt, it means that grease and food splatters build up more before you think to clean it.
My favorite substance for cleaning kitchen backsplash is baking soda. You remove grease effectively without using any harsh chemicals. As with other deep cleaning kitchen tasks I’ve outlined, if there is significant grease build-up or other stubborn spots, make a baking soda paste and let it sit for a bit before cleaning.
12. Oven
Homemade chemical-free oven cleaner is a complete game-changer for cleaning your oven. You will not find a simpler, no-scrub method for cleaning your oven, with or without chemicals, that works this well. You may actually get motivated to clean your oven more than once a year. (Or not. No judgment either way.)
One of the best parts about the homemade chemical-free oven cleaner is that you can use it on the oven racks, too. If they aren’t that dirty, leave them in the oven, and wipe them clean afterward. If they are pretty dirty, take them out of the oven. Spray them in the tub, in a utility sink, or outside and then wipe down before placing them back in the oven.
For stubborn oven door spots, I highly recommend Mr. Clean Magic Erasers. Once you’ve completed a round of the above homemade oven cleaner and your oven door still isn’t as clean as you’d like, go over it with one or two magic erasers. They do require scrubbing, but they works.

13. Dishwasher
It’s important to wipe down the outside of the dishwasher once a week or so to prevent the spread of germs. Warm soapy water works perfectly for this task. If the dishwasher is stainless steel and needs a little polishing, refer back to step #6.
To clean the inside of the dishwasher, fill a measuring cup with one cup of vinegar. Place it on the top rack, and run the dishwasher on the no-dry setting. When the dishwasher finishes, wipe out the inside with a wet microfiber cloth.
Fill a measuring cup with 1/2 cup baking soda. Place it on the top rack, and run the dishwasher on the no-dry setting for a second time. When the dishwasher finishes, rub the baking soda into every little crevice. Wipe out the inside with a wet microfiber cloth.
Run the dishwasher on one final no-dry setting to clean out any remaining vinegar and baking soda.
14. Furniture
If you have a kitchen table and chairs, a kitchen island with bar stools, or other furniture in the kitchen, wipe it down with warm soapy water, all-purpose kitchen cleaner, or wood cleaner.
15. Floor
My favorite way to clean linoleum or tile kitchen floors is with an old-fashioned mop and pine cleaner. Move the furniture, garbage cans, and other kitchen items out of the room. Sweep the floor before you start mopping. Choose a time to mop when no one will be in the kitchen for half an hour afterward, so the floor can dry thoroughly.

I also recommend keeping a Swiffer and wet cloths on hand for spot floor cleaning. As much as I love a full mop cleaning, it’s much more practical for me to grab the Swiffer a few times during the week to wipe up small spills.
No products found.
16. Baseboards
Even when you’re careful to sweep and mop right up to the baseboards, they take a beating in the kitchen, collecting grease and bits of food. Take a damp microfiber cloth and work your way all around the baseboards in the kitchen.
17. Windows
I stick to tried-and-true Windex for washing windows. There are lots of DIY window cleaner recipes if you prefer a non-chemical cleaner. As with any surface in the kitchen, windows may collect grease over time. If regular window cleaner isn’t cutting it, remove the grease with warm soapy water or baking soda before using the window cleaner of your choosing.
18. Sliding door
Having a sliding door or other outside door off of your kitchen is wonderful for outdoor dining and entertaining. It also lets in ample amounts of sunlight, which is always welcome. As the door is in such a prominent place in the house, it gets dirty. The glass cleaner of your choosing will work just fine for the inside. Clear the outside glass panels of bugs and large dirt and debris before applying window cleaner.
19. Framed art
Having a few framed art pieces in the kitchen adds a little character. The kitchen is also a perfect place for seasonal/holiday decor that you switch up periodically. Dust off framed art, and give the glass a quick shine.
Two of my favorite general kitchen wall art pieces are OldEnglishCo’s cheese print and MeyerMarketDesign’s kitchen prayers and kitchen utensils. For seasonal and holiday art (not specifically kitchen-themed but will work well in the kitchen), I love thewheatfield and housefenway.
20. Light fixtures
Finally, finish your deep cleaning kitchen tasks list by changing any burned out light bulbs and dusting the light fixtures. If you have can lights, turn them off and dust around the bulbs.
Bonus tasks!
After completing my initial list of deep cleaning kitchen chores, I thought of two more tasks that I wanted to add to the list.
21. Kitchen sink organizer
I’ve been using an older version of the Joseph Joseph surface sink caddy for years and love it. When the caddy starts filling up with water, dump it out. Two or three times per month, take the caddy apart. Wash the components, and let them dry completely before reassembling the caddy. Letting the caddy dry also allows the countertop underneath to dry out completely.
22. Garbage cans
Even when you use garbage bags and put in new garbage bags regularly, over time, the cans get dirty. Take out the garbage bags. Wipe down the insides and outsides of the garbage cans with warm soapy water. Allow the cans to dry completely before lining them with new garbage bags.
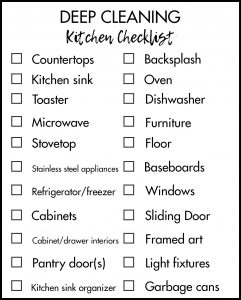
Download your free deep cleaning kitchen tasks printable checklist!
Make it easy to keep track of your kitchen deep cleaning with a printable checklist!
[Deep cleaning kitchen tasks checklist]
[Disclaimer: There are a few affiliate links in this post. Thanks for your support!]
Did you use one of the tips from this deep cleaning kitchen tasks resource?
I want to hear about what worked well for cleaning your kitchen! Tag your images #RoseClearfield on Instagram or Twitter or post a photo to my Facebook page.
Pin this post for easy access to the deep cleaning kitchen tasks and FREE printable checklist later!