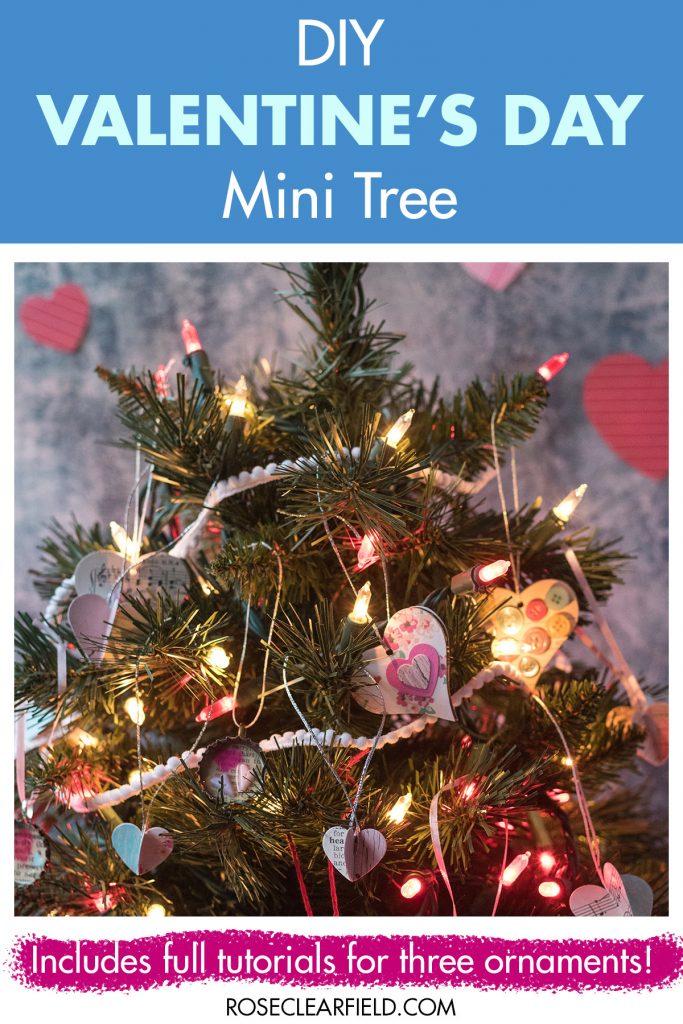


I’m showing you how to put together the cutest DIY Valentine’s Day mini tree for all of your February holiday decorating needs.
The DIY Valentine’s Day mini tree is the perfect decoration for people who hate taking down their Christmas trees. You still get to display a bright, colorful tree, and it doesn’t feel like you simply forgot to put away your Christmas decorations. A mini holiday tree is also perfect for anyone who is crazy about miniature versions of things. As much as I love having a Christmas tree, I love taking it down and getting my living room back, too. Putting up a mini tree for Valentine’s Day is the perfect compromise.

I’m showing you how to assemble the tree itself and then how to make three different DIY mini Valentine’s Day ornaments. I know that the supply list for the ornaments seems a little ridiculous. I promise that it isn’t going to break the bank.
- First, if you craft often, I guarantee that you have a number of the basic supplies (i.e., paper glue, ribbon) on hand.
- Second, you can customize the ornaments any way you like to fit your preferences and available supplies. For example, I use multiple types of ribbon and twine for my ornaments. Don’t feel like you have to buy tons of twine and ribbon, especially if you don’t have other projects in mind for these supplies.
The great part about having a mini holiday tree is that it’s so easy to switch up the ornaments and other details (i.e., lights, garlands) for different holidays and seasons. You need a lot fewer decorations than you do for a full-size tree, and the process of re-decorating it doesn’t take long at all. You’ll soon be on your way to making more ornaments for other holidays.
DIY Valentine’s Day mini tree and ornaments supplies
Mini tree
- Tabletop-sized pre-lit fir tree. Any tree 18″-24″ tall with white lights will work well.
- Red holiday lights. A 50-light strand is plenty of lights for a tabletop tree.
- White poms trim or similar small-scale trim to use as a garland. I also love this rainbow pink poms strand for Valentine’s Day. You can find this type of item in the dollar spot at Target (which is where I got mine) or the holiday section at Michaels this time of year.
Paper hearts ornaments
- Colored or patterned card stock or scrapbook paper. I recommend using at least four different designs.
- Heart paper punches – 1″ punch and 1 1/2″ punch
- Scrapbookers glue
- Pencil
- Scissors
- Ribbon, twine, or metallic braid. I used 3/8″ ribbon from Michaels, red twine, and Kreinik No. 16 10mm metallic braid in hi lustre silver, pearl, and Vatican gold.
Wooden hearts ornaments
- Wooden heart slice ornaments with holes
- 1/8″ circle hole punch
- Scrapbookers glue
- Scissors
- Twine or metallic braid. I used red twine and Kreinik No. 16 10mm metallic braid in hi lustre silver, pearl, and Vatican gold.
- Assorted colored and patterned card stock and scrapbook paper
- Depending on the specific ornaments you make, you may also need a few buttons and ribbon. I share more details about these supplies in the instructions.
The patterned papers I used for the paper hearts and wooden hearts ornaments include the following.
- Valentine’s-Day themed dictionary pages (You’ll need the square templates, available here.)
- Weathered aqua and pink wood paper from the Far Far Hill’s Old Wood Kit
- Pastel-colored vintage library cards
I share more of my favorite vintage paper resources in my DIY scrapbook embellishments tutorial.
Note: I don’t use ribbon for stringing the wooden hearts ornaments like I do for stringing the paper hearts and bottle cap ornaments. The hole openings are simply too narrow for it.
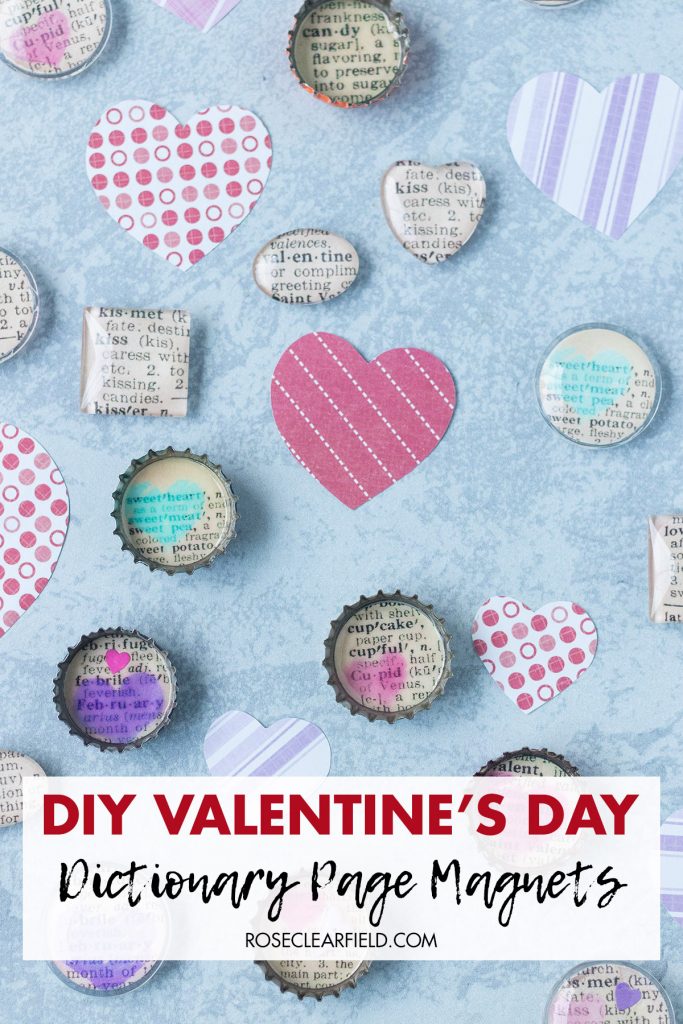
Bottle cap ornaments
- Metal bottle caps. You can use your own recycled bottle caps (which is what I did), or you can purchase recycled or new bottle caps.
- 1/4″ x 1/16″ neodymium magnets, one for each magnet. For large quantities, I recommend Amazon. For small quantities, I recommend Michaels. It’s much less expensive to buy neodymium magnets in bulk. However, not everyone needs 100 magnets.
- Valentine’s Day dictionary page circle templates (available here)
- White card stock
- 1″ circle paper punch
- Diamond glaze
- E-6000 adhesive
- Q-tips
- Scissors
- Ribbon, twine, or metallic braid. I used 3/8″ ribbon from Michaels, red twine, and Kreinik No. 16 10mm metallic braid in hi lustre silver, pearl, and Vatican gold.
- Acrylic spray (Optional. If you print your dictionary page circles with an ink-jet printer, give them a couple of coats of acrylic spray to prevent the link from running. You don’t need to coat laser-printed pages.)
Instructions for the DIY Valentine’s Day mini tree ornaments
Note: When you use scrapbook glue, allow one or two components to dry completely before moving on to the next glued component. The glue dries in under two minutes. Allowing it to dry fully as you go minimizes wrinkling.
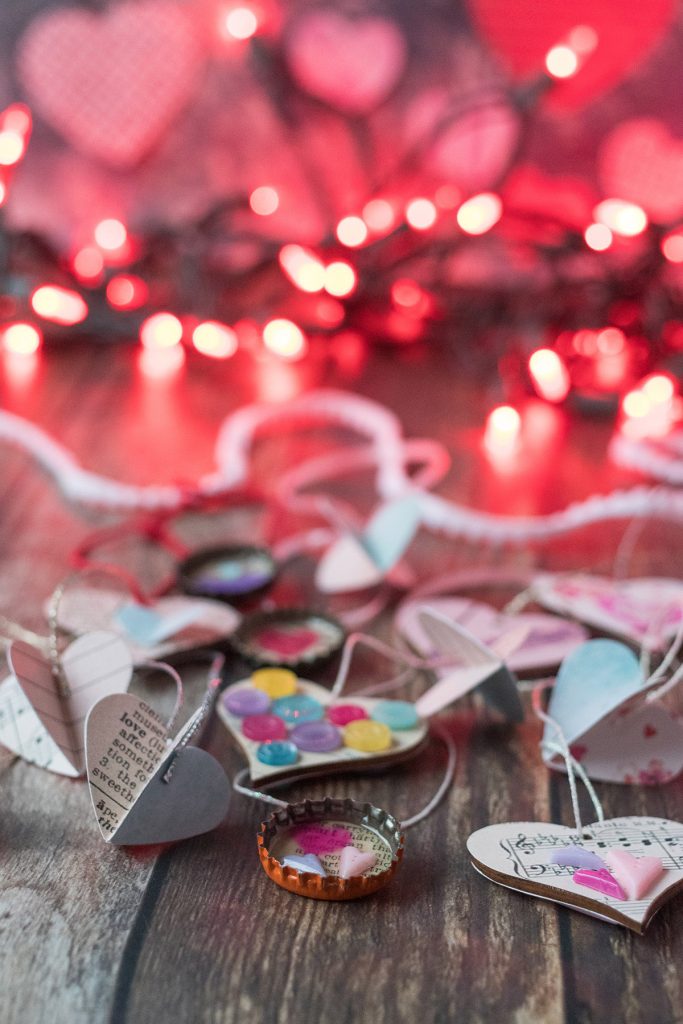
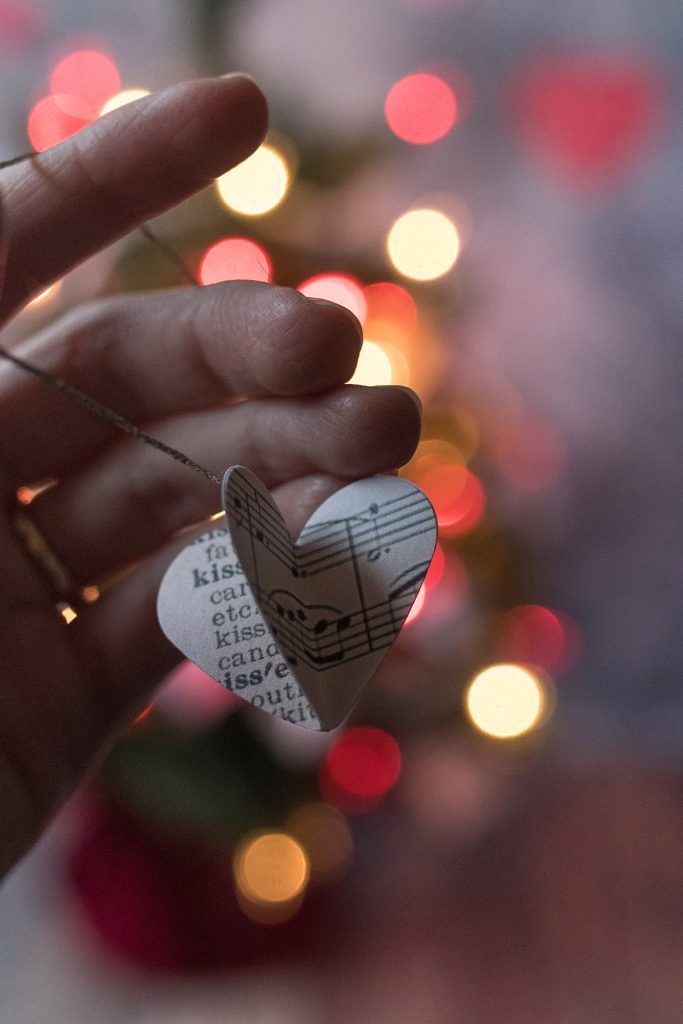
Paper hearts ornaments
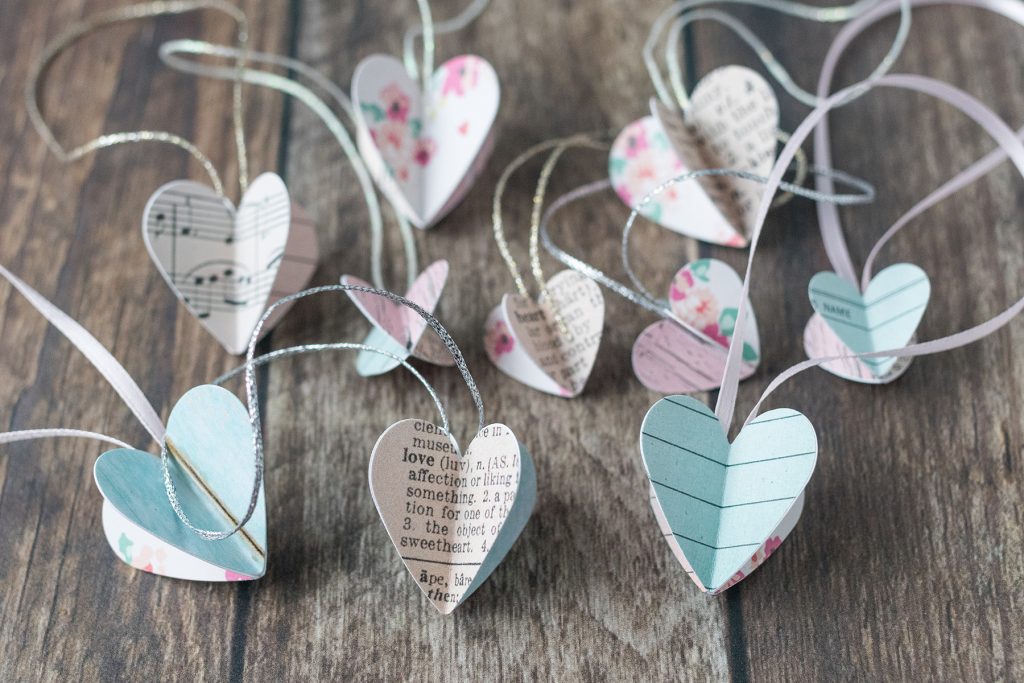
For the instructions, I’m using the 1 1/2″ heart paper punch.
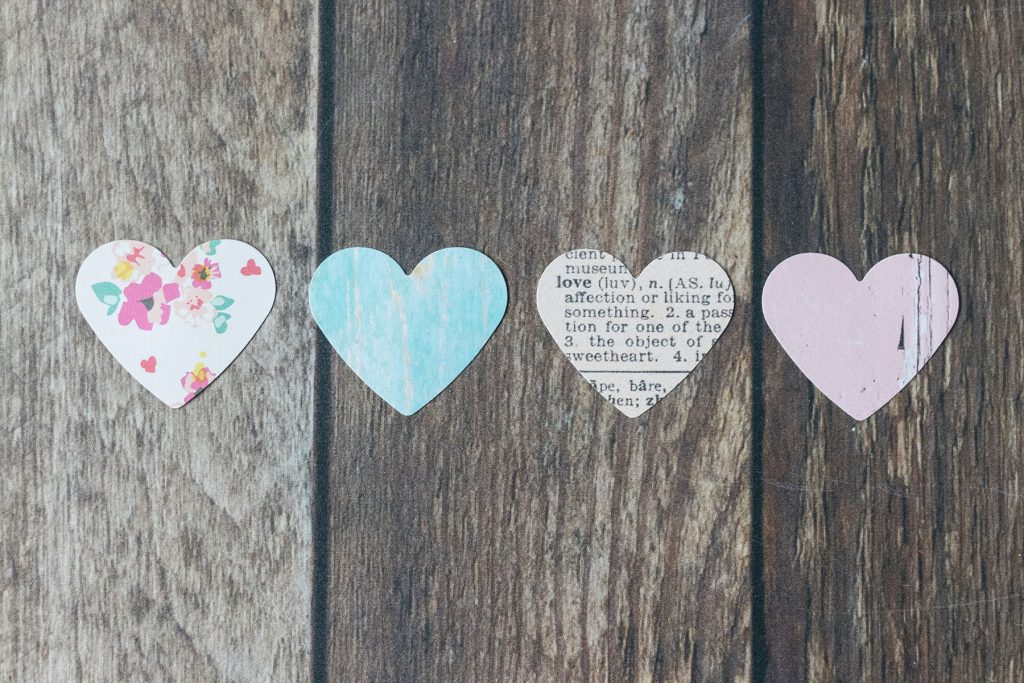
Use your paper punch to punch four hearts.
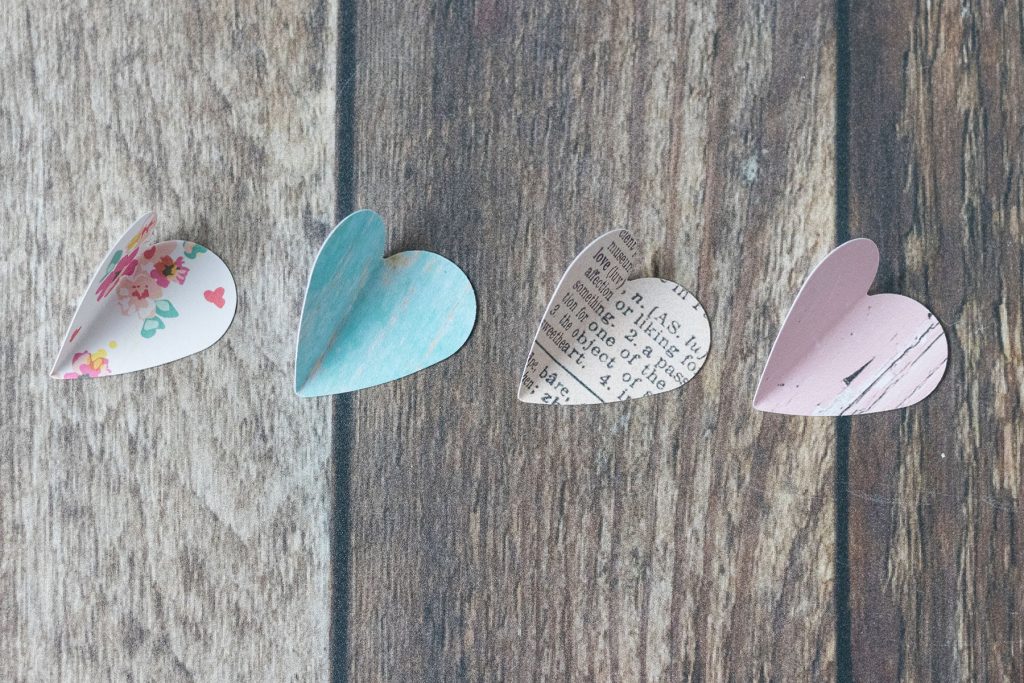
Crease each heart down the center. You’ll be gluing the hearts back to back, so you want to crease the hearts inward as shown in the picture above.

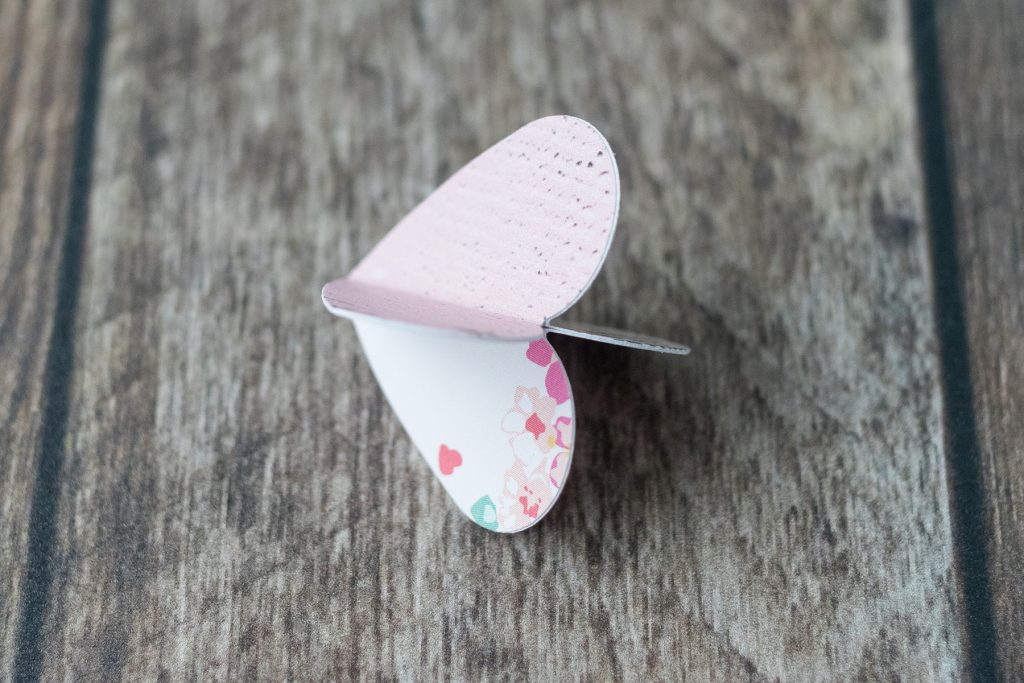
Use the scrapbookers glue to glue two of the heart halves together as shown in the picture above. Allow them to dry completely.
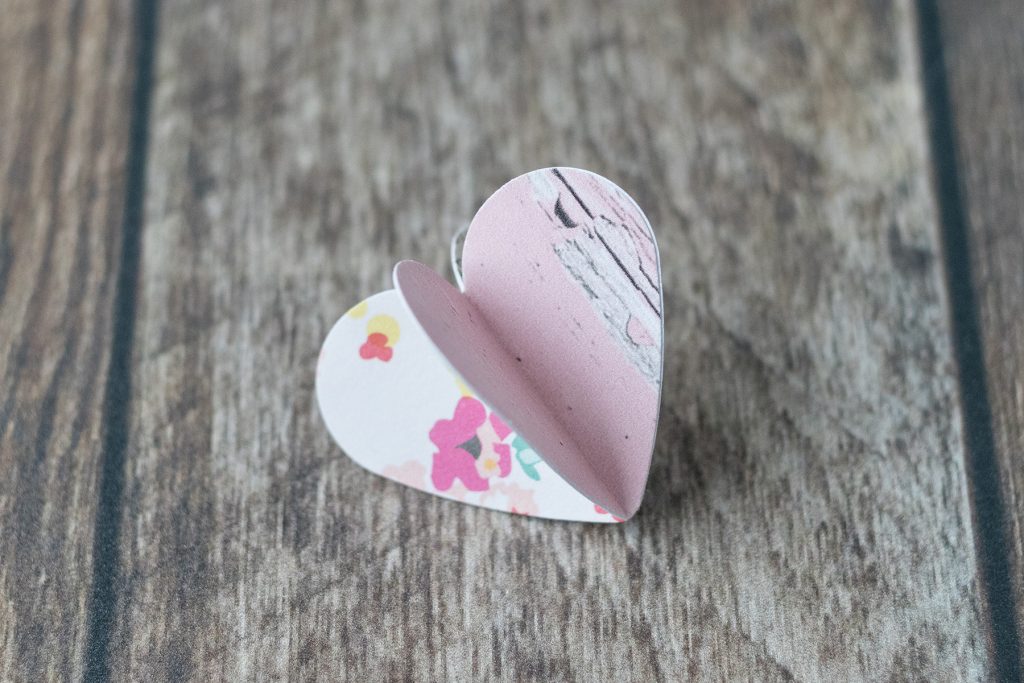
Glue the third and then the fourth hearts. Your fourth heart will link back up with your first heart. Allow each heart to dry completely before moving on to the next one.
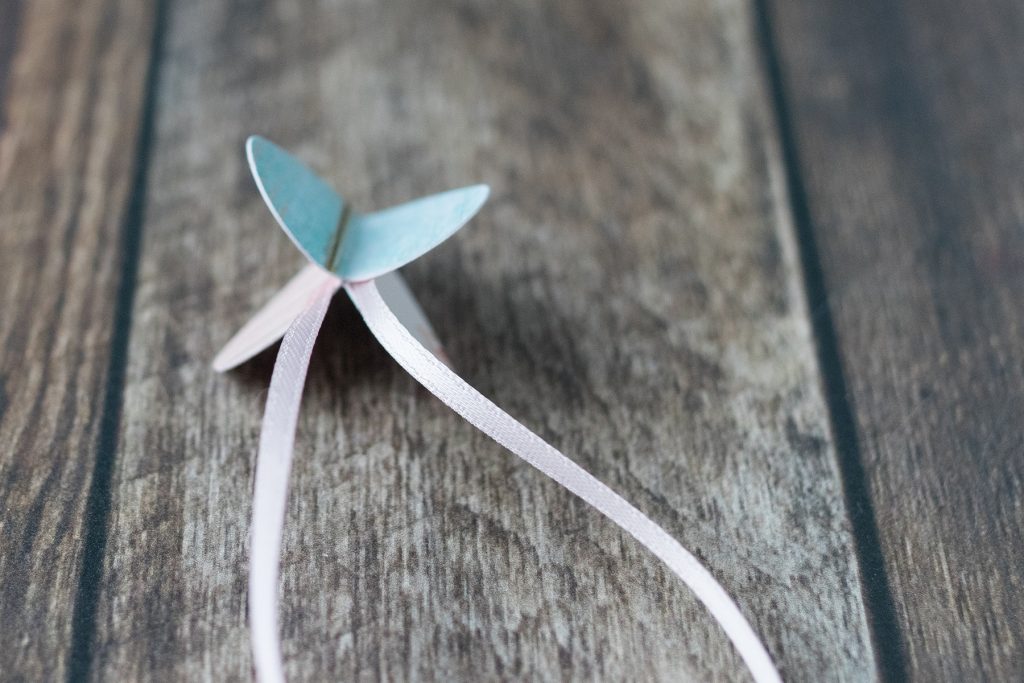
Cut a 9″ length of ribbon or twine. Use the scrapbookers glue to glue one end of the stringing material to the ornament. Loop the ribbon or twine around and glue the other end to the opposite side of the ornament as shown above. Allow it to dry completely.
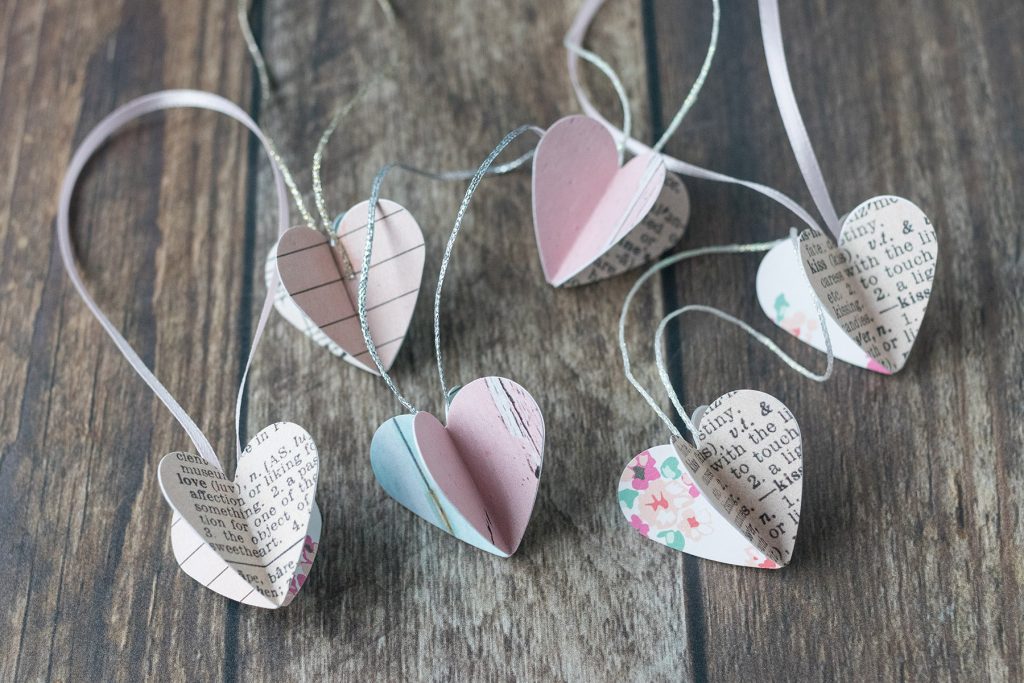
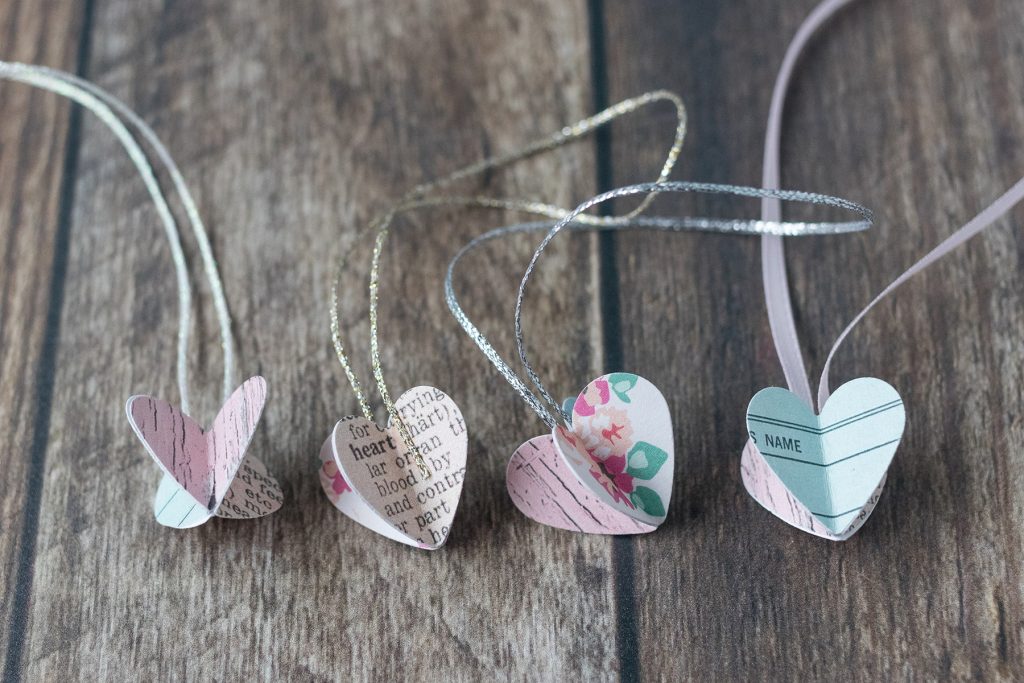
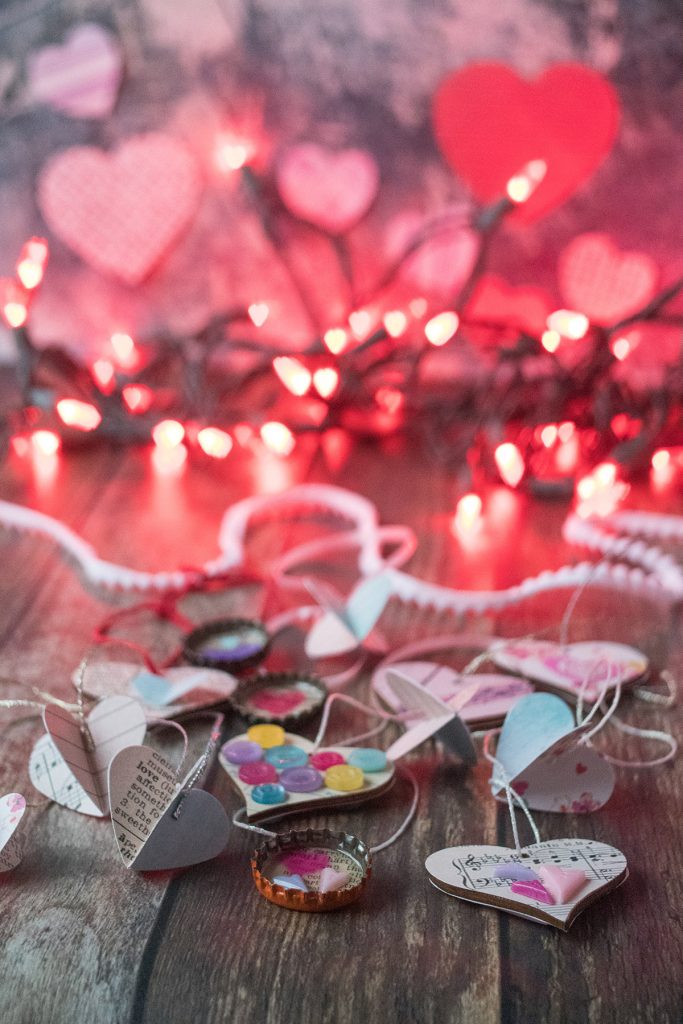
Here are the paper hearts ornaments I made in the 1″ size.
Wooden hearts ornaments

To make the wooden hearts ornaments:
- Use a wooden heart and a pencil to trace the heart shape on the scrapbook paper. To make your ornaments double-sided like I did, you’ll need two heart shapes for each ornament.
- Use scissors to cut out the paper hearts. Cut just past the pencil outline, so no pencil outline remains on the heart.
- To punch the holes, place a paper heart the way you’ll glue it on the wooden heart. Flip the paper and wooden heart over. Trace the hole opening through the back side of the heart. Use the hole punch to punch out the hole. I recommend cutting out all of your hearts and punching the holes before moving on to gluing.
- Use the scrapbook glue to adhere the paper heart to the wooden heart. Smooth it into place. Allow it to dry completely.
- Add the embellishments of your choosing. I provide more details about the embellishments below. I glue all of my embellishments with the scrapbook glue.
- Repeat steps 4-5 for the back side of each ornament.
- Cut 9-10″ twine or metallic braid of your choosing. String the ribbon, twine, or braid through the hole. Double knot the ends as tightly as possible. Cut off any excess stringing material.
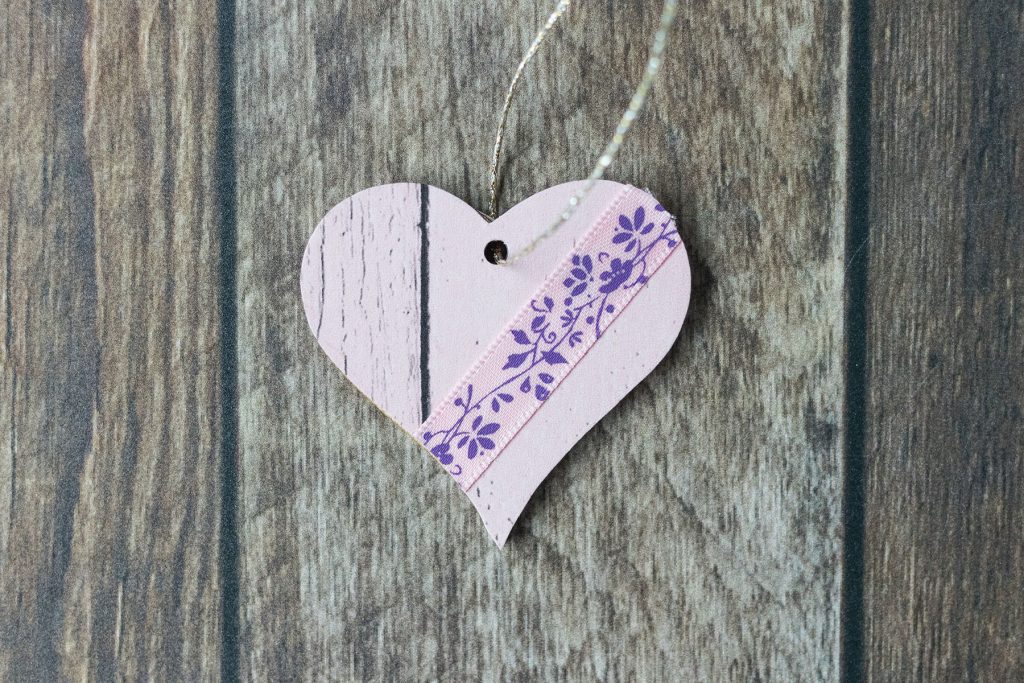
Diagonal ribbon
I laid a length of ribbon across a wooden heart with a weathered pink wood background, which is linked in the supply section. I recommend choosing a ribbon 1/2″ in diameter or less. Cut the ribbon slightly longer than needed, and glue it in place. When it’s dry, flip the heart over and cut off the excess ribbon. This process ensures you cut the ribbon as close to the wooden heart as possible.

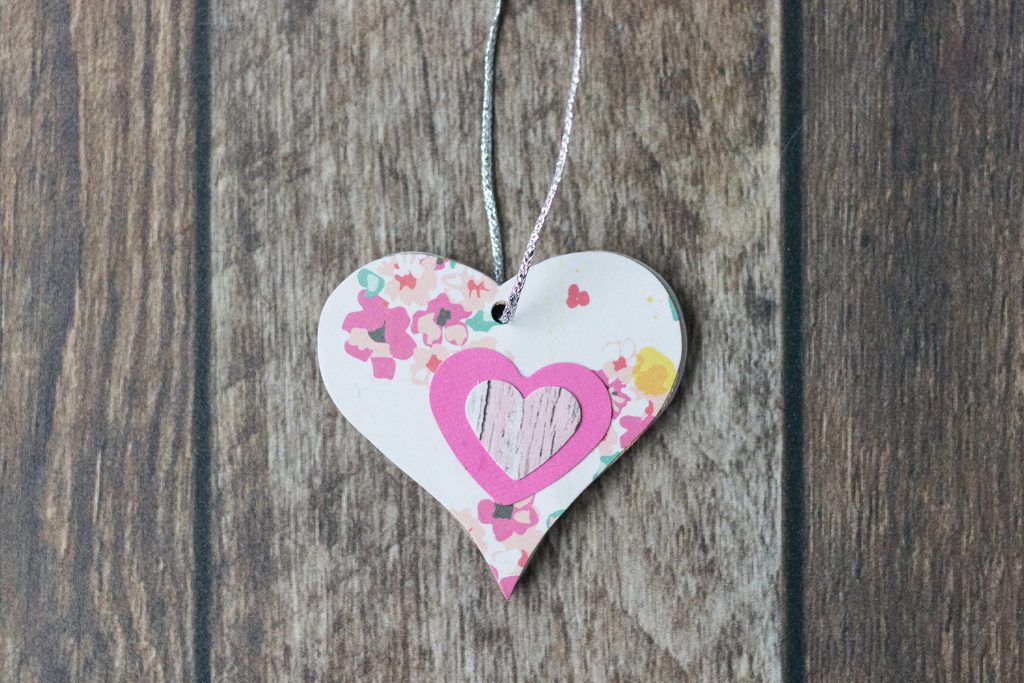
3D heart
For the 3D heart ornament, I used one of my Valentine’s Day-themed dictionary pages and the weathered aqua wood, both of which are linked in the supply section. Use a 1″ heart punch for your 3D heart. Crease it down the middle. Use scrapbook glue to adhere just the crease to the wooden heart.

Mini heart trail
The background for the mini heart trail is the weathered aqua wood, which is linked in the supply section. I used a 1/8″ heart punch to punch the mini hearts out of dark pink and purple cardstock. Arrange the mini hearts, so it looks like they’re trailing up the ornament. Adhere them with the scrapbook glue.
Layered hearts
I layered two hearts on a floral-patterned background. I used a 1″ punch for the larger heart and a 5/8″ punch for the smaller heart. The larger heart is solid pink card stock, and the smaller heart is the weathered pink wood page I link in the supply section.

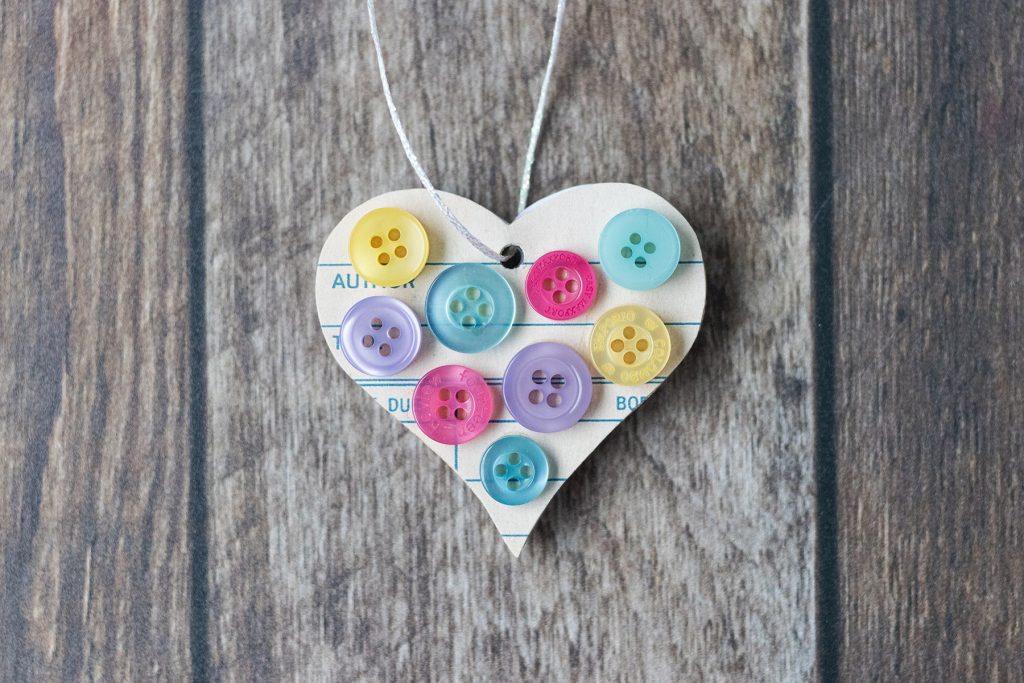
Heart buttons
If you’ve spent any time on my blog or Etsy jewelry shop, you know that I’m crazy about buttons. I had to create a couple of Valentine’s Day ornaments with buttons.
The music background I used is no longer available, but you can find similar free sheet music downloads at Old Design Shop. Unfortunately, the exact heart buttons I used are no longer available either. I also love these miniature heart buttons from WhiteElephantCrafts, which are available in multiple colors.
Circle buttons
The last wooden heart ornament features a vintage library card background. I linked this resource in the supply section. The buttons are from a pastel button mix (similar) from MellowMoonSupply, which is my current favorite shop to purchase buttons on Etsy. I recommend choosing buttons 1/2″ in diameter or smaller and arranging them on your heart before you start gluing.
Bottle cap ornaments
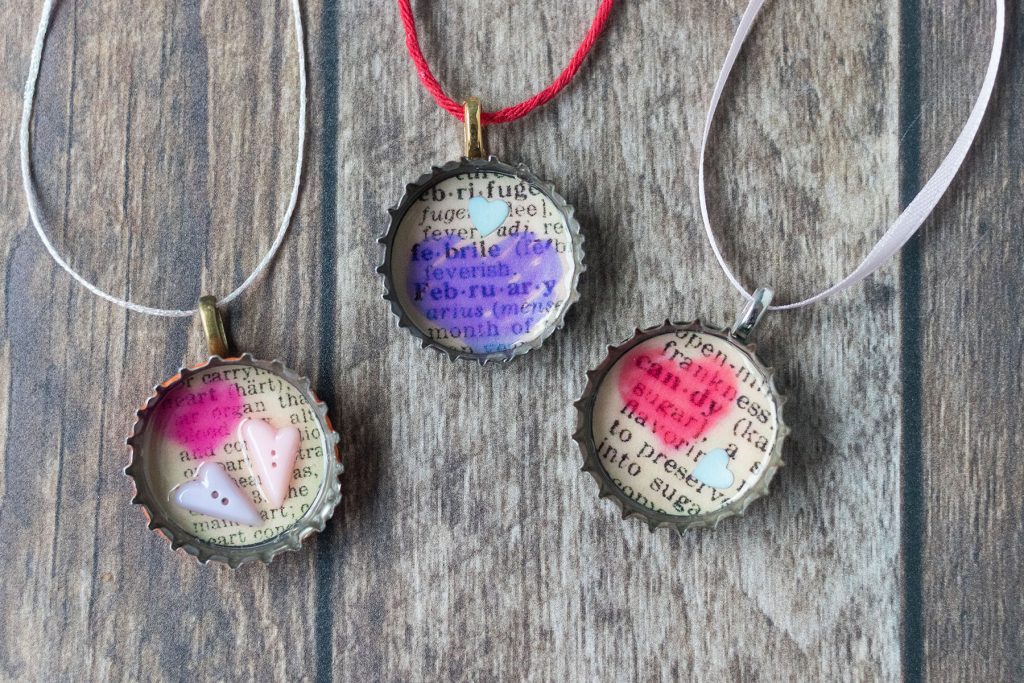
I have the full directions for the bottle cap ornaments in my DIY Valentine’s Day dictionary page magnets tutorial. The tutorial includes free printable dictionary page circle templates and a complete set of directions.
To make ornaments instead of magnets, swap out the magnets for jewelry bails. Then cut 9-10″ lengths of the ribbon, twine, or metallic braid of your choosing. String the ribbon, twine, or braid through the bail. Double knot the ends as tightly as possible. Cut off any excess stringing material.
I only made dictionary page ornaments with bottle caps. But glass cabochons work well, too! You’ll see lots of examples of Valentine’s Day items with glass cabochons in the magnets tutorial.
Your new ornaments are ready for your Valentine’s Day mini tree!
Assembling the mini tree for Valentine’s Day

Here’s my pre-lit tree, ready to go. There are only two items I added to it for Valentine’s Day before I decorated it with ornaments.

My tree came decorated with the white lights. I added a strand of red lights. A 50-light strand is plenty for a tree of this size.
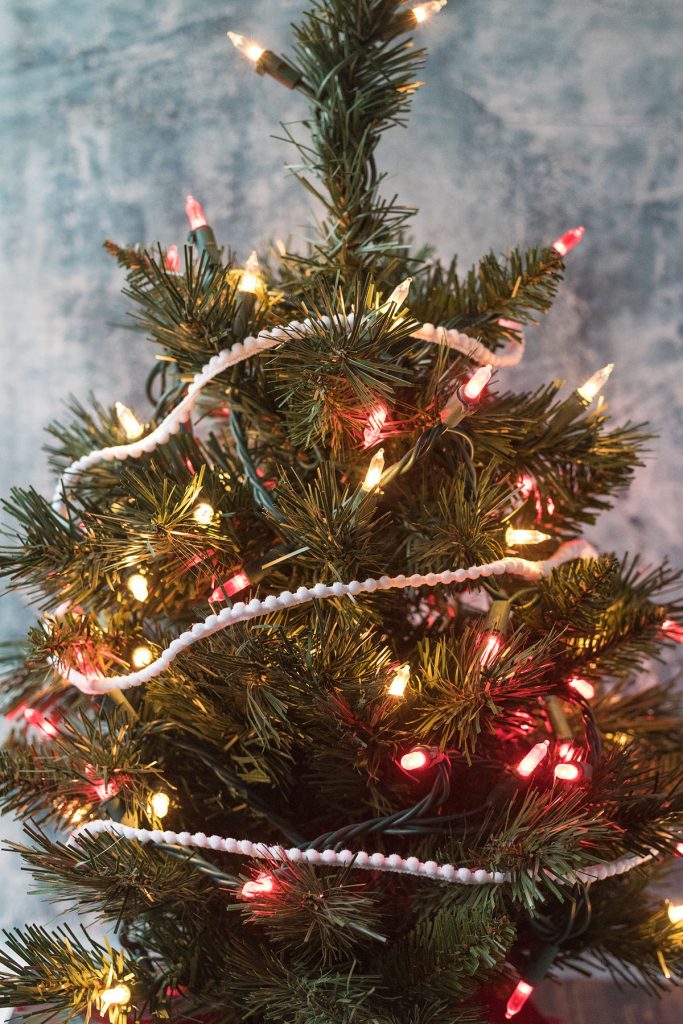
Then I added a white pom garland. You certainly don’t have to add a garland. There is a lot going on with the mini tree already between the lights and ornaments. But I like the added touch, as many people put a garland or two on a full-size tree.
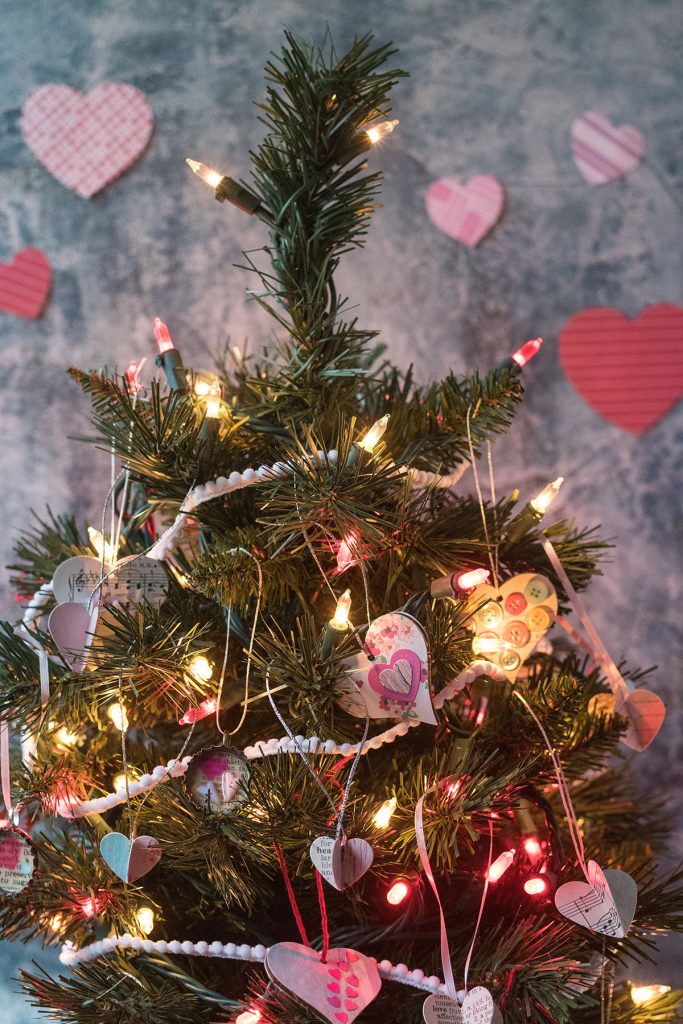
After I’d decorated my tree with lights and a garland, I added the ornaments.

Your DIY Valentine’s Day tree is ready to display in an entryway, living room, or kitchen! Happy Valentine’s Day!

[Disclaimer: There are a few affiliate links in this post. Thanks for your support!]
Did you make your own Valentine’s Day mini tree?
I want to see it! Tag your images #RoseClearfield on Instagram or Twitter or post a photo to my Facebook page.
Pin this post for easy access to the DIY Valentine’s Day mini tree instructions later!