I am a huge believer in creating the best photos you can with the best equipment you can afford. Learning how to take better blog photos with your phone can be a huge asset for your blog photography.
Yes, we all love to get new photography toys. But great photography equipment doesn’t make you a great photographer. I do shoot all the photos for this blog with a DSLR camera and advocate making the investment. However, there is so much you can do to take better photos for your blog with your phone, too.
I see numerous bloggers take the lazy route and use their own mediocre phone photos or rely heavily or exclusively on generic stock photography. If you own a relatively new smartphone with a solid camera (it doesn’t have to be the best one on the market), you have a very powerful tool to take better photos for your blog. With a few simple tips, you can significantly improve your photography without spending any money beyond your monthly phone bills.
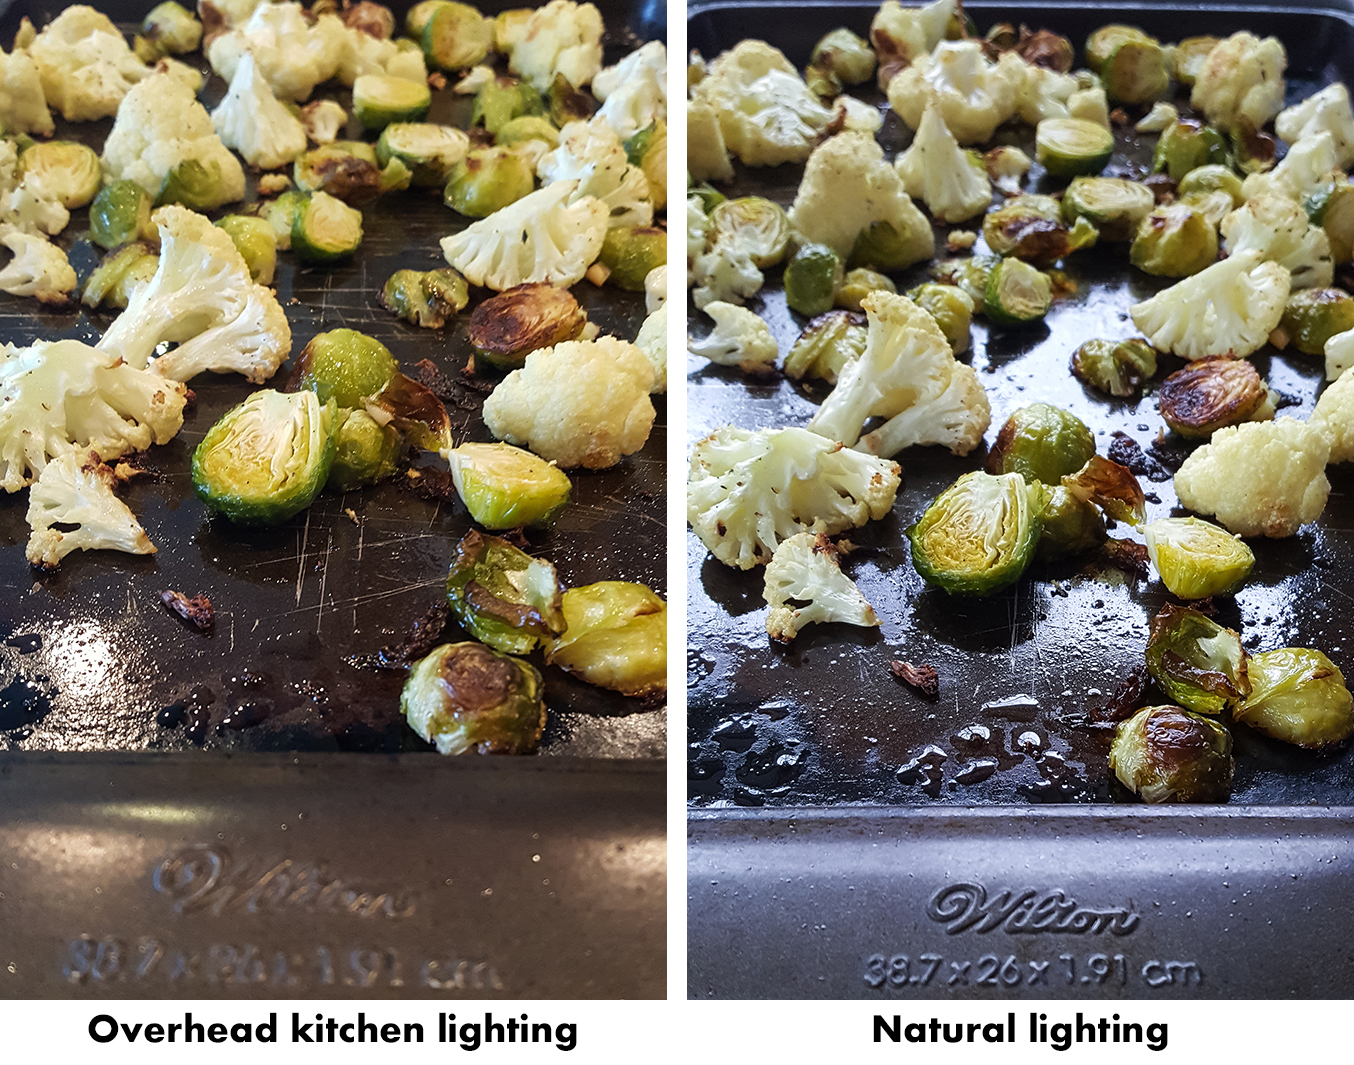
Find the best lighting in your house or start using artificial lighting
There is a common misconception that successful bloggers have amazing lighting throughout their homes. In truth, most bloggers have one or two locations in their houses with great lighting that they use for the majority of their shooting. Find this lighting and create a movable or permanent photography setup for shooting in that location.
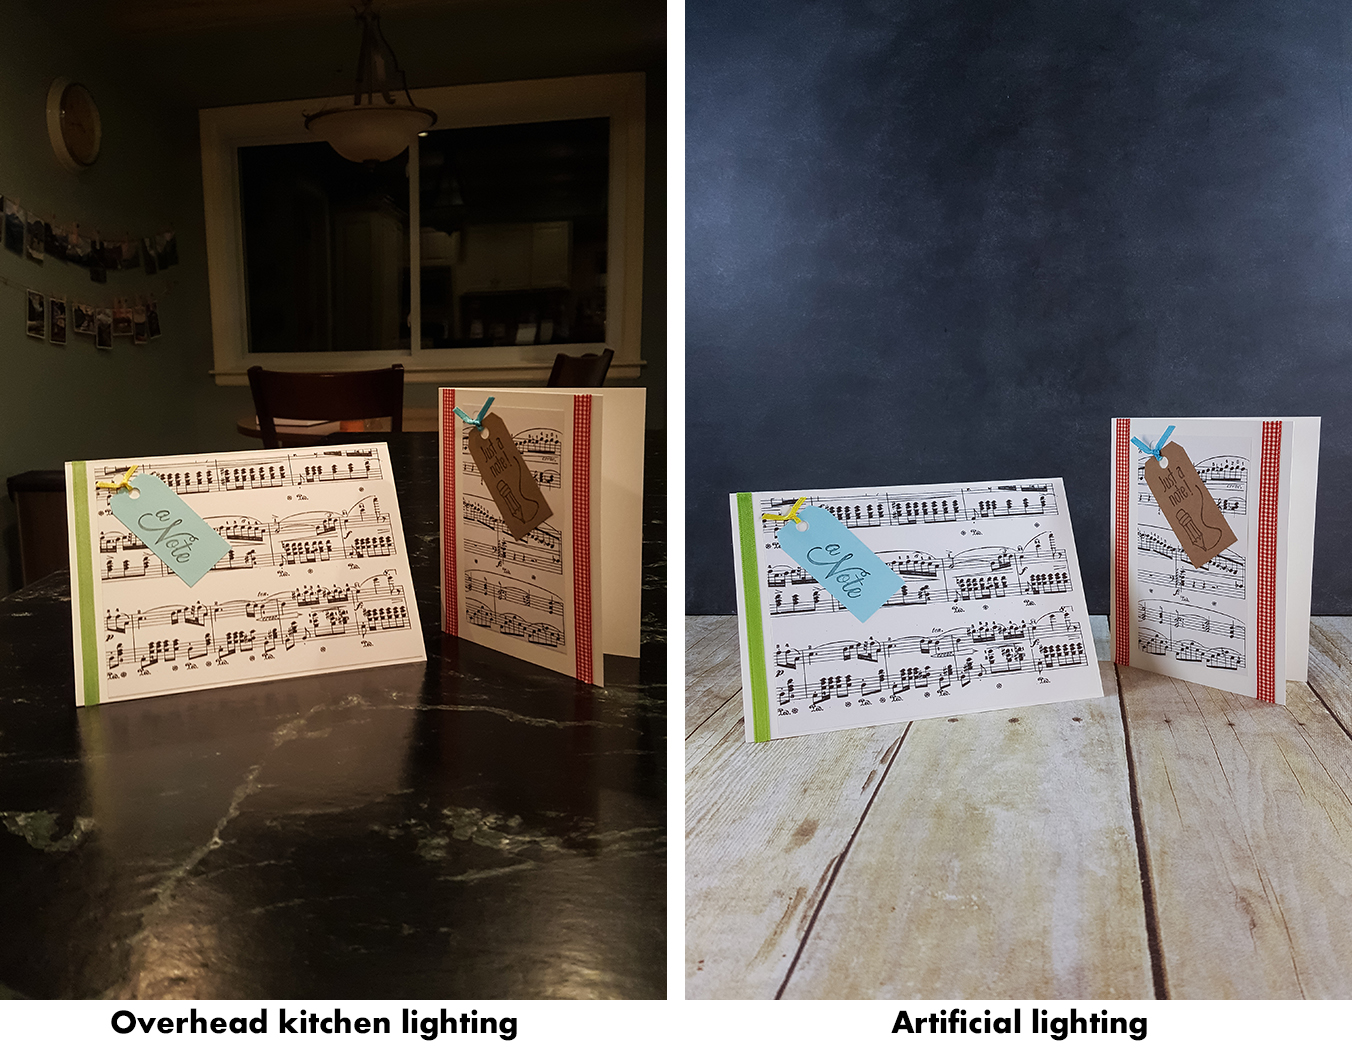
I know that shooting with artificial lighting is controversial, but it’s been a game-changer for me. I have a lot of flexibility with my shooting schedule. But I live in the Midwest where the days are short and dark for long stretches of the year. Artificial lighting allows me to get the shots I need when I need them with consistent, bright lighting. You can read more about the artificial lighting I use over here.
Get out of auto mode
There is another common misconception that successful bloggers take such great pictures because they have great cameras. Having a great camera = taking great pictures, right? Wrong. Successful bloggers take great pictures because they’ve learned their camera settings inside and out and have worked hard to improve their photography skills. Modern phone cameras offer a wide range of camera settings. You can download a manual camera app for even more control.
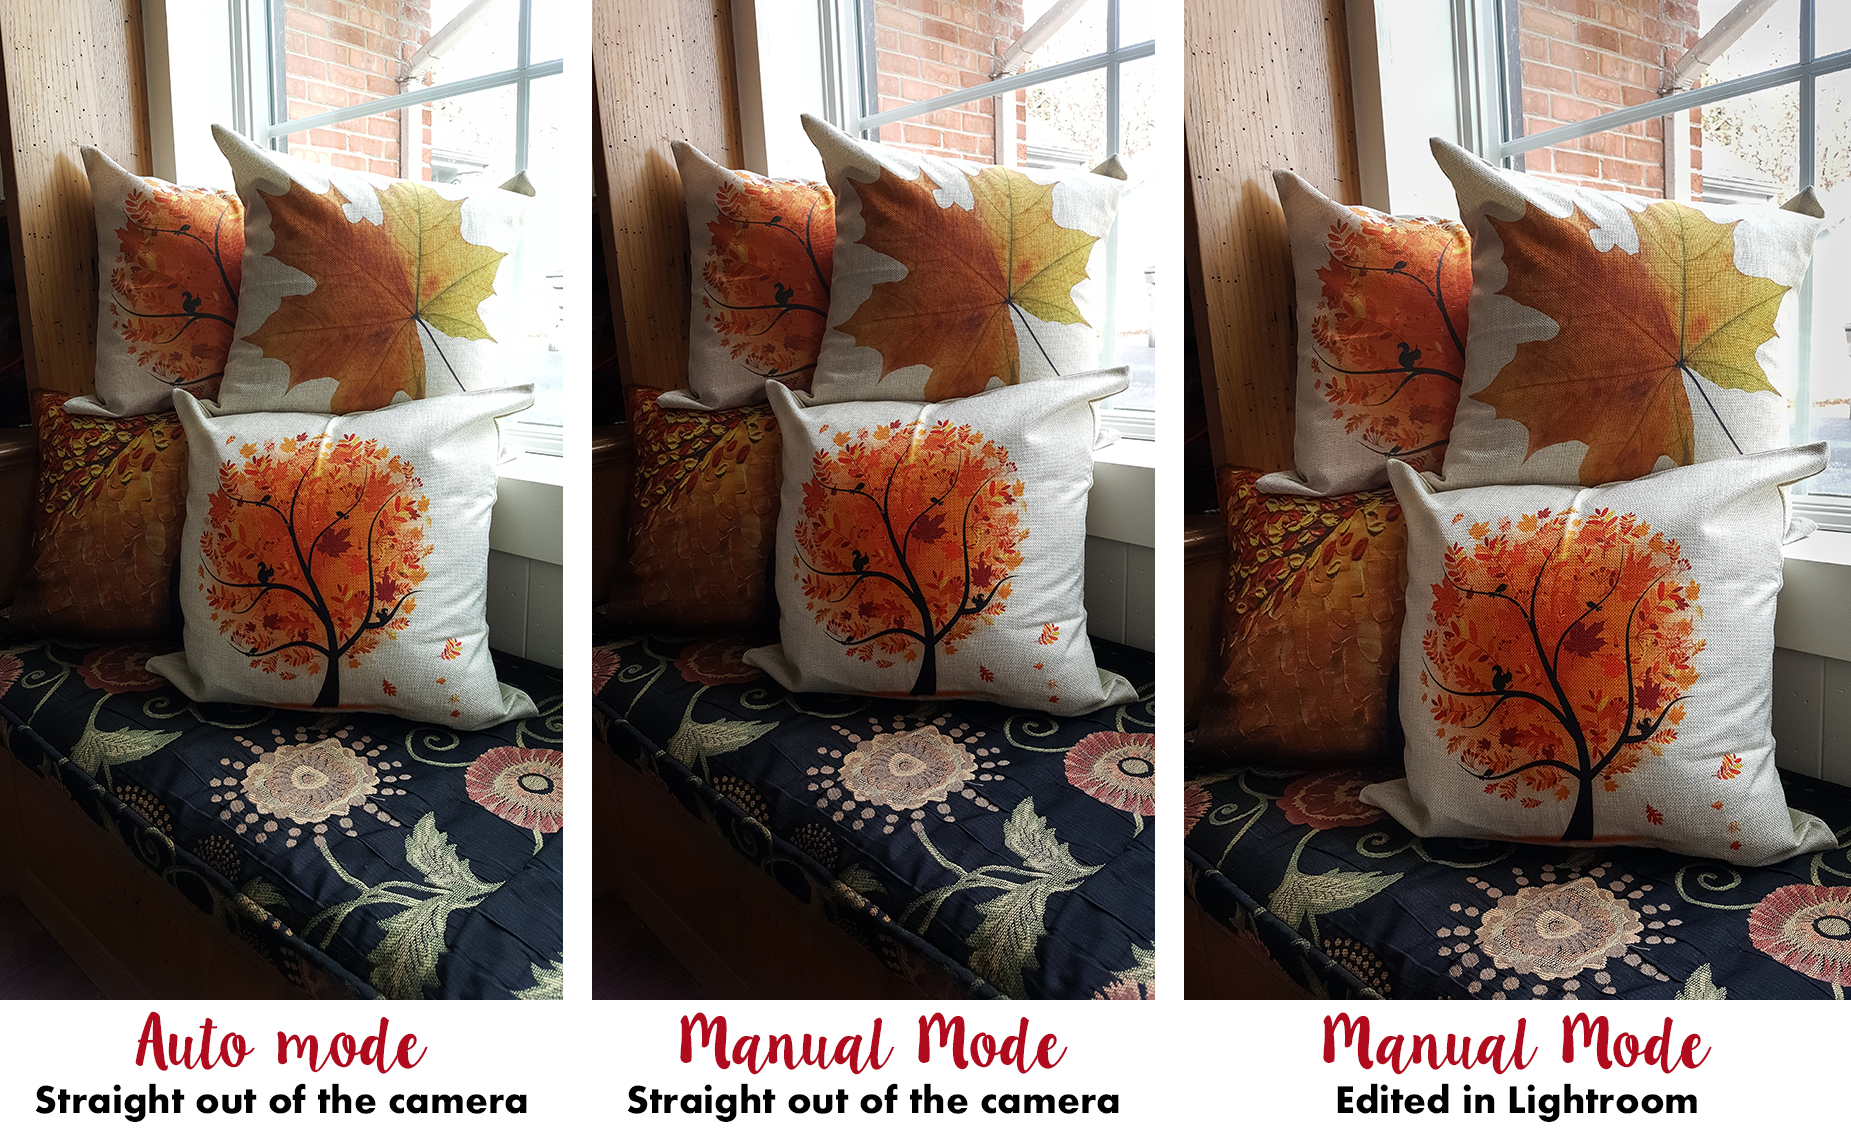
Switch your camera app into manual mode and experiment with the varying settings to get a sense of each setting. Personally, for blog photography, I think ISO and white balance will make the biggest difference. I also recommend using manual focus. In most instances, using manual focus on a smartphone camera is as simple as touching the screen where you want the camera to focus. For example, if you’re photographing a plate of cookies, most likely you’ll want to focus on the cookie right on the front of the plate. The camera may not choose this cookie as the focal point. Simply touch the cookie to change the focal point.
I know that the difference between the three example images isn’t staggering. However, pay attention to how much more detail I was able to retain in the final image. You can clearly see the corner of the top right pillow and a bit of the background behind it. The bottom left pillow also has a lot more detail.
Turn on the grid on your phone
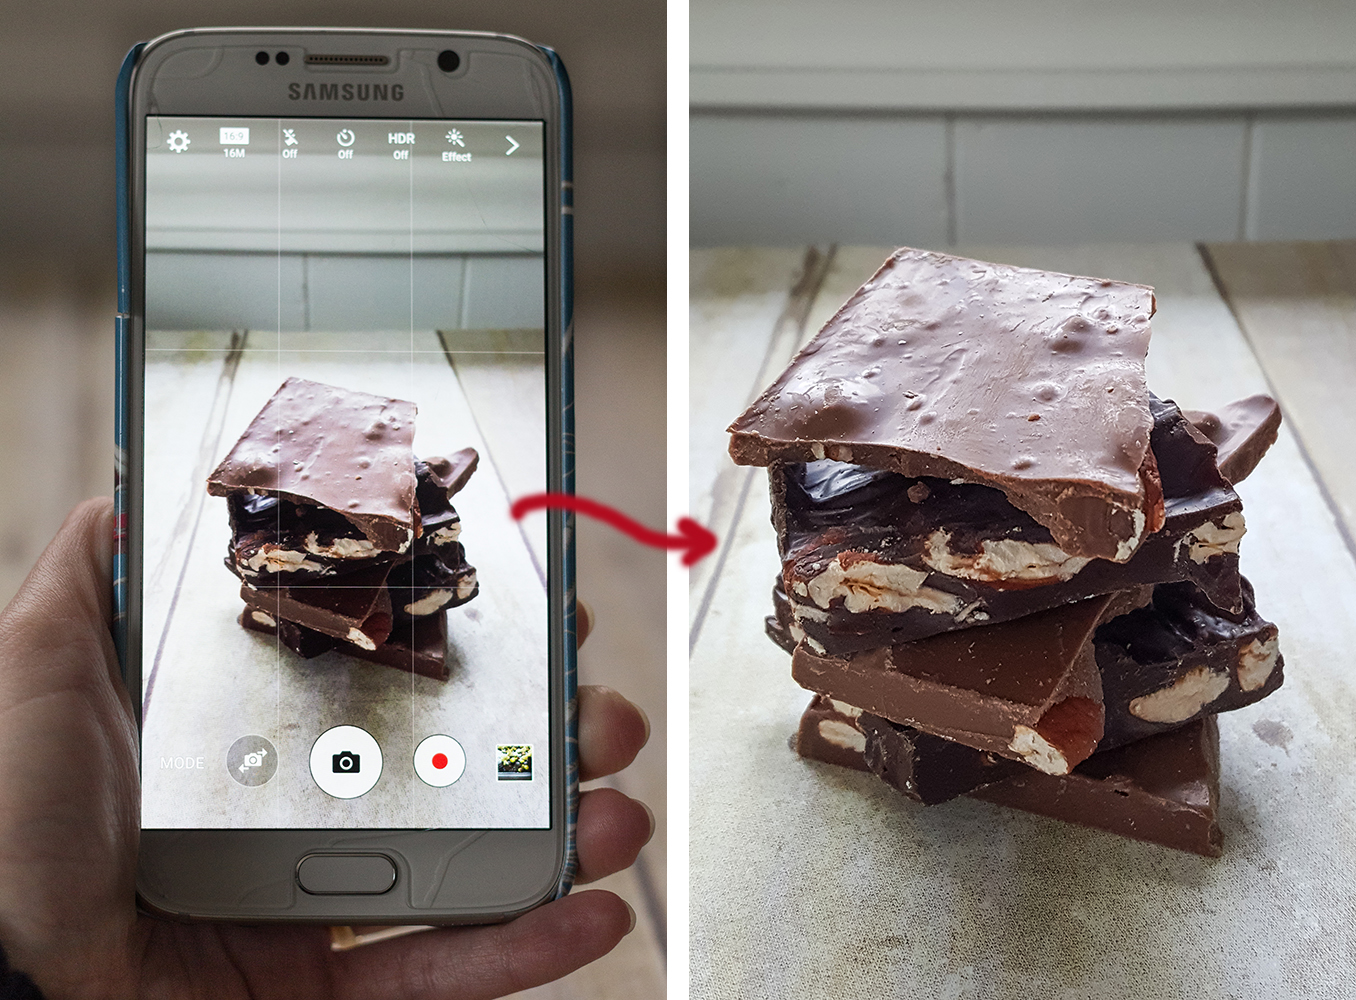
Turning on the grid overlay on your phone helps you use the rule of thirds. Instead of centering your subject, you can position it to the left or the right or a bit higher or lower in the frame. It may not seem like a big deal to change the composition a little, but this simple change will make a big difference. With the grid overlay, you’ll know the exact positions for the rule of thirds lines so that you can compose your image accordingly.
Turning on the grid overlay should be pretty straightforward on most phone cameras. If you aren’t sure how to switch on the grid, Google the name of your phone and “camera grid overlay” (i.e. “Samsung Galaxy s6 camera grid overlay”).
Many editing programs also feature a grid overlay, which is helpful when you crop your phone images. Again, if you don’t know how to turn on the grid function in the editing program of your choice, you should be able to figure it out via a Google search.
Avoid the zoom function
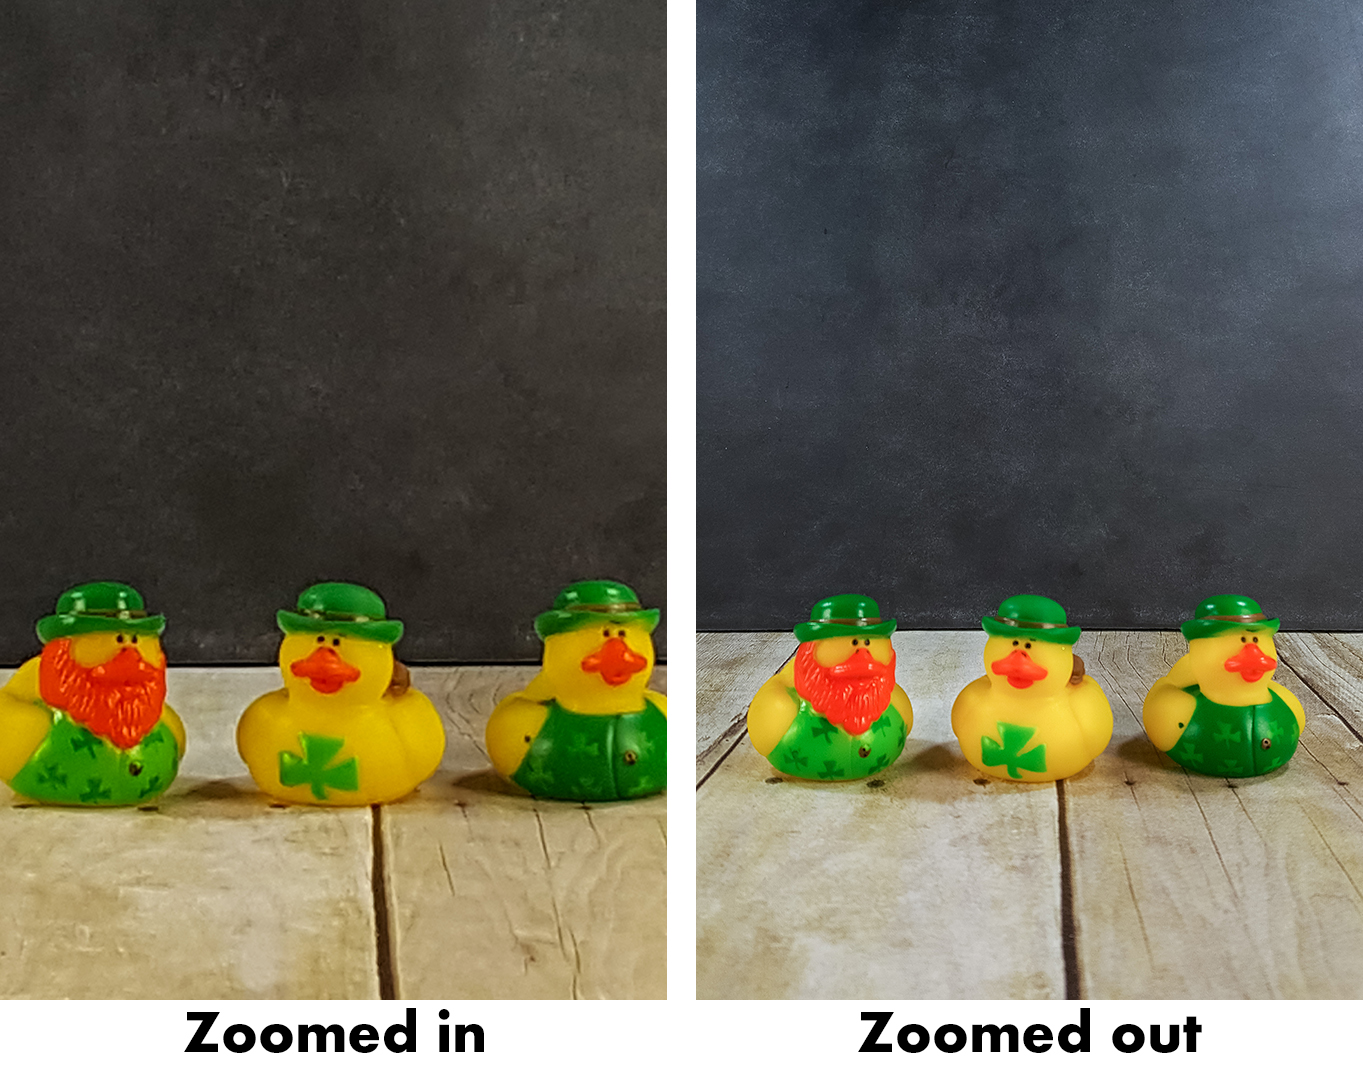
Unless you’re using a top of the line phone camera, the zoom function often does more harm than good. Unlike a DSLR zoom lens, which can produce high-quality images over a range of focal lengths, a phone camera produces its best images when it’s zoomed out fully. When you zoom in, the camera starts to pixelate the zoomed out image, compromising the image quality. Whenever possible, physically move yourself and the camera to get the shot you want without using the zoom function.
The difference between these two images is pretty obvious. The ducks on the left are pretty pixelated or blurry. The ducks on the right are crisp with great detail. Full disclosure: I also edited the zoomed out version to get rid of the yellow tint you see in the left image.
Remove distracting elements
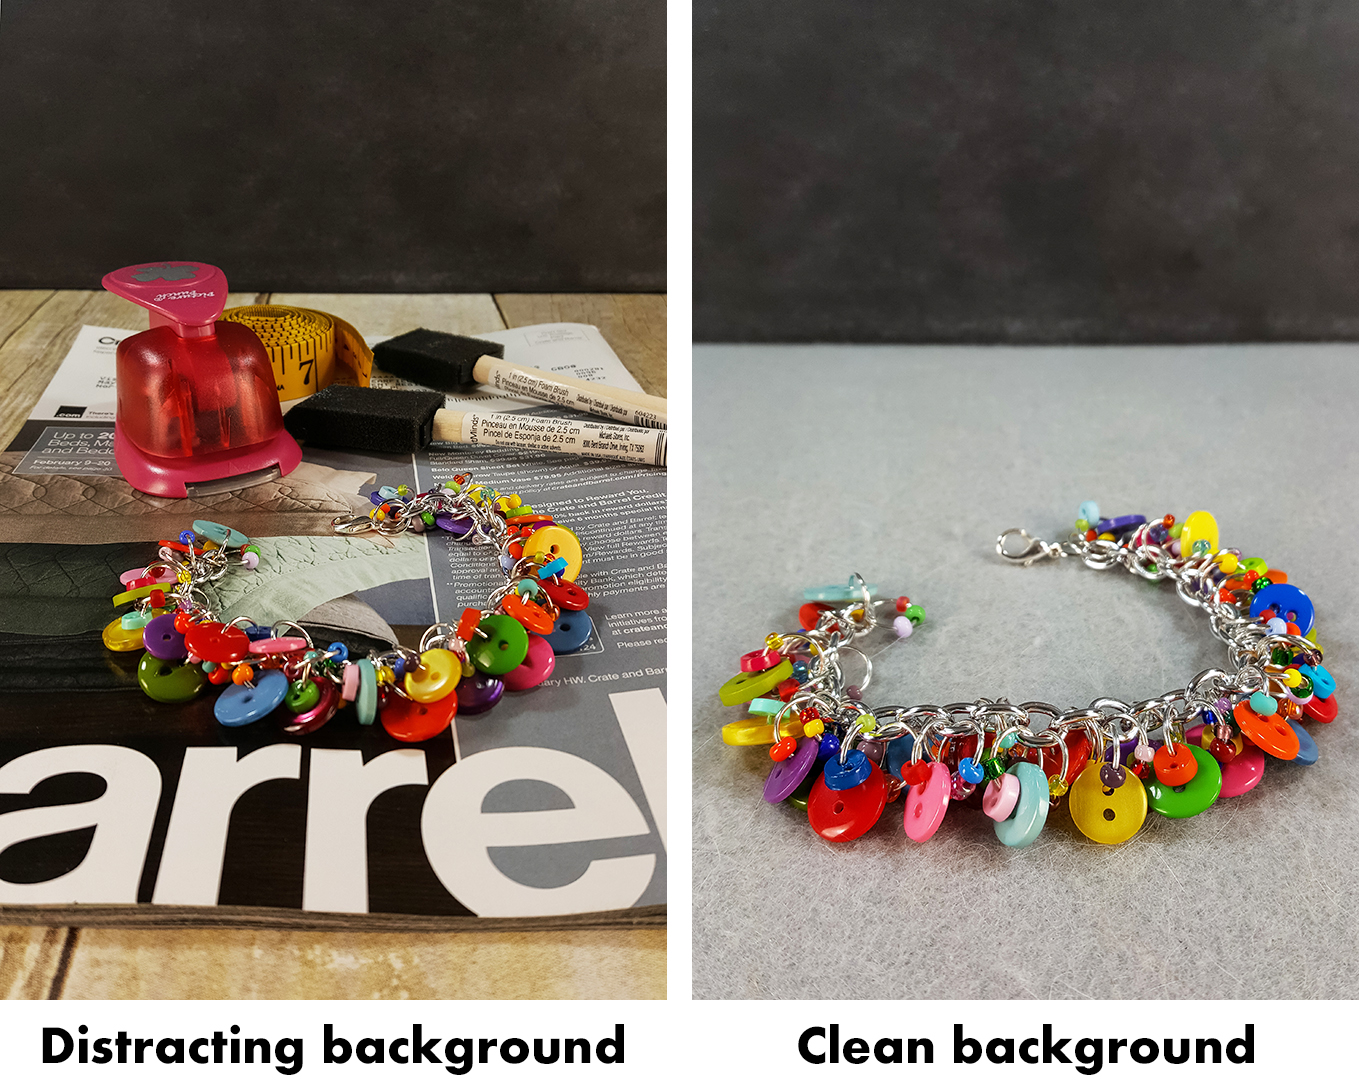
Many of the best tips for better blog photography are applicable to both phone and DSLR photography. Removing distracting elements is no exception. Clearing miscellaneous items out of the frame is a simple, effective strategy for turning your good photos into great photos. Creating a clean backdrop allows the viewer to focus on the subject at hand. It seems like an obvious concept, but many bloggers leave distracting elements in their shots. Take your images a step further by using a few backdrops and props (see the next tip!).
Gather a set of essential backdrops and props
When you’re brand new to blog photography, using backdrops and props may seem overwhelming and potentially expensive. While there no limit to the backdrops and props you can buy, you can get started with a few items from the dollar store and supplies you already have at home. Start simple with a piece of white poster board and a couple of items that fit with your blog shoots. For example, if you have a food blog, style your shoots with silverware, napkins, and a glass of water, beer, or wine. From there, you can start picking up more backdrops and props as your budget allows.
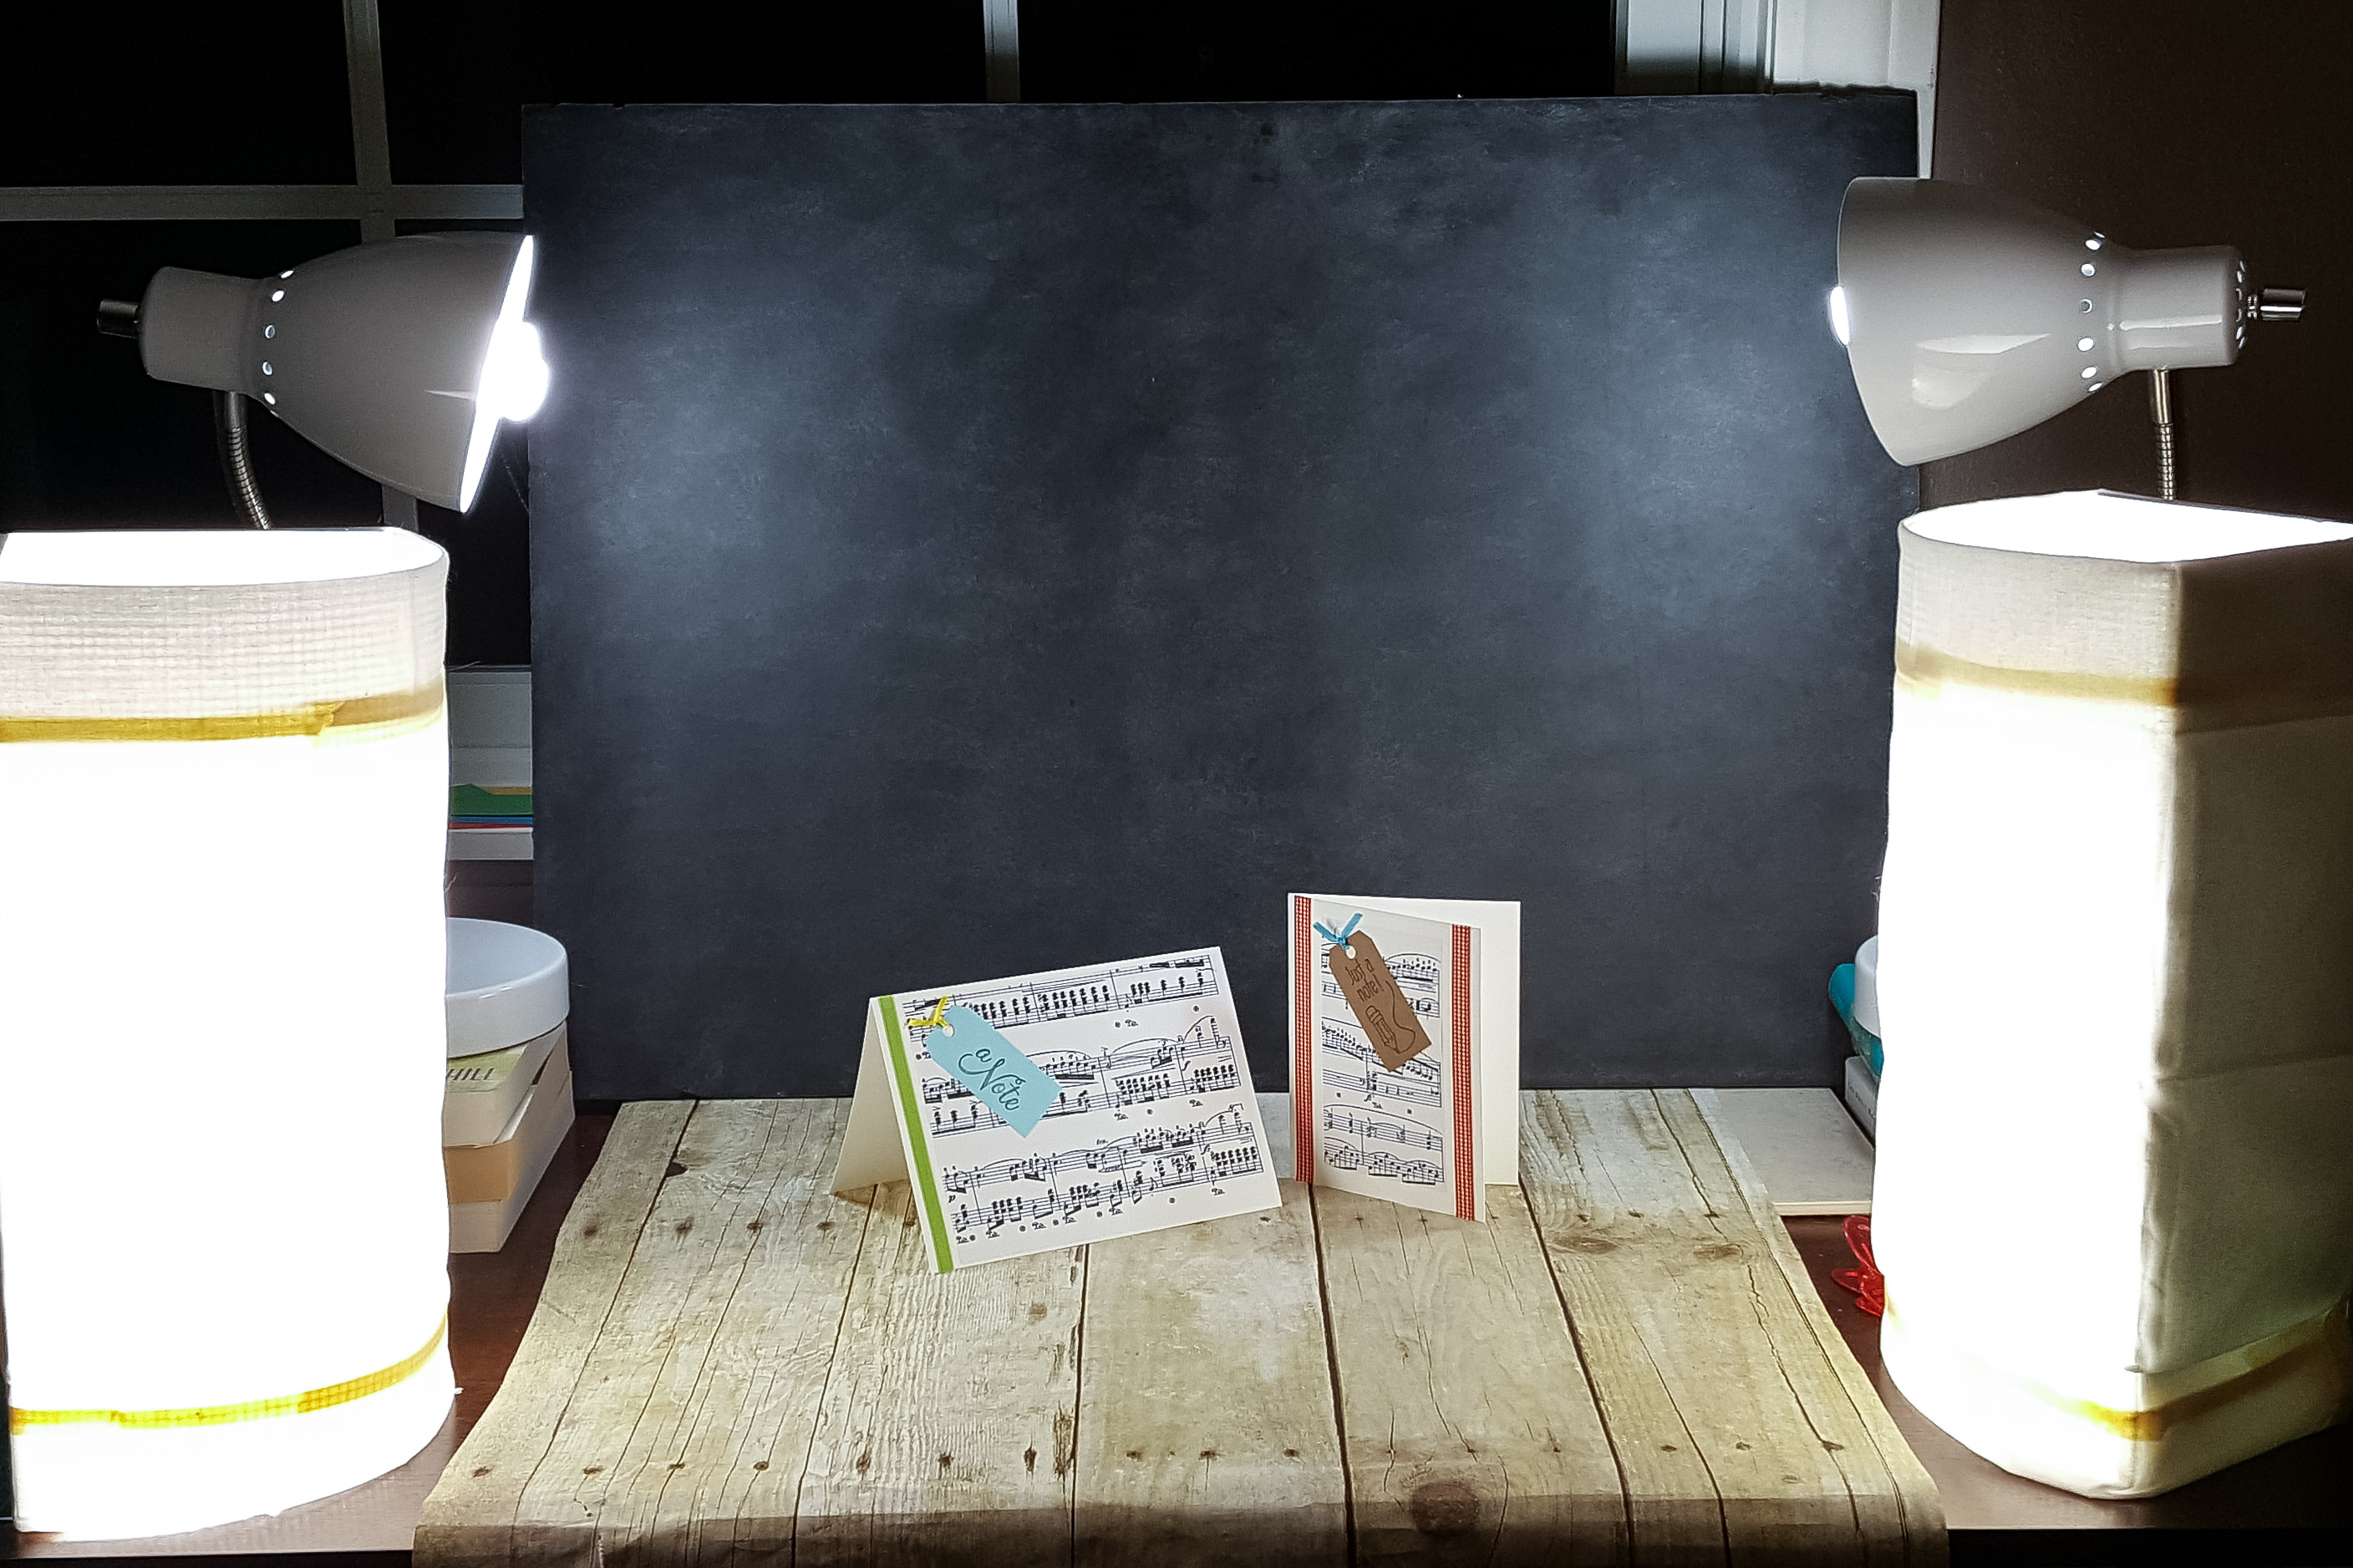
Currently, the backdrops I use the most are a black foam board with a DIY chalk finish (~$2 or less) and a faux wood paper photography backdrop (~$12, similar), which is what you see in my lighting and backdrops shot above. (See examples of this setup in use here, here, and here.) This setup is extremely versatile. The room I have it set up in gets ample natural light, so I use it with natural lighting during the day and artificial lighting at night.
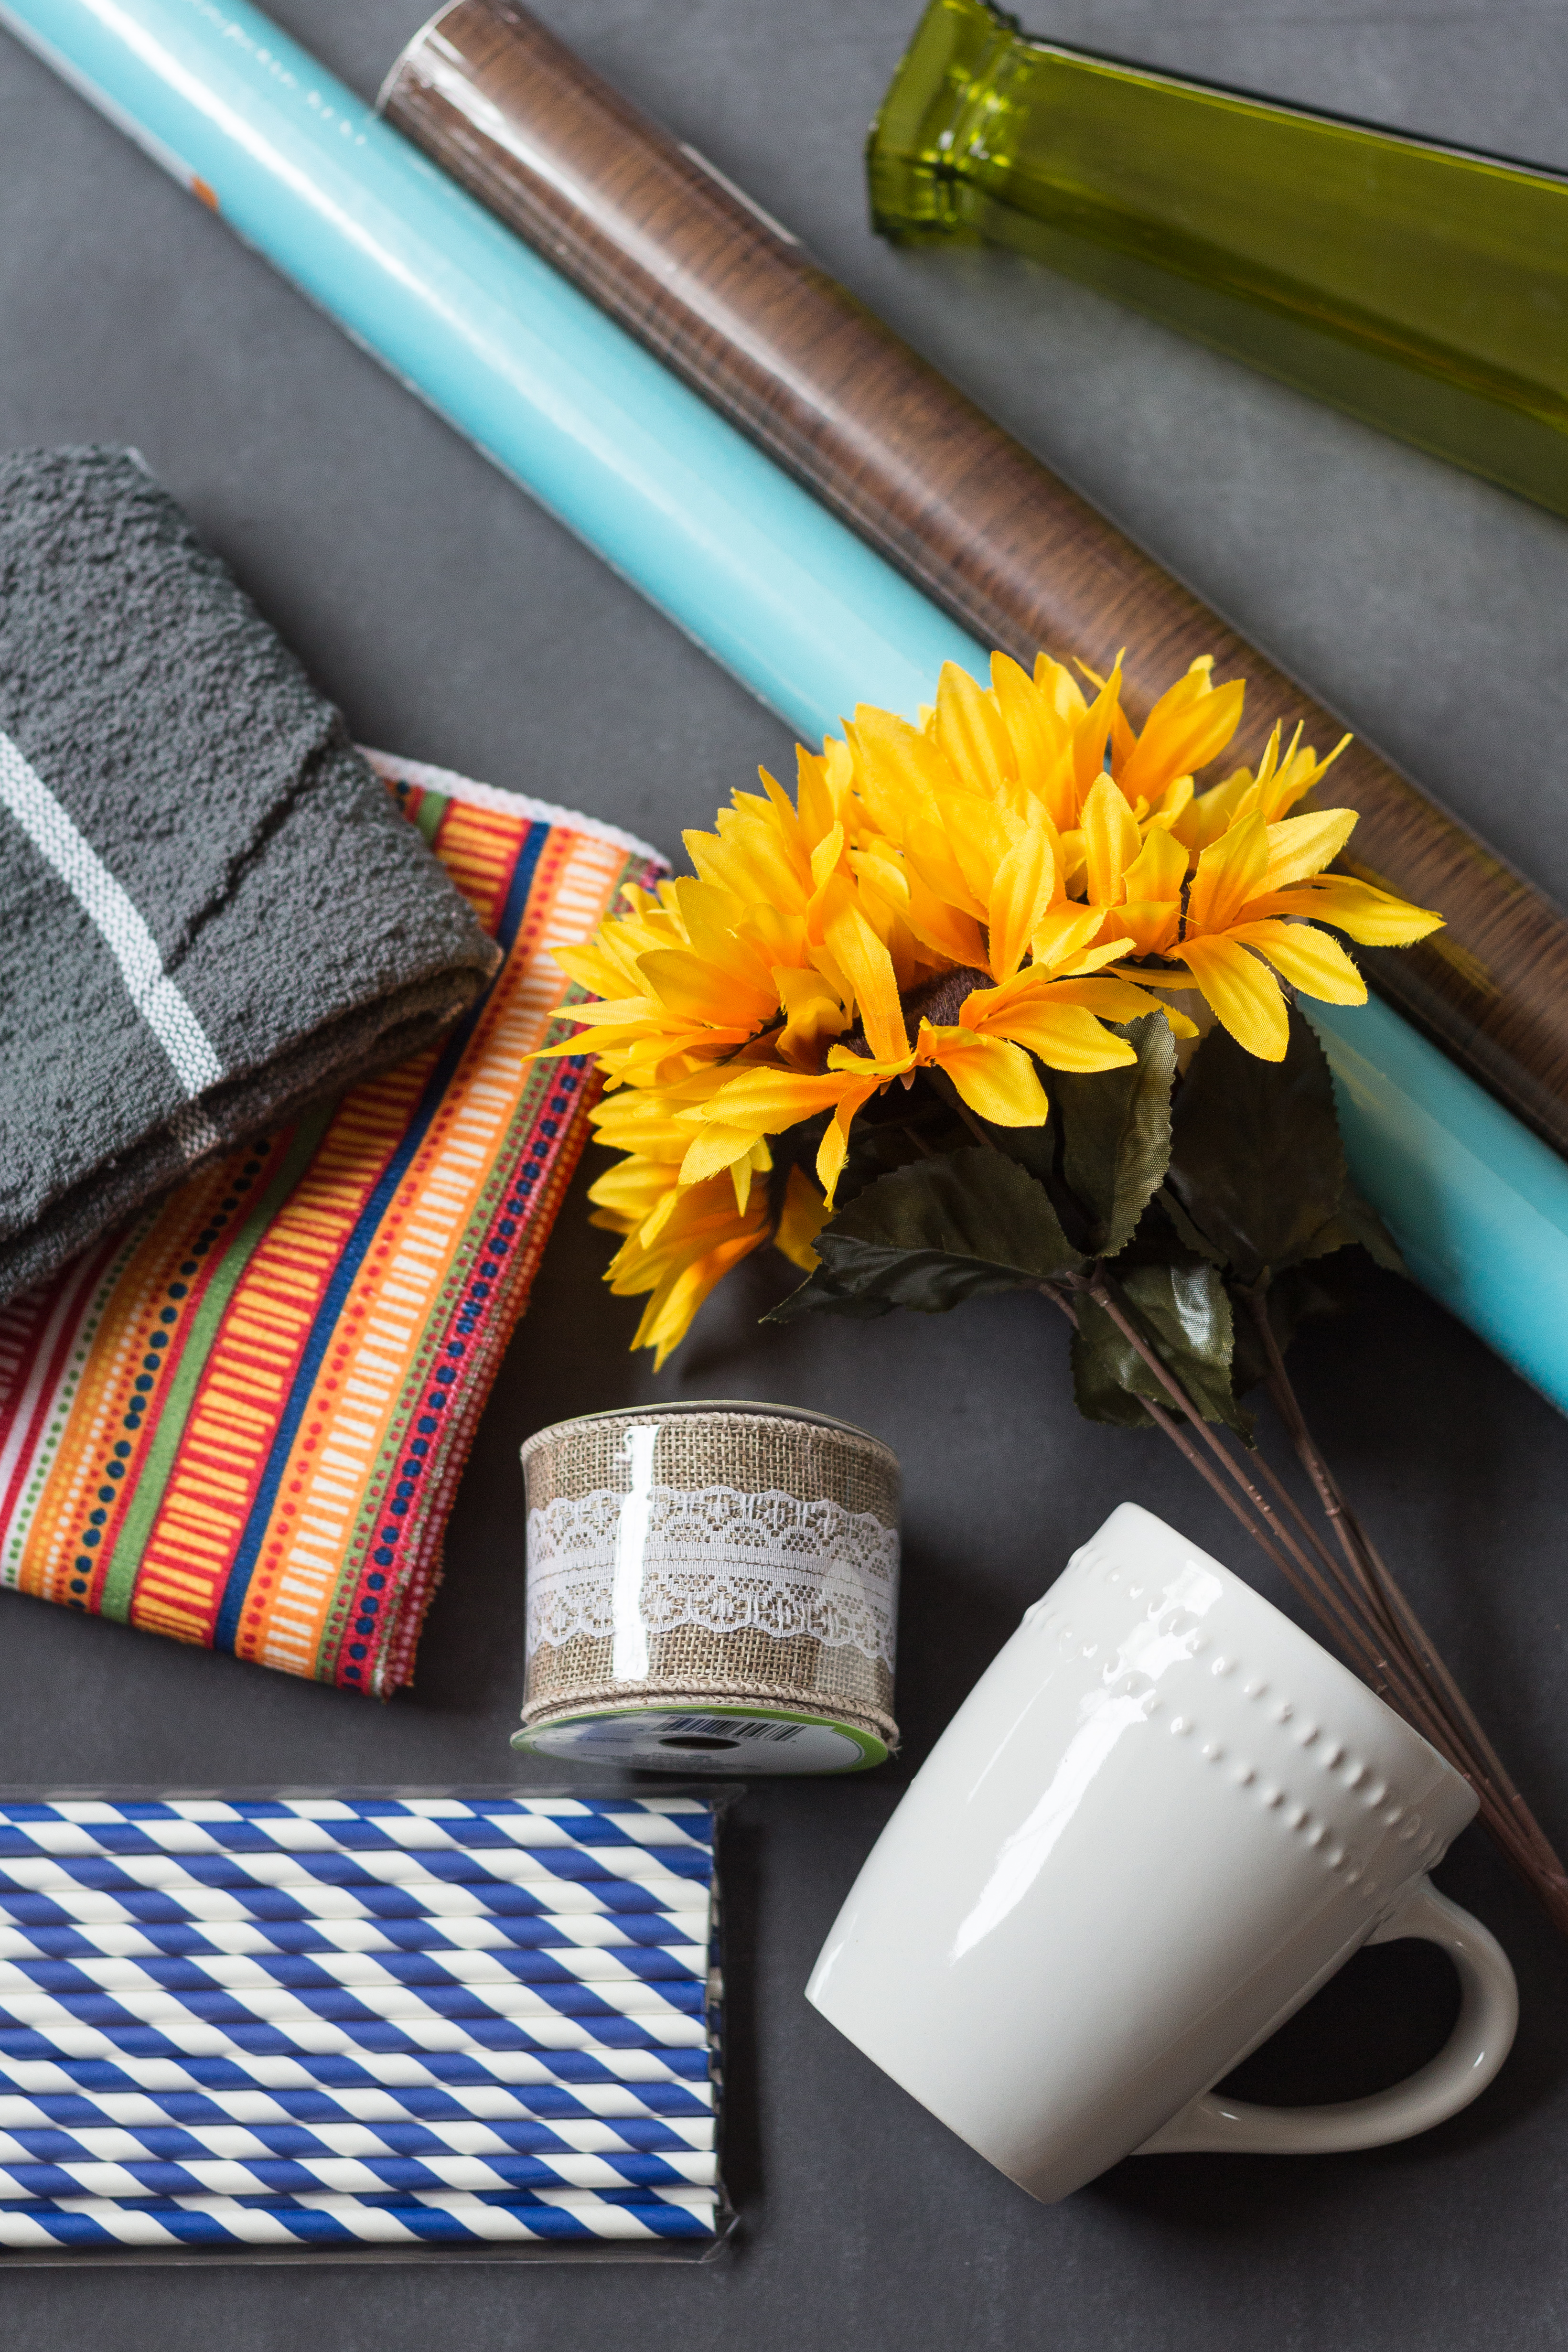
The photo below it (which I did take with my DSLR, not my phone) it is a set of props and backdrops I recently acquired from a dollar store. (Some of you may have already seen this shot on Facebook or Instagram.) I spent $9 for everything you see here, and I also got a few new white foam boards and clips. Creating styled shoots doesn’t have to break the bank!
Are you looking for even more inexpensive blog photography backdrops and props?
Check out my ebook Blog Photography Hacks!
Edit your photos
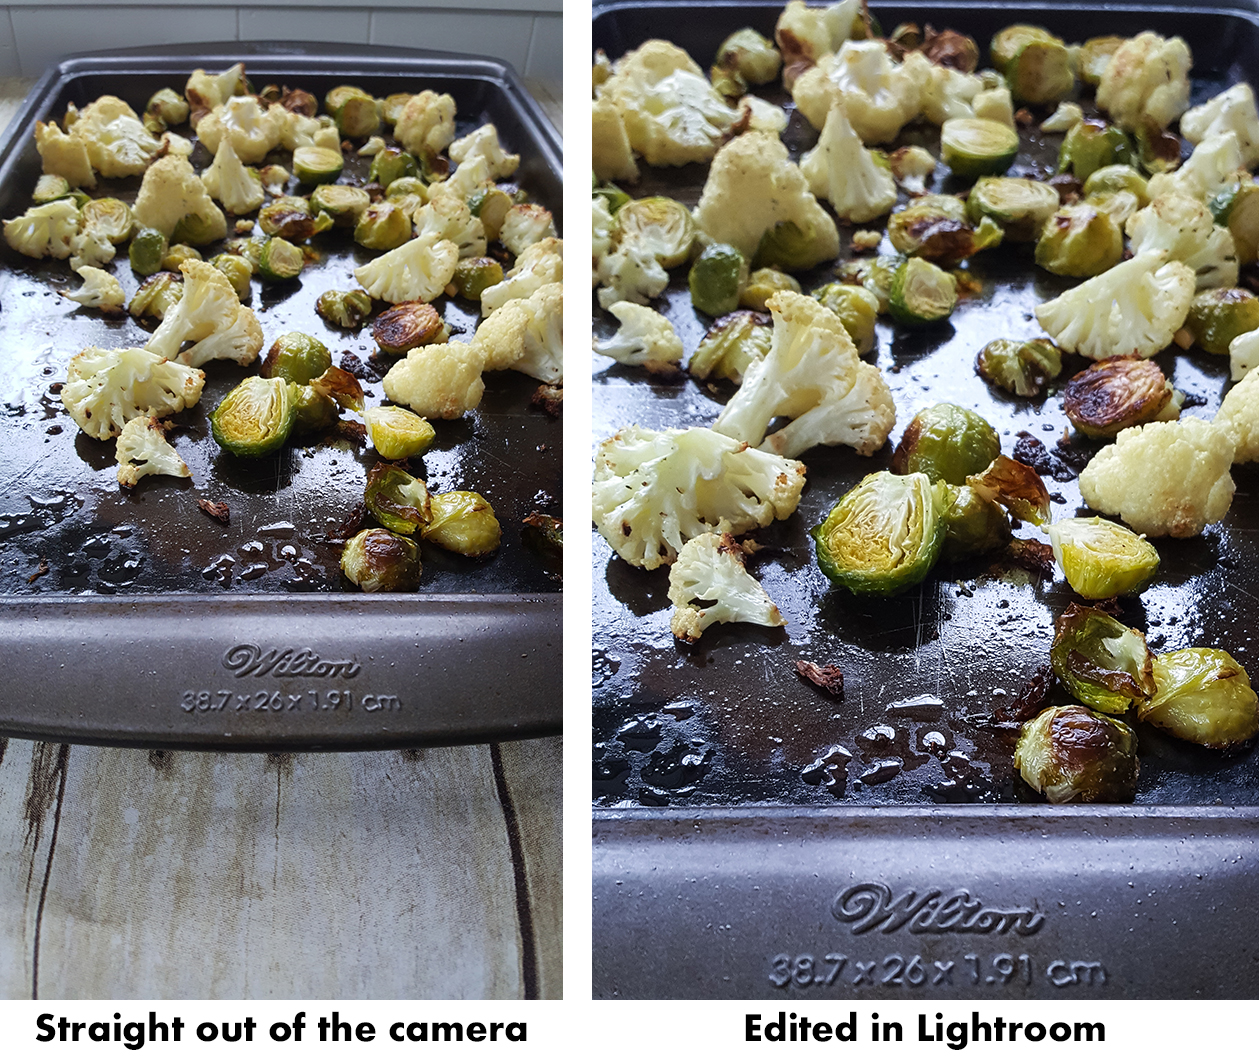
Editing transforms a good picture into a polished, professional image. For this post, I used the default camera on my Samsung Galaxy s6. I adjusted some of the settings, such as ISO and white balance, as needed. I did my editing in Lightroom because Lightroom is the photography program I’m most comfortable using. If you want to edit your photos on your phone, I recommend Snapseed (Android | iPhone) or VSCO (Android | iPhone). If you want to edit your photos on your computer with a free program, I recommend Picmonkey. For flexibility to edit your photos on either device, Google Photos is your best option.
Finally, I can’t stress enough the importance of continuing to improve your photography skills. Regardless of the camera you’re using, you should be learning as much about photography as you can. Even though it’s extremely rare I use my phone for blog photography, I was able to apply my years of photography experience to create high-quality images for this post with ease.
[Disclaimer: This post contains a few affiliate links. Thanks for your support!]
Do you have any additional tips that help you take better photos for your blog with your phone?
Leave them in the comments!
Pin this post for easy access to blog phone photography tips later!
More blog photography resources:
Photography 101 for Bloggers: Take and Edit Better Photos
Pinterest 201 for Bloggers: Grow Your Blog with Optimized Pin Images






Great tips!
Great tips! Overhead kitchen lighting is absolutely the worst for photos (at least in every kitchen I’ve tried to photograph in!). Another phone editing app I like is called “Afterlight,” but you can’t use it to take photos and control the camera like VSCO.
I keep meaning to make myself a faux chalkboard backdrop with foam board, but it’s usually closer to $7 here. I know that’s still not much in the grand scheme of things, but it always feels too much for what it is!
Really useful, even for us amateurs.
These are extremely helpful tips! I use my iPhone for all my pictures and eventually want to invest in a camera, but that’ll be wayyyyyyy down the line when we’re a two-income household again! So these are helpful suggestions for me as I attempt to shoot with my phone!
Thank you got sharing all this grea info. I struggle to take pictures inside with my phone as i have yet to invest in a full on camera. I am going to start playing around with my settings, your photos are beautiful.
Great tips! And great photos 🙂 I definitely need to stop relying on my phone’s auto mode.
Love it! My phone pics are so/so, there’s a 50/50 chance that they’re decent, haha!
Pingback: How to Take Better Photos for Your Blog with Your Phone – PHOTOFORMAT
So glad I read this! Thanks for the tips!
Awesome post! Another key to great smartphone photography: I invested in the iPhone 7+ to get Portrait Mode, which makes many of my photos look like they were taken with a DSLR. I find myself carrying my actual camera less and less–pretty much only when I travel!
These are some great tips! I recently upgraded to a DSLR but shot with my phone for quite awhile. I think the biggest thing is to remove distractions from the background. That’s especially important with phone cameras!
Definitely great tips! Thanks for sharing 🙂
These are great tips. I use Afterlight to edit my phone photos or the preset filters on the ABM app. My phone is now my only camera I use 🙂
These are really great tips, Rose. Like you, I live in the Midwest where you struggle to find good lighting. That’s especially true when you work during the daytime outside of your home and must resort to shooting indoors at night.